Studio Portrait: Clean background, Simple Light; Forceful, Expressive Portrait
Specifics:
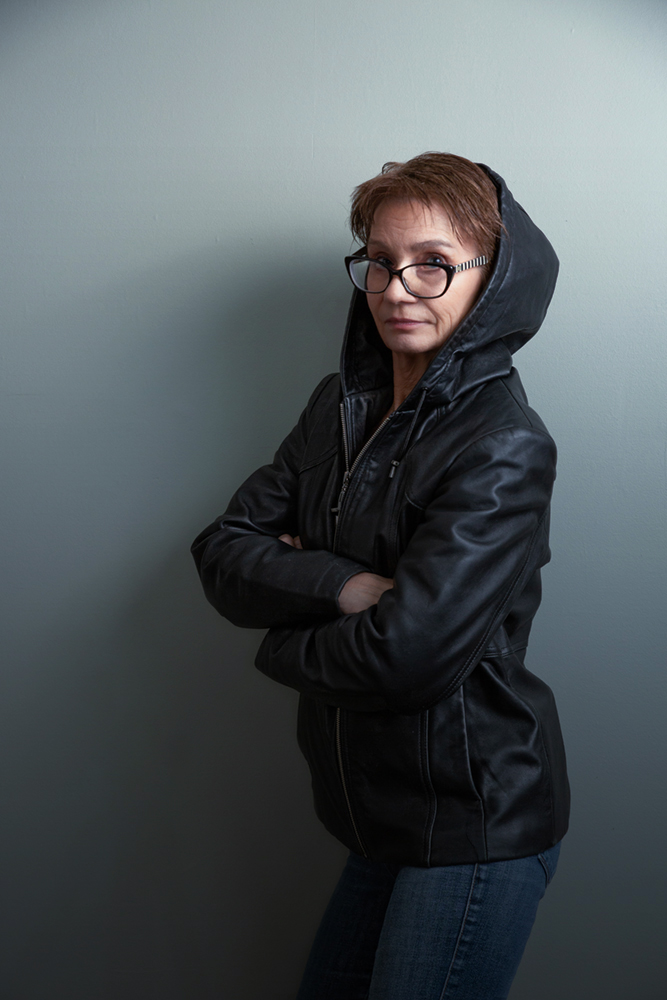
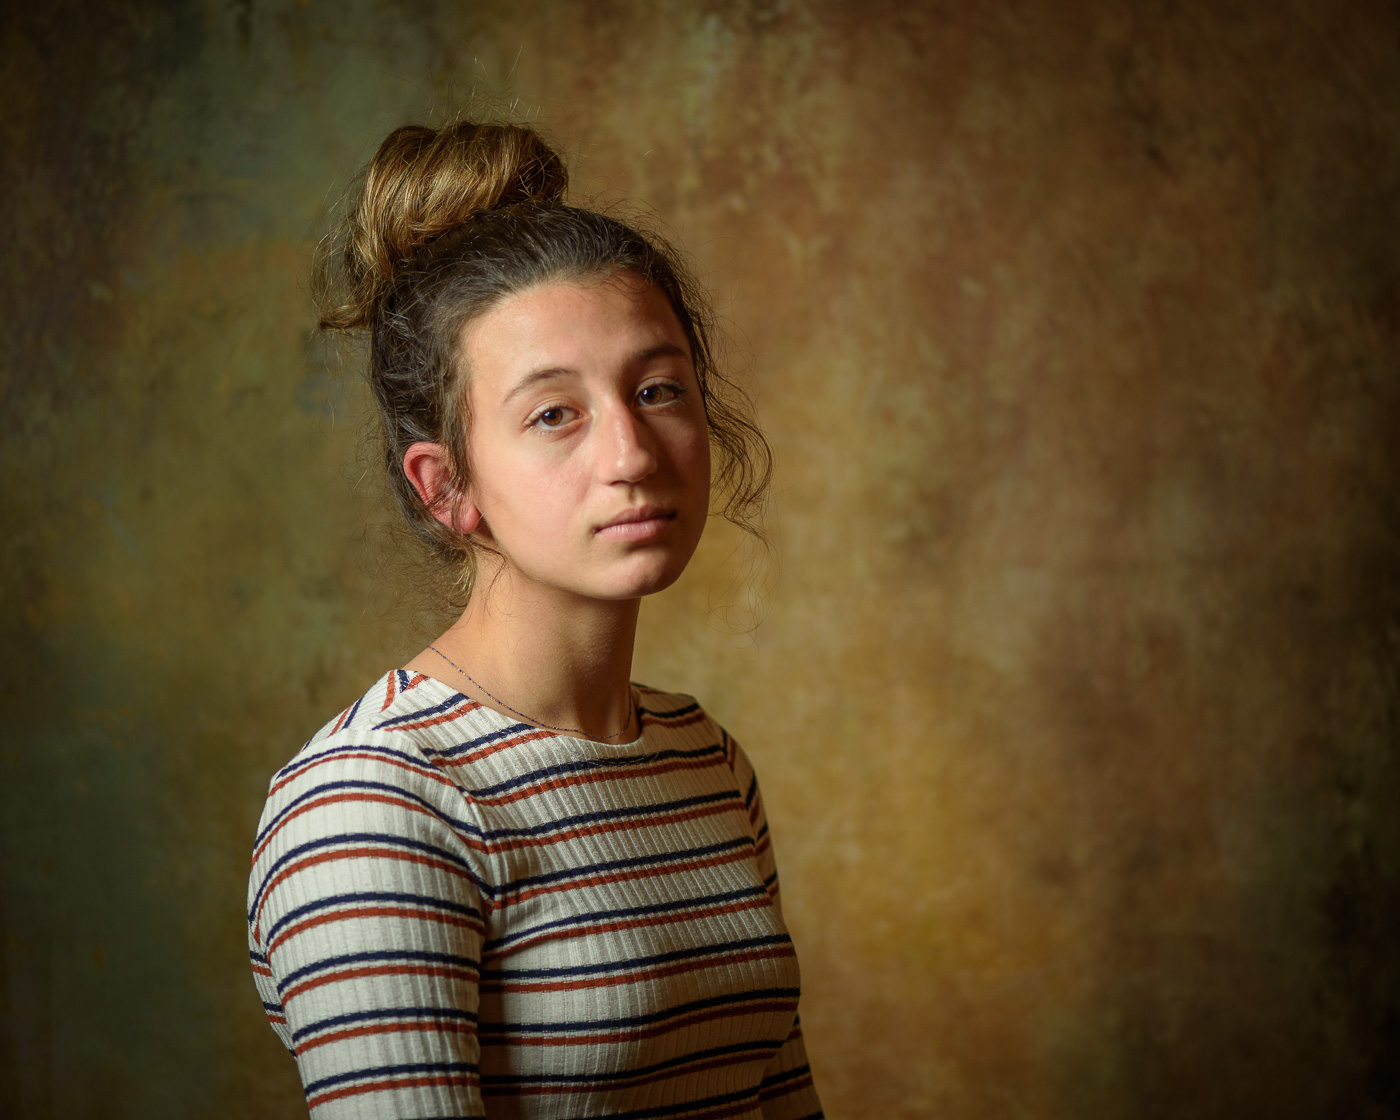
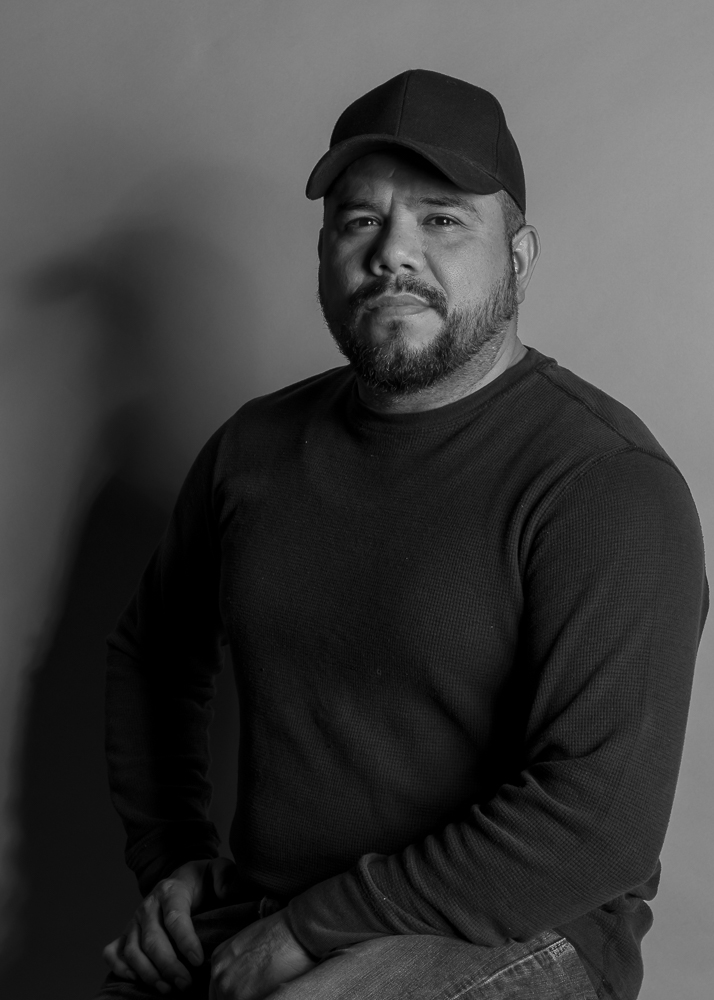
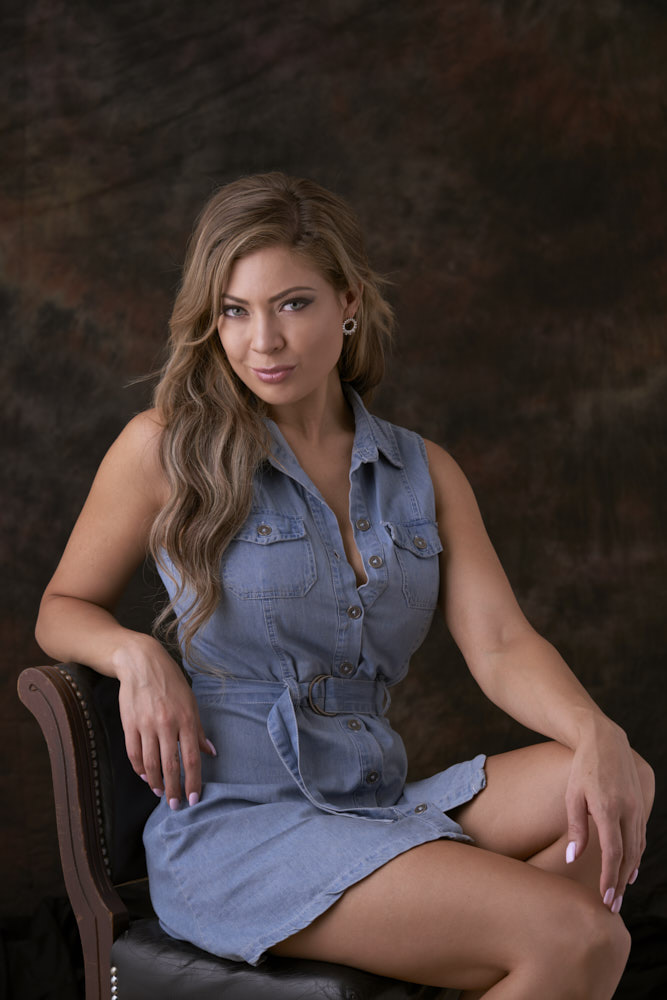
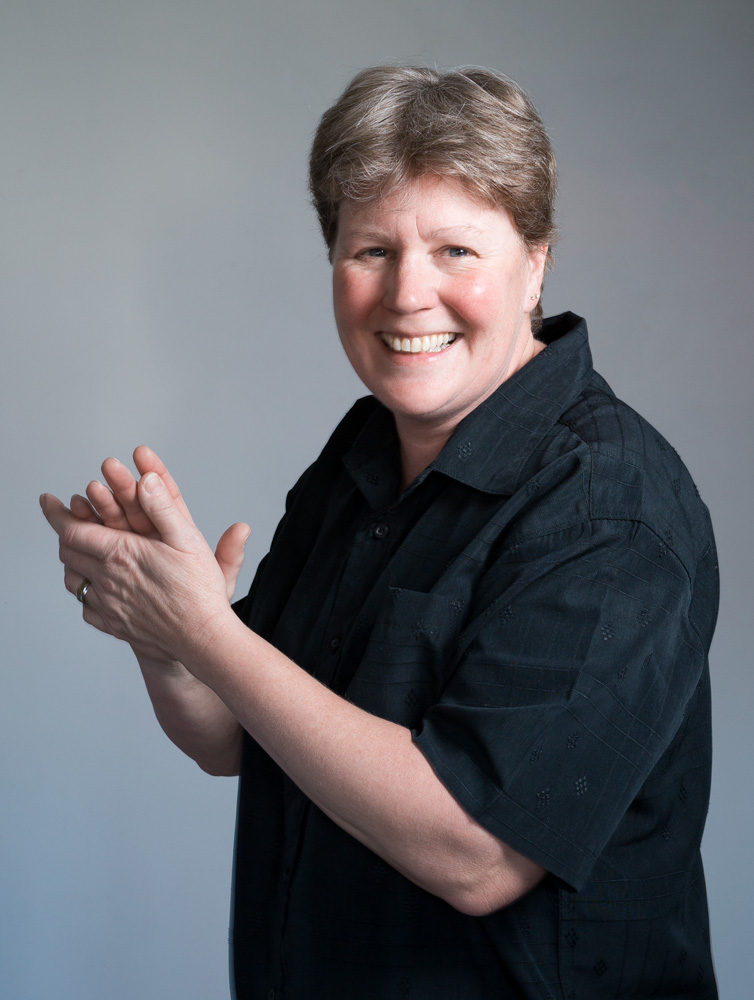
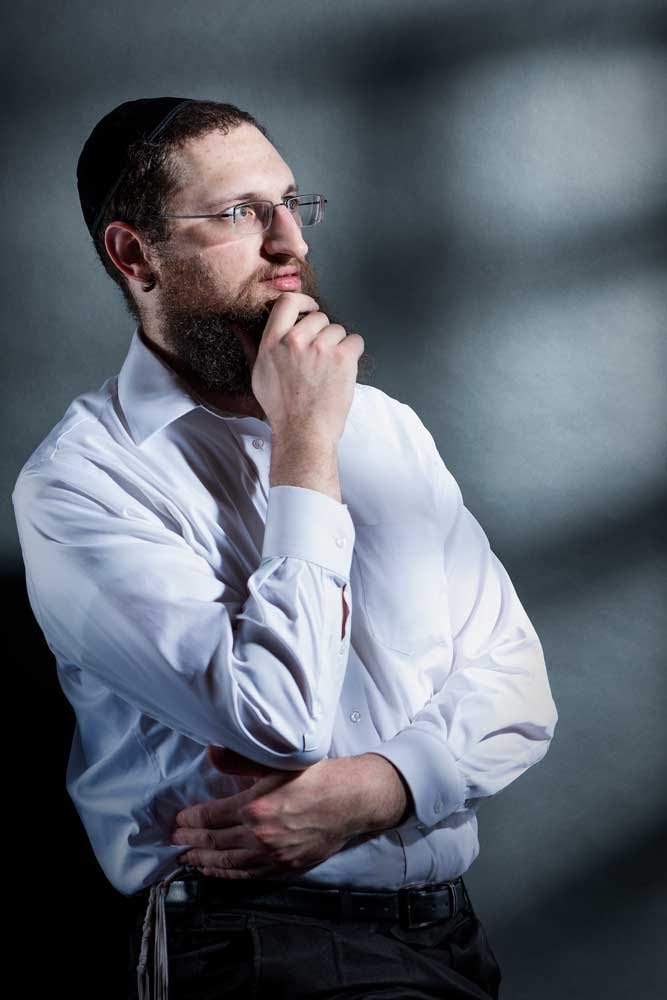
A very clean portrait shot on a flat field background (wall, seamless, cyc, material, cloth, canvas…) Tightly focused and stylistically within your style. This image should be created to show how you handle strong personalities in front of your lens.
There should be special attention placed on the expressiveness of the portrait: Sadness, pain, angst, joy, humor, intensity… ENGAGED. We want to see more than a smile, more than a beauty shot. This is a glimpse into the soul of the subject.
It is important to make the lighting something that enhances the look / feel of the subject. Whether it is soft or hard, single light or multiple strobes, natural or mixed or whatever, the light and the subject should be something that makes sense – to you.
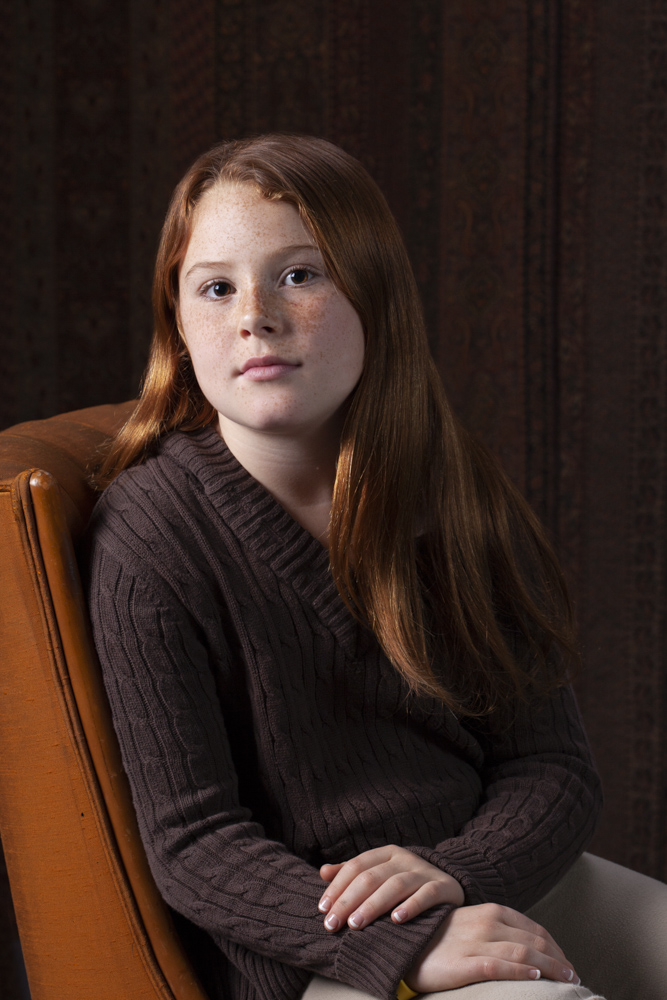
This portrait of a young lady was taken by Edward Weston nearly a hundred years ago.

The studio portrait is a unique part of what we do. And there are many reasons why we choose to work in the studio.
The studio is impervious to weather… too hot or too cold outside is of no consequence.
The studio allows the photographer to do what he/she wants to do with the lighting without the distraction of the ambient sunlight.
The studio becomes a sanctuary of creativity where we can do what we want whenever we want.
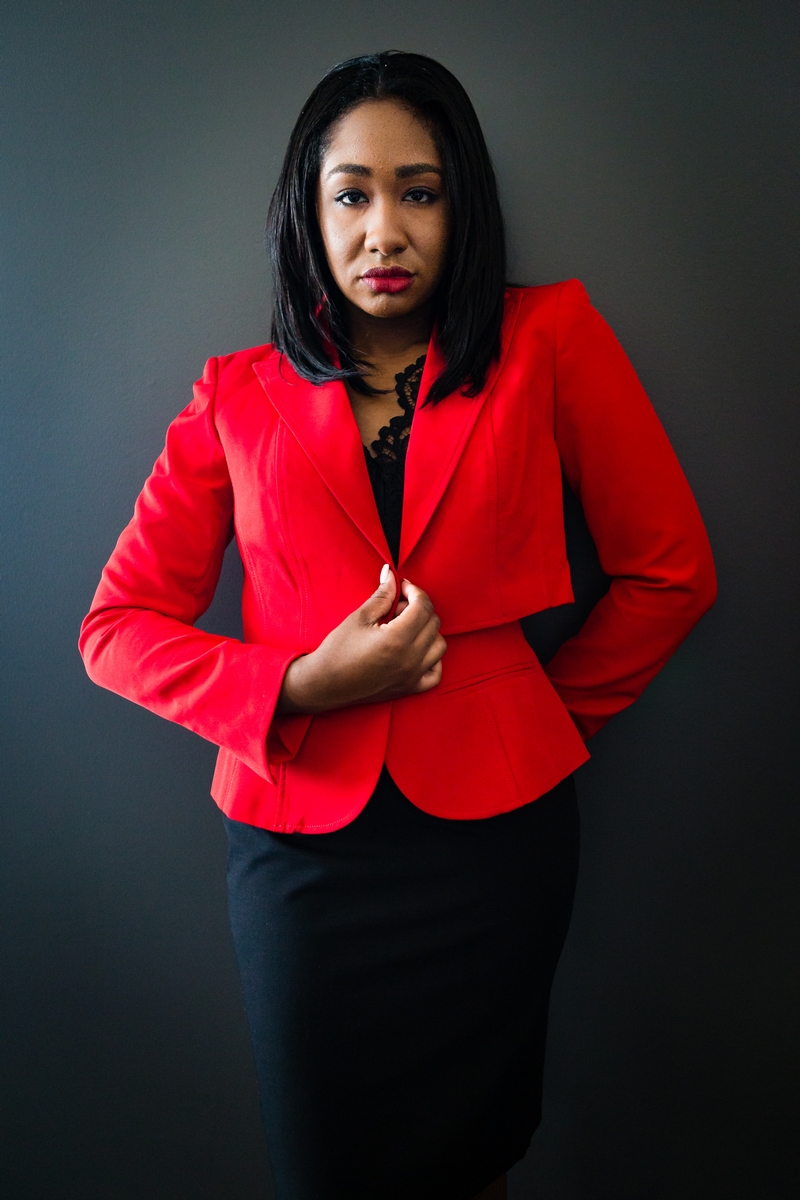
In this assignment, we are looking at something a bit different for a reason. We want the subject to be removed from all context of background or place. We want something plain for the background… a painted wall, a muslin sheet, a piece of fabric, a blank canvas upon which our subject can be placed.
This non-contextual background gives the subject a prominence that is different than when interacting with the environment. It puts them front and center with no distractions.
I would prefer this portrait to be from mid-thigh to waist. This is not a headshot or only face portrait, although I expect you will certainly do some of them. A little more of a half shot is what I would want.
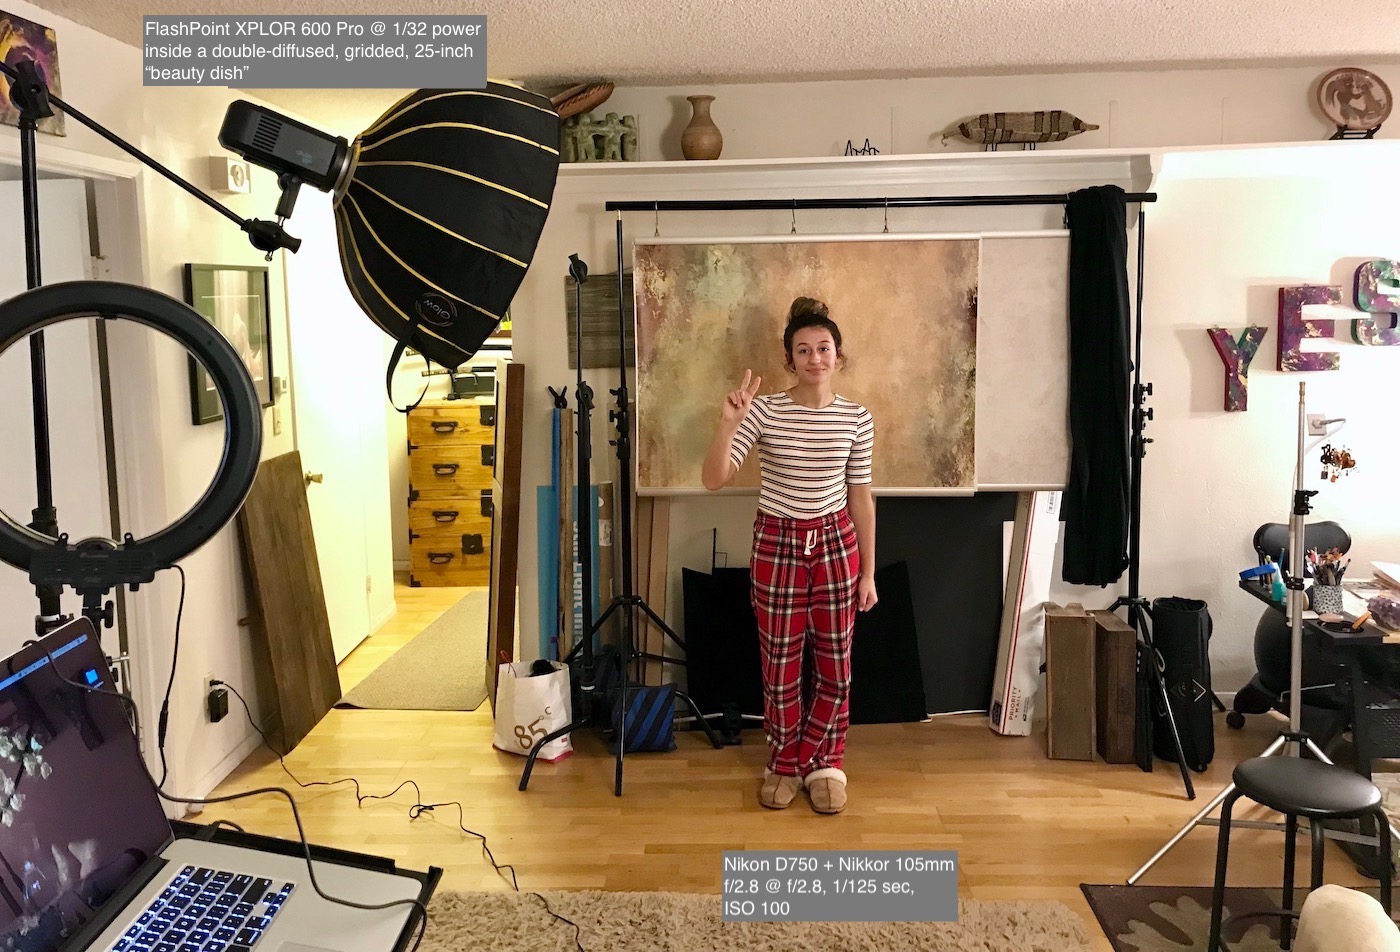
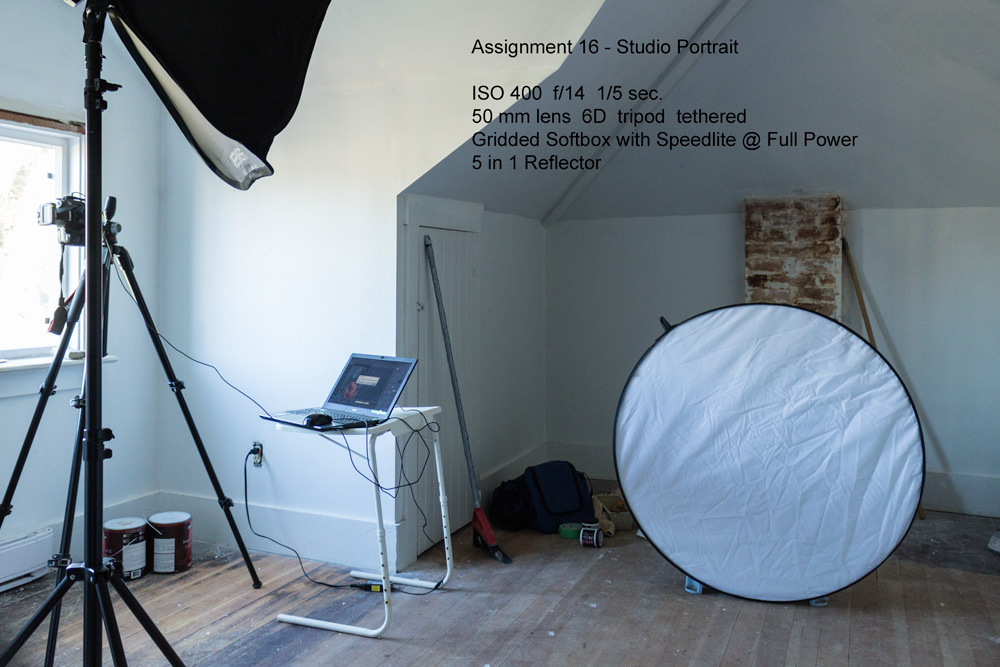
AND… shoot and upload your set please – how and why you lit it.

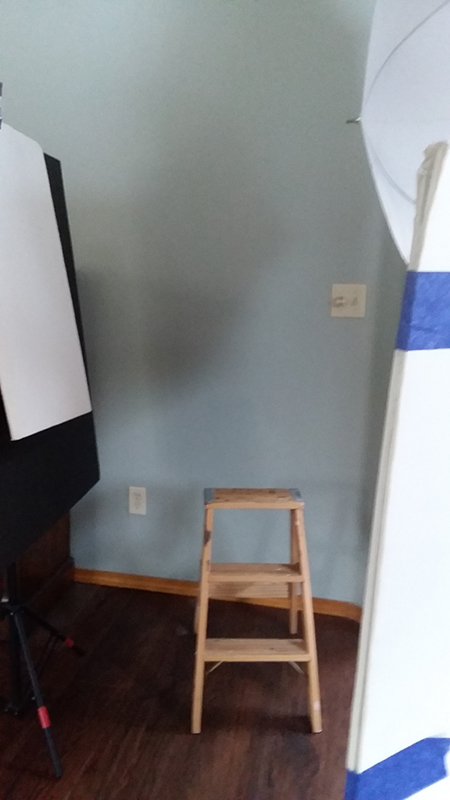
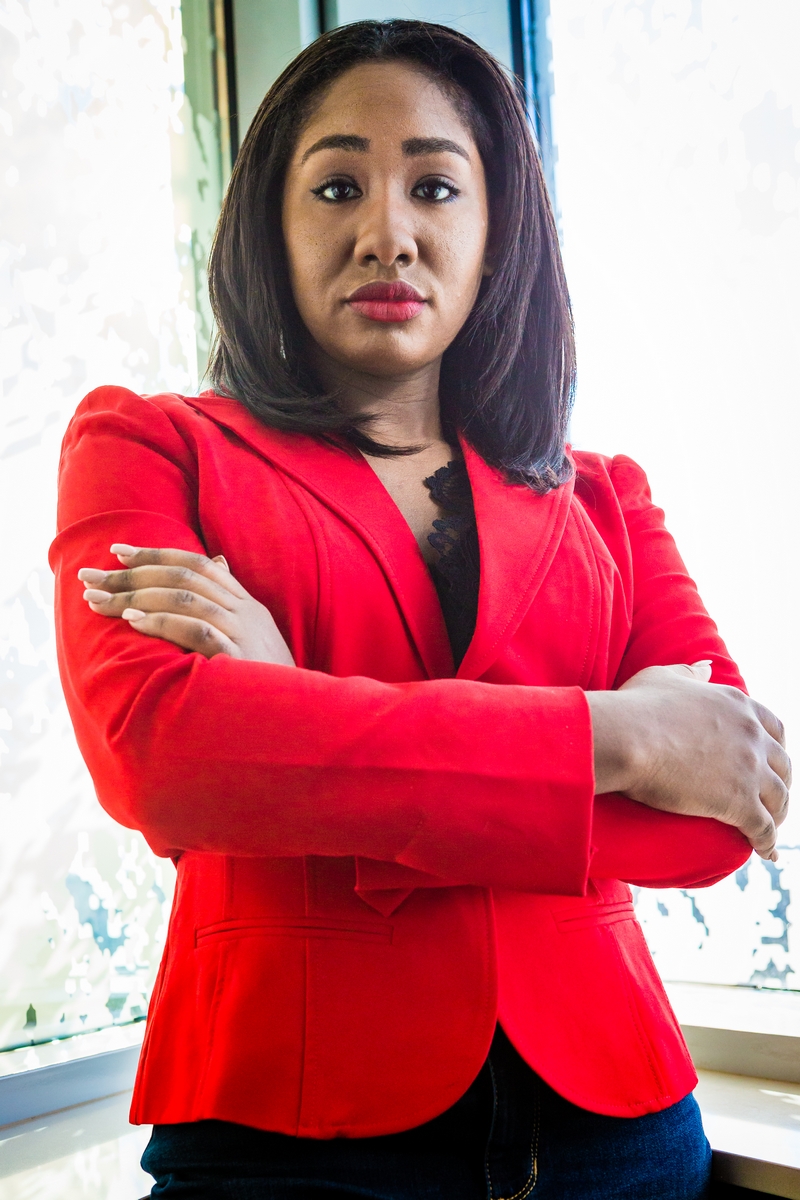
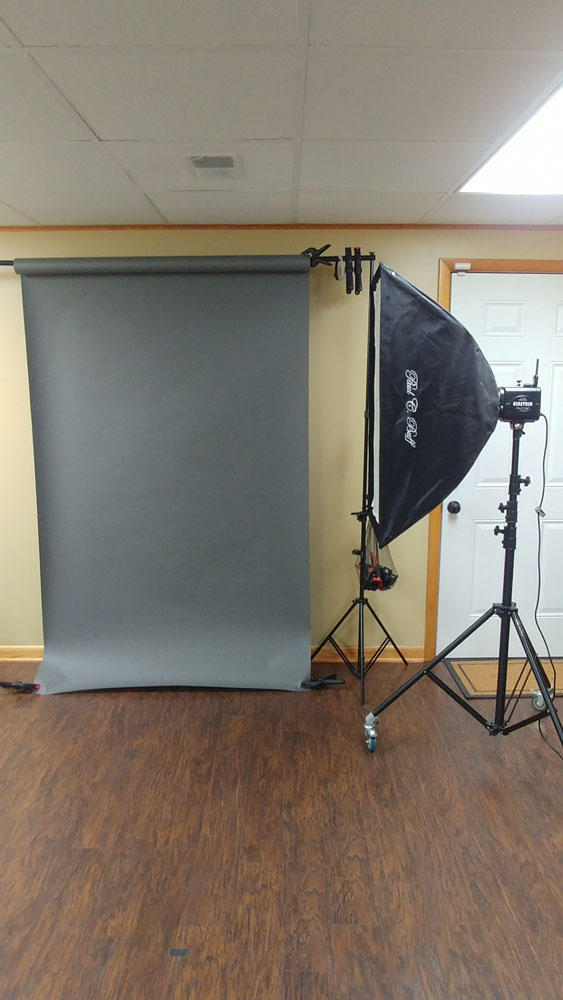
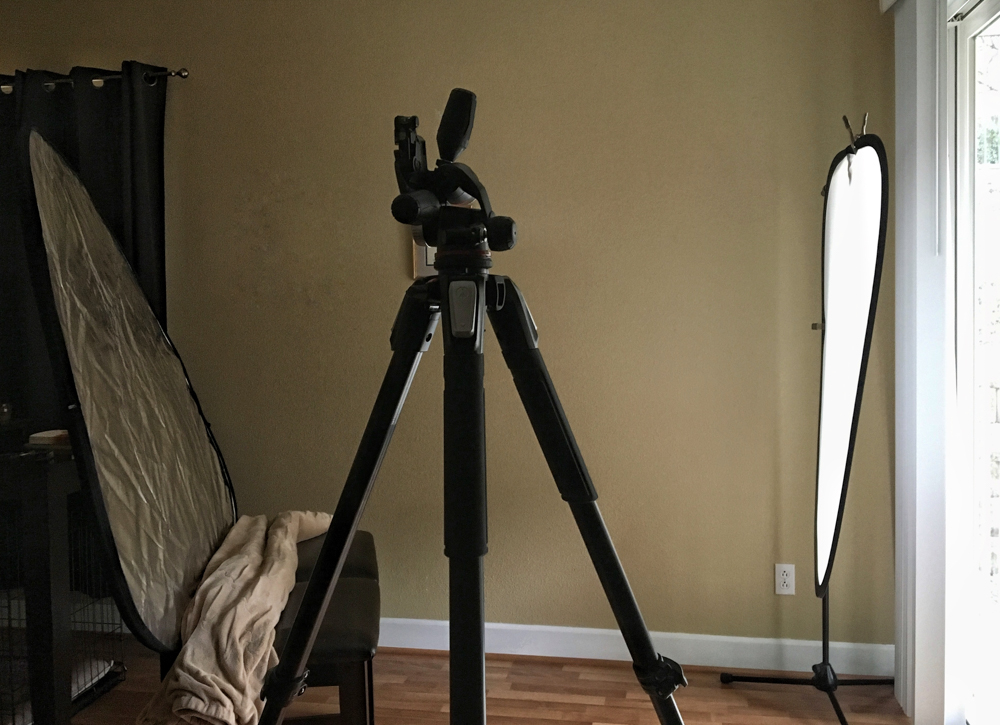
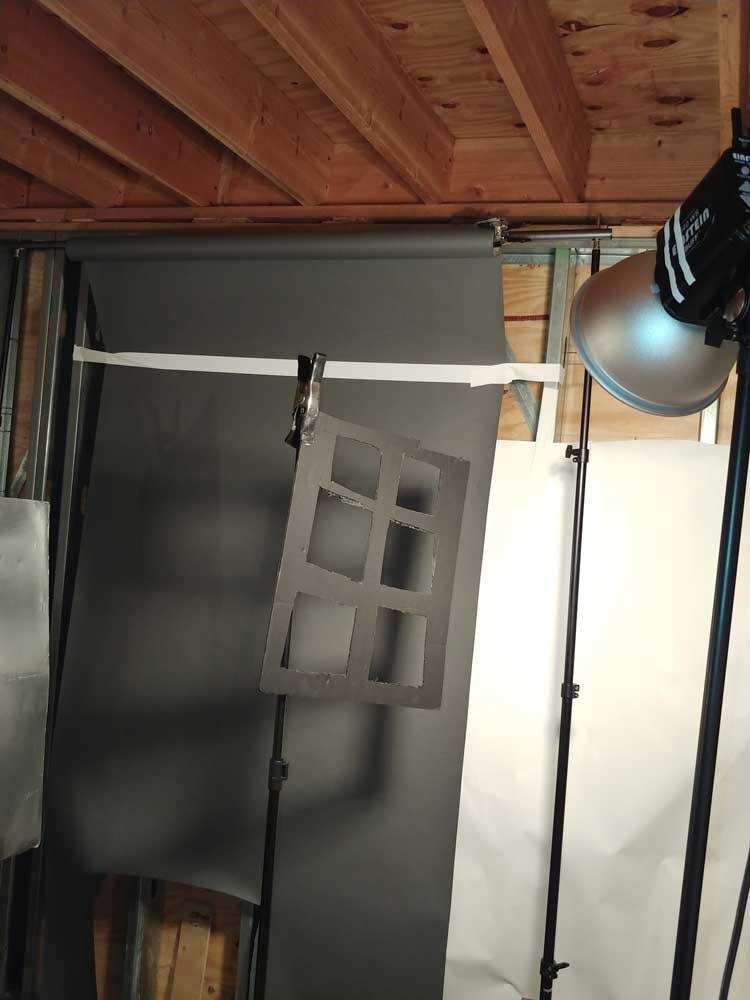
NATURAL LIGHT STUDIO PORTRAIT
For those of you who would prefer to shoot with natural light, you will need a large source; window, doorway, open garage door. Wherever you can find a large area of non-directional light. Placing a background can be as easy as a blank wall or a piece of large fome core. Head to home depot for a sheet of that white foam insulation… it is somewhat fragile, but it is very inexpensive. Also look at a piece of white panelling that can be used again and again.
This is why it is important to cultivate friendships with pickup owners.
You can place the background and subject with the light coming from the side, 45 degrees, or front. It is your call. We wont see the light or the room you are working in so you can do pretty much what you want to make the light work the way you want it to.
Use a reflector or white board for opening up the shadow side of the subject if it is rendering too dark. Clamp it on a stand if you need to place it close to the person. Home Depot clamps are still a buck… now that is a deal!
A few Youtube Links for you:
This one is not too bad, but mostly focused on using a meter.
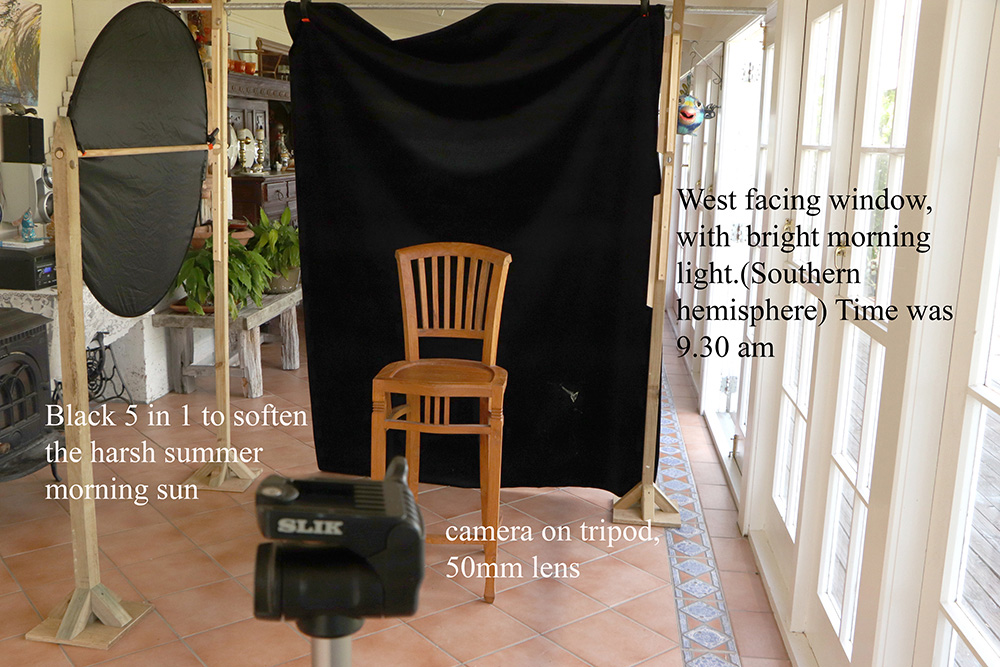
NATURAL LIGHT (studiio) PORTRAITS IN OUTSIDE STUDIO
Use a shady area or one with soft, north light (in the northern hemisphere – south light in the southern hemisphere). Hang or mount the background and use white cards for fill and added punch if needed. NOTE: frequently the photographer is standing in the sun so have an umbrella at the ready for shade so you can see the back of the camera.
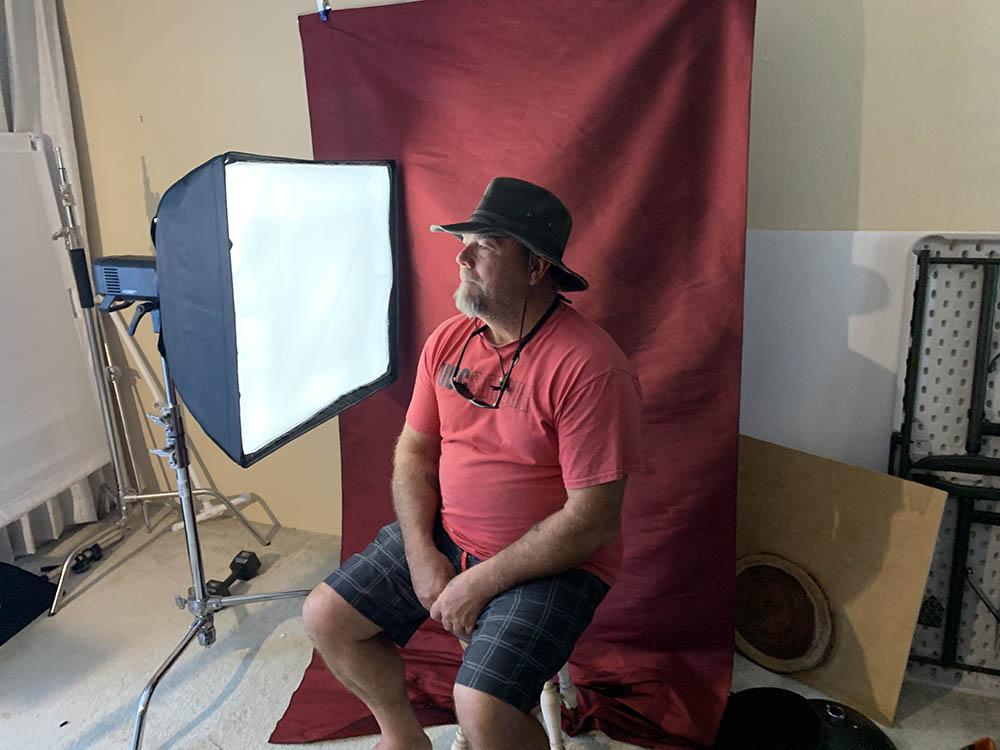
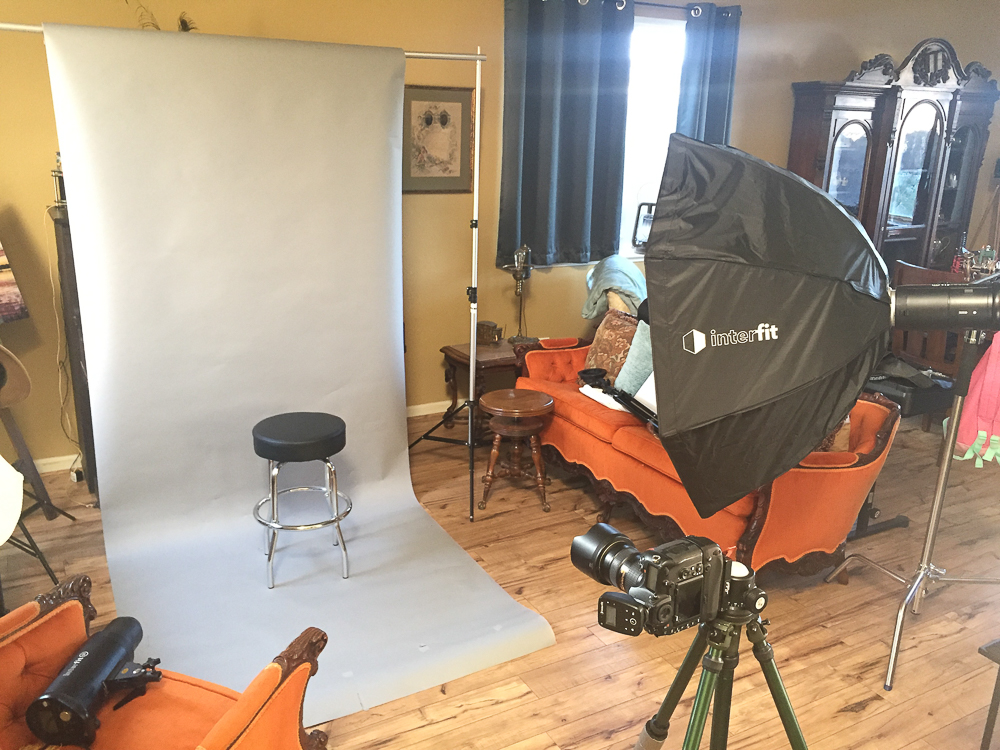
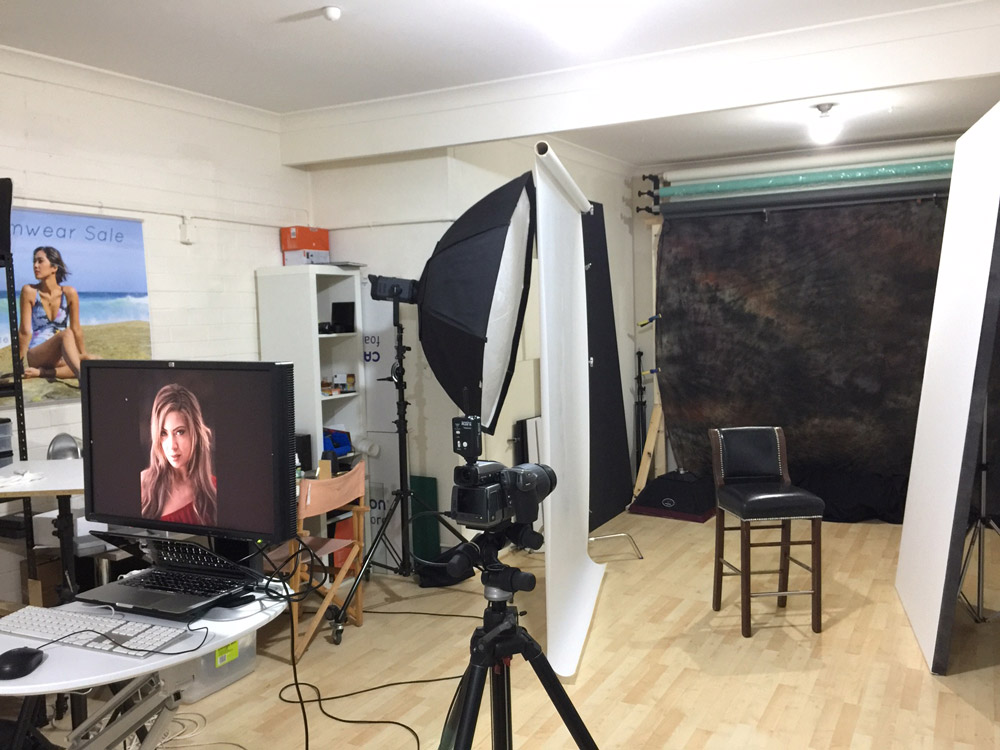
STUDIO LIGHTING INSIDE
I am wanting the images to be shot with one light for this exercise. I recommend a large light, but if you are into gridded spots, go for it. Suggestions include a 60″ softlighter, a 50″ octabox or Westcott Apollo, or a large scrim like a shower curtain for the main light.
FOR THOSE WHO MAY NEED AN ITEM OR TWO.
Start with the light in as close as it can possibly be to your subject (without being in your frame). Move the light back and away from the subject slowly until you get the look you like. Frequently I use the light as close as I can possibly get it.
Fill cards and reflectors to taste.
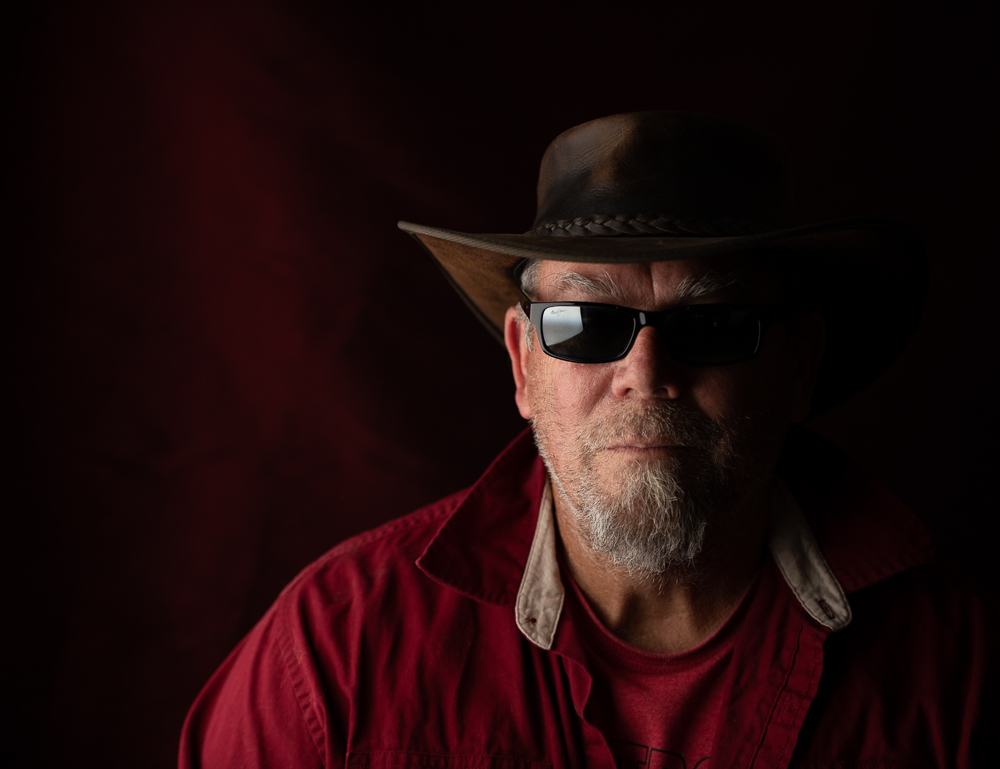
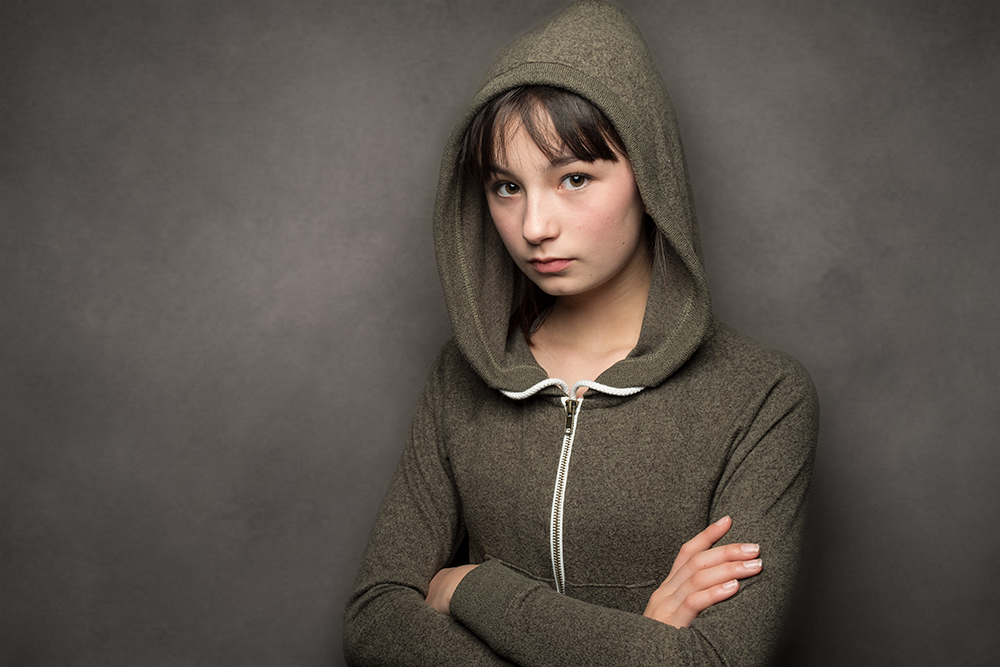
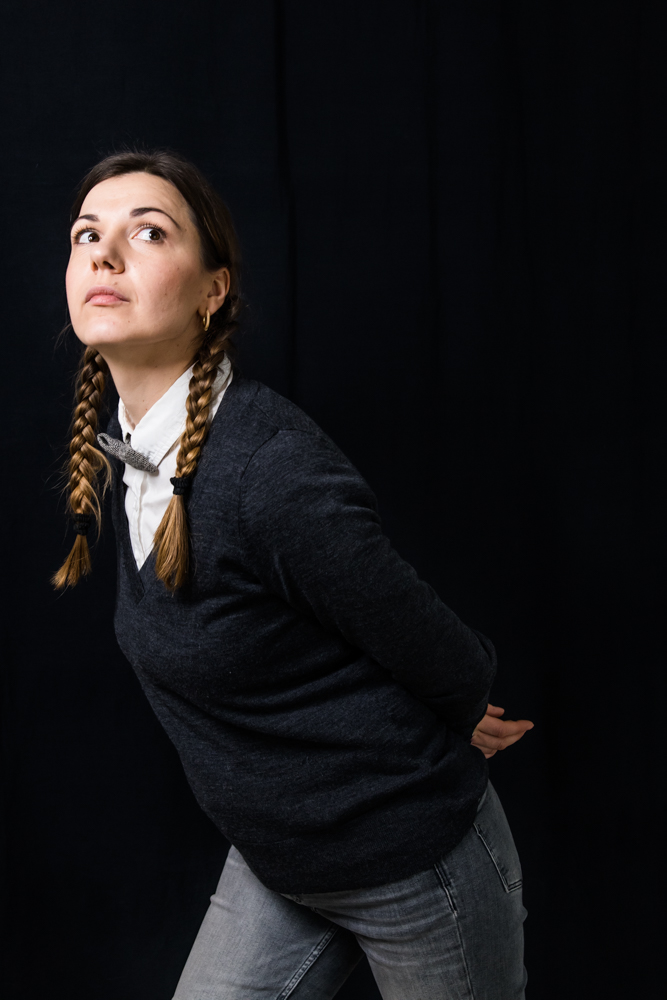
The choice of color for background is up to you. Whether you want white or black or gray or red… all will depend on what you and your subject are trying to say. Look closely at the images on this link… they will give you ideas for posing.
Youtube links:
Areas to watch out for:
- Hands
- Feet
- Arms at weird angles
- Shoulders uplifted and less relaxed
- Shadows under noses and dark eye sockets. (Usually means the light is too high – or pose is angled too low)
- Too much contrast between lit and shadow side (add fill – or move subject around to face more of them at the angle of the light.)
I looked on Youtube for some “Posing guides” and found way too many that should have been called “how NOT to pose your subject”… sheesh. These are three of the better ones.
Possibly some goofy areas, but still informative.
Bambi… nuff said.
Long and very informative.
Watch for arms over the head… usually looks pretty terrible. Watch for hands flat to the camera… we want to see the profile of the hand, not the width of the hand – ESPECIALLY if it is around the face. Don’t put hands around the face unless you have a great and compelling reason… and yes, I will ask.
Watch for arms and elbows coming toward the camera… that reach TOWARD the lens will make the elbows seem quite large and the arm very chunky and not attractive. Same for legs and feet although I am not having you sit them down. This is a standing portrait.
If you are new to the studio portrait lighting thing, please take advantage of the UDEMY course I gave you a pass for.
Shooting studio like portraits – even on location – is one of the staples of our business. We will get to “headshots” in another assignment.
Photographers you may enjoy:
Richard Avedon
Skrebneski
Scavullo
Irving Penn
Add your favorite studio photographers to the comments below.
Now – explain to us what you did, and why.
IDEAS FOR LOCATIONS:
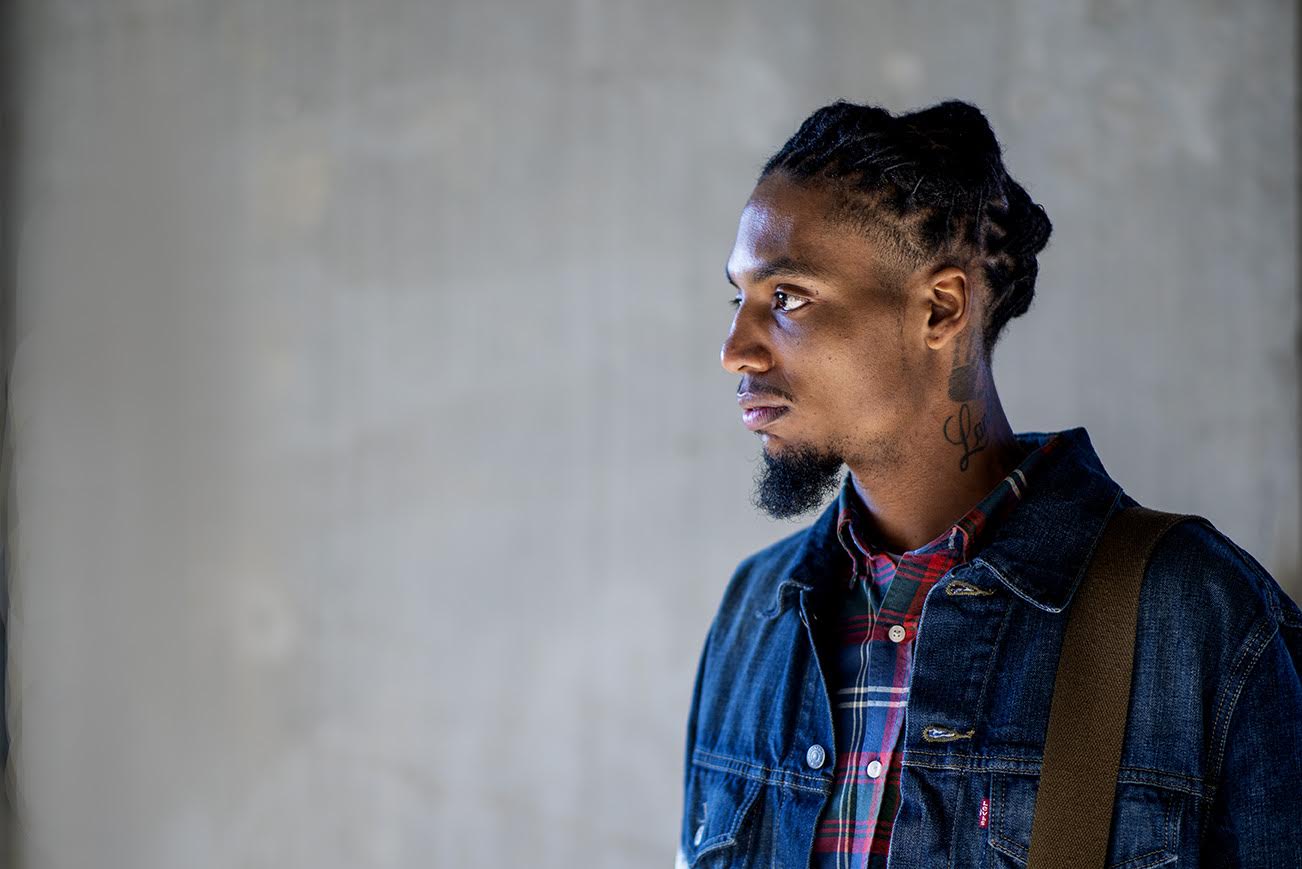
If you do not have a studio available to you, think about these alternatives. A north side of a building, in the shade. Many photographers have used this simple light to make very expressive and beautifully lit portraits.
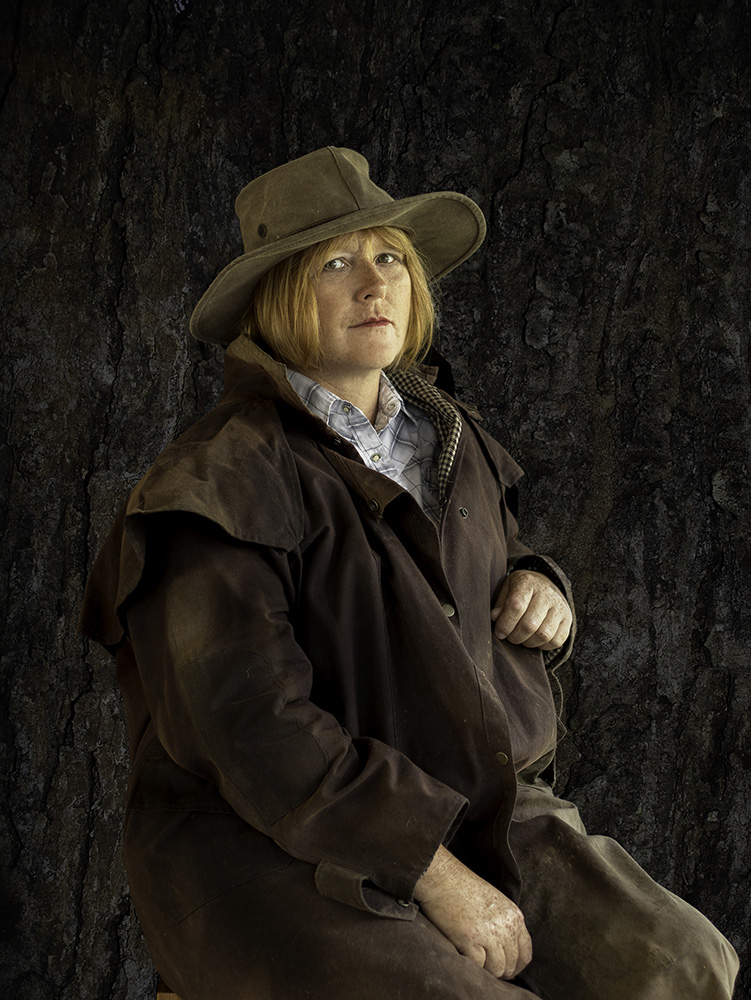
“In the American West” by Avedon, was shot almost entirely on north facing walls (shade) with no additional lighting. Putting up a clean, white sheet or something without a pattern on it and moving the subject a few inches away can be a very powerful image. Be sure to watch for as unobstructed light source as possible. Trees, buildings that are dark and in shadow and dark clouds will make the exercise a bit less simple.

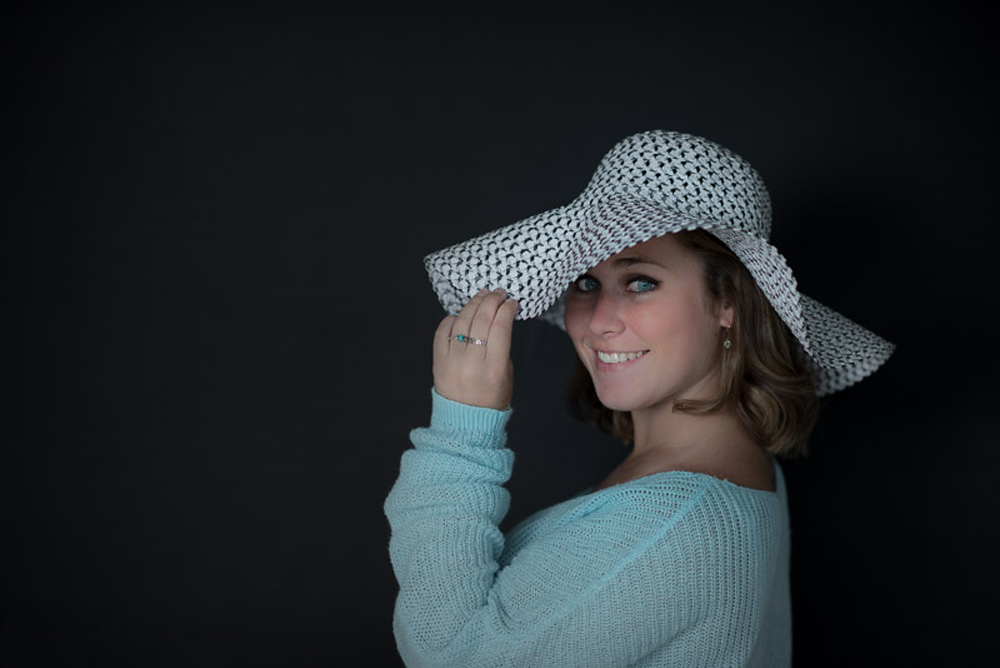
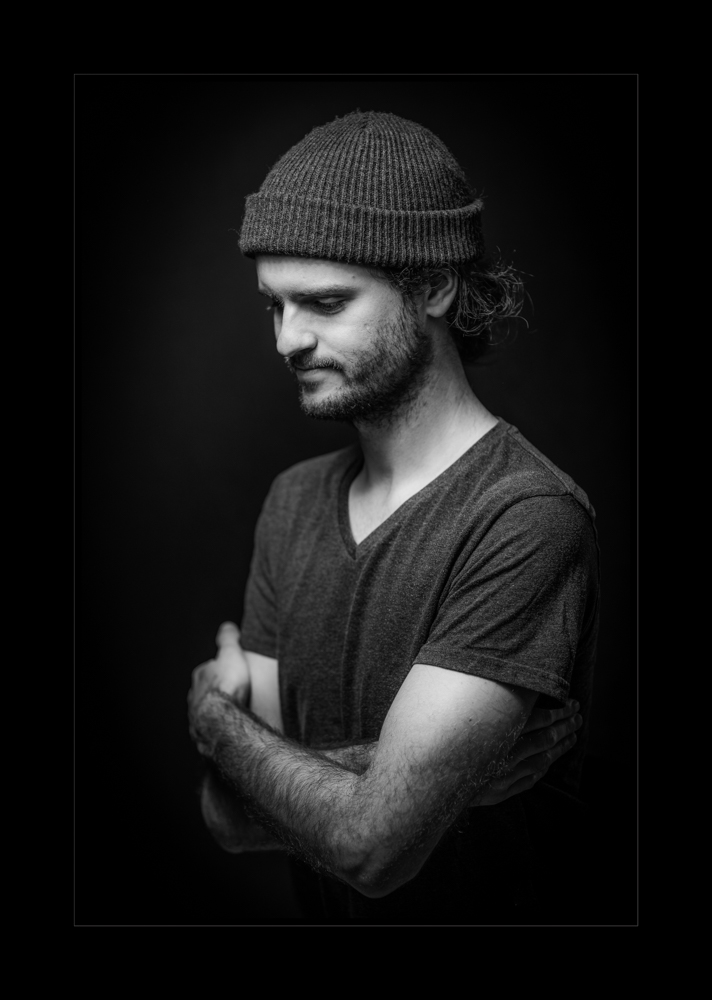
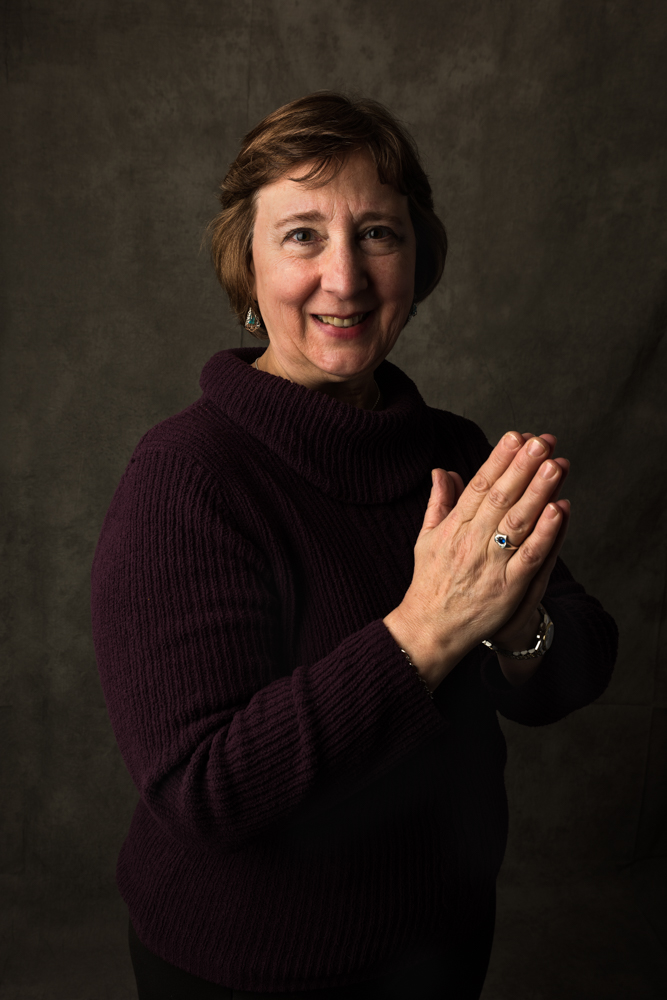
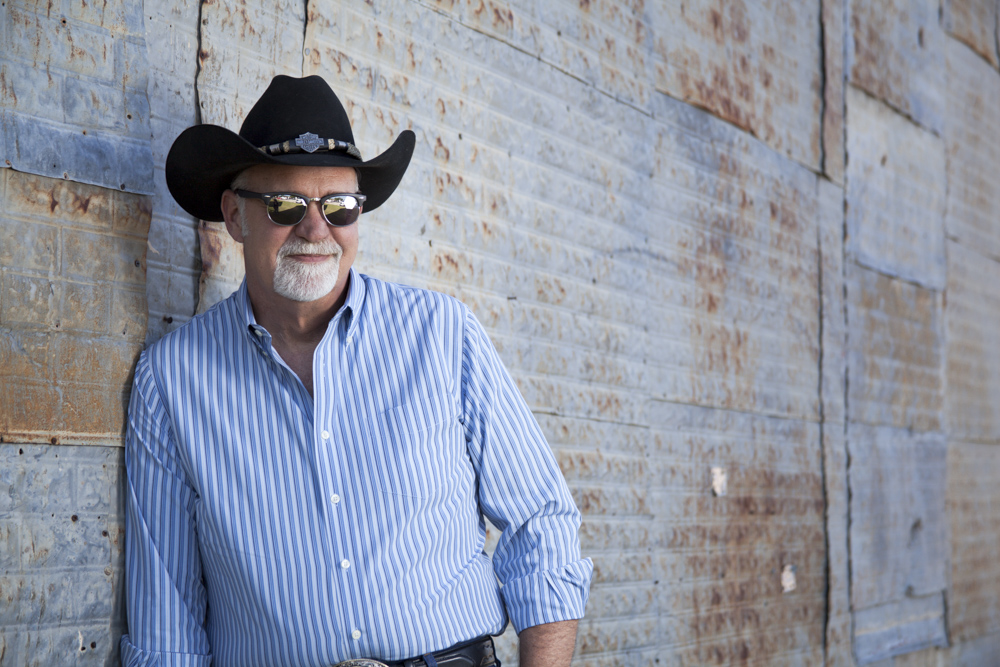
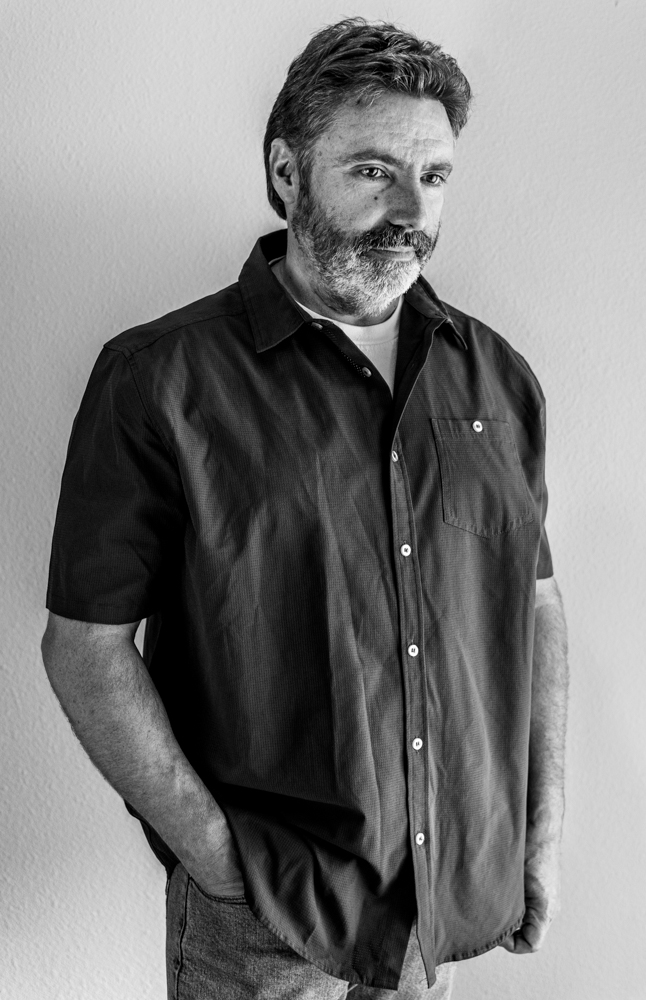
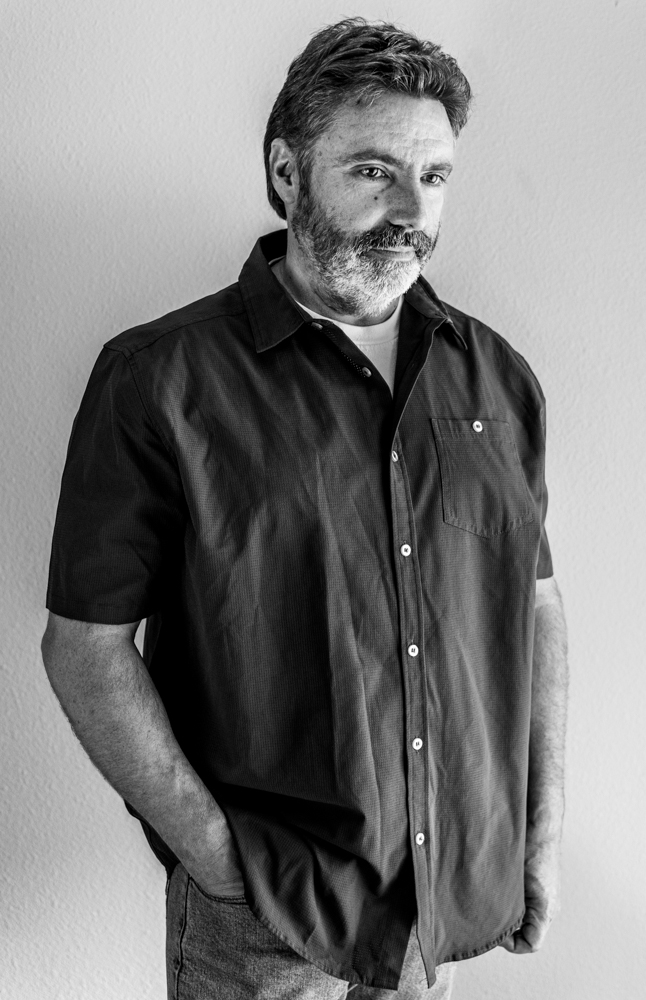
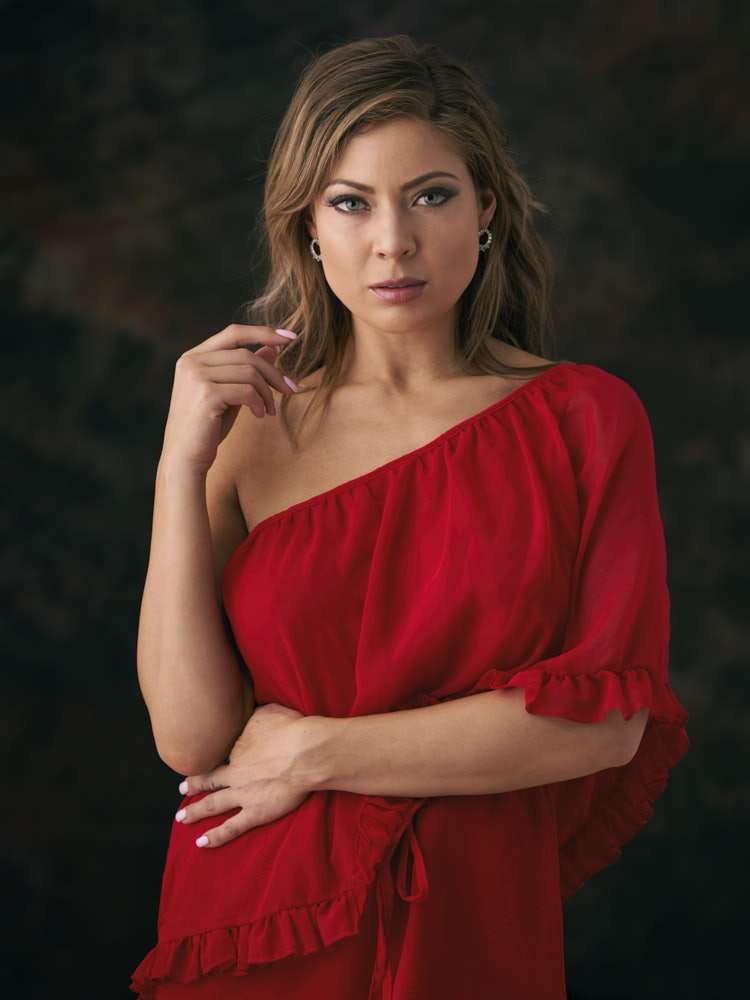
A cross section of portraits on a clean background. One light examples too.
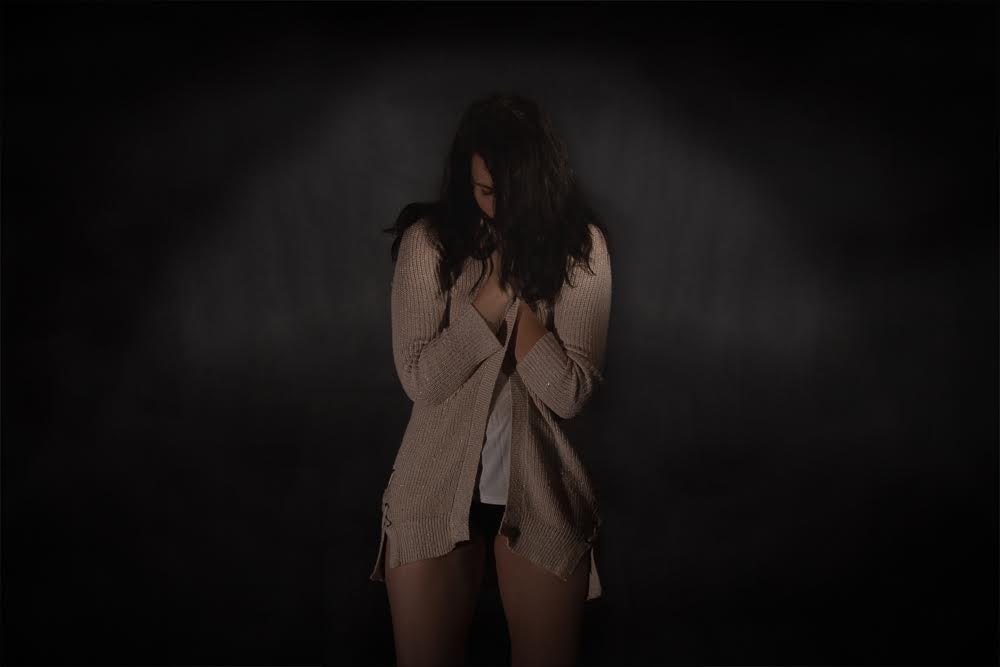
![]() I would like you to do this with minimal lighting… no more than one light, or natural light main as in the Avedon example.
I would like you to do this with minimal lighting… no more than one light, or natural light main as in the Avedon example.
Suggestions: Scrim lighting / softbox / umbrella / window.
Please no hard light, bare strobe, full sun looks. We want this to be a softly lit, one light portrait on a clean background.