PROPERTIES OF LIGHT TWO: THE DISTANCE OF THE SOURCE
This is one of the more complex of the properties since it affects both the softness of the light, as well as the contrast of the lighting over all.
Every light source has a dimension that reveals its best properties.
For instance we will take a 24″ Beauty Dish.
A beauty dish is not just the lighting instrument, but it is also the light created by it.
A beauty dish LOOKS like a beauty dish at 2.5 times the diameter or less. Beyond that distance it just becomes a light. (BTW, the beauty dish is designed to go straight over camera and NOT be filled in from the sides. You are free to use it anyway you want of course, but I thought I would share that with you.)
We will look at how that works with all the lights in the assignments to shoot below.
Distance can change relative size of light source to subject.
A softbox in close to the subject can be relatively large (soft) but if we move that source far beyond the 2.5 diameter, you fill find it will start to act like any other ordinary light.
For instance, a 44″ square softbox may look soft when it is 12 inches away from a small bottle of perfume. But if you move it to 15 feet away, you will find it doesn’t differ much at all from a bare bulb light source. Any difference is negligible in the presentation from the subject.
The distance can change the fall-off and contrast of the light.
The infamous Inverse Square Law at work right there.
Two good videos on using the Inverse Square Law.
Work and Assignments for those who need them:
Assignment one.
Using a softbox on a boom, move it around the arc of beauty and choose a subject that is a stack of books. Make sure the stack is at least 18″ high.
Put your light back left, back right, back top, side left and side right. Use a fill card on the shadow side to keep the texture visible. Once you have the books set, do not rearrange the composition for the books shot.
Assignment two:
Shoot the books with the light coming from the side you choose. Make sure your camera is getting all of the books, and it should cover two feet wide in the viewfinder. Then move the light back foot by foot until you can no longer shoot it because of underexposure.
Assignment three:
Put a subject 10 feet from a white wall. Light them to f-11. Make the photograph.
Do not move the light and have the subject be next to the white wall – touching it even. Adjust light for exposure but do not move it. Make the shot.
Using a medium softbox, shoot the subject with the box as close to the subject as possible without being in the shot. Then move it back one foot, adjust the light and shoot again. Keep moving the light back one foot, make your adjustments and shoot it.
Alternative. Put the light at 2 ft from the subject exactly. Find exposure at f-11. Make the shot.
Move the light back 1 foot, change the aperture to f-8 (do not remeasure the light). Make the shot.
Then move it back two feet, set the aperture to f5.6 and make the shot. Do not change the setting on the light.
Now move it two more feet back, and set the aperture to f-4 and make the shot.
You have just set your lights according to the inverse square law, and nailed your exposures. However, notice how the light presents from the subject.
Not good or bad, but different.
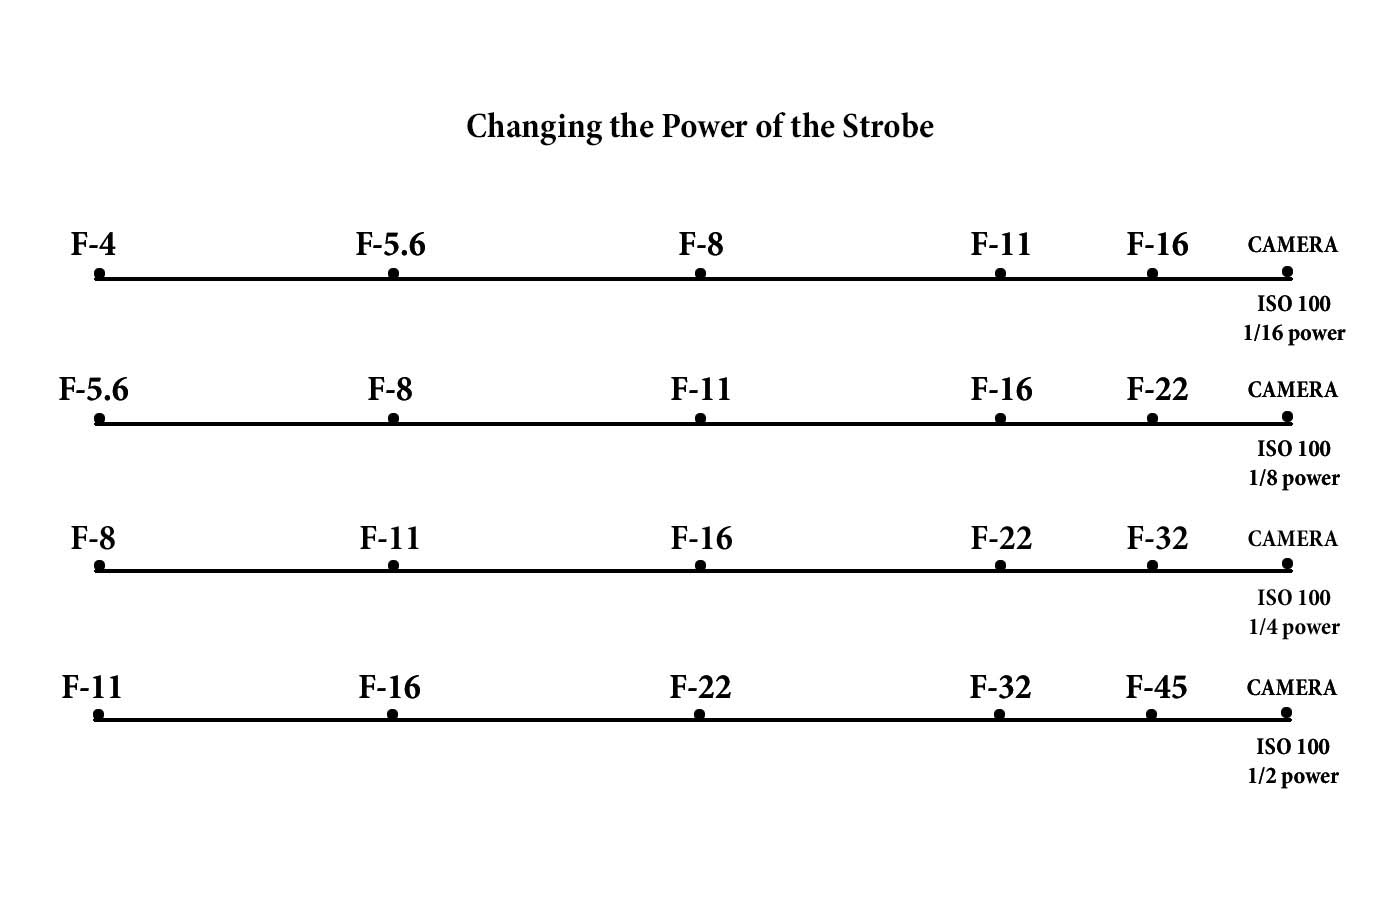
To control the exposure you can use the power of the lights (both up and down)
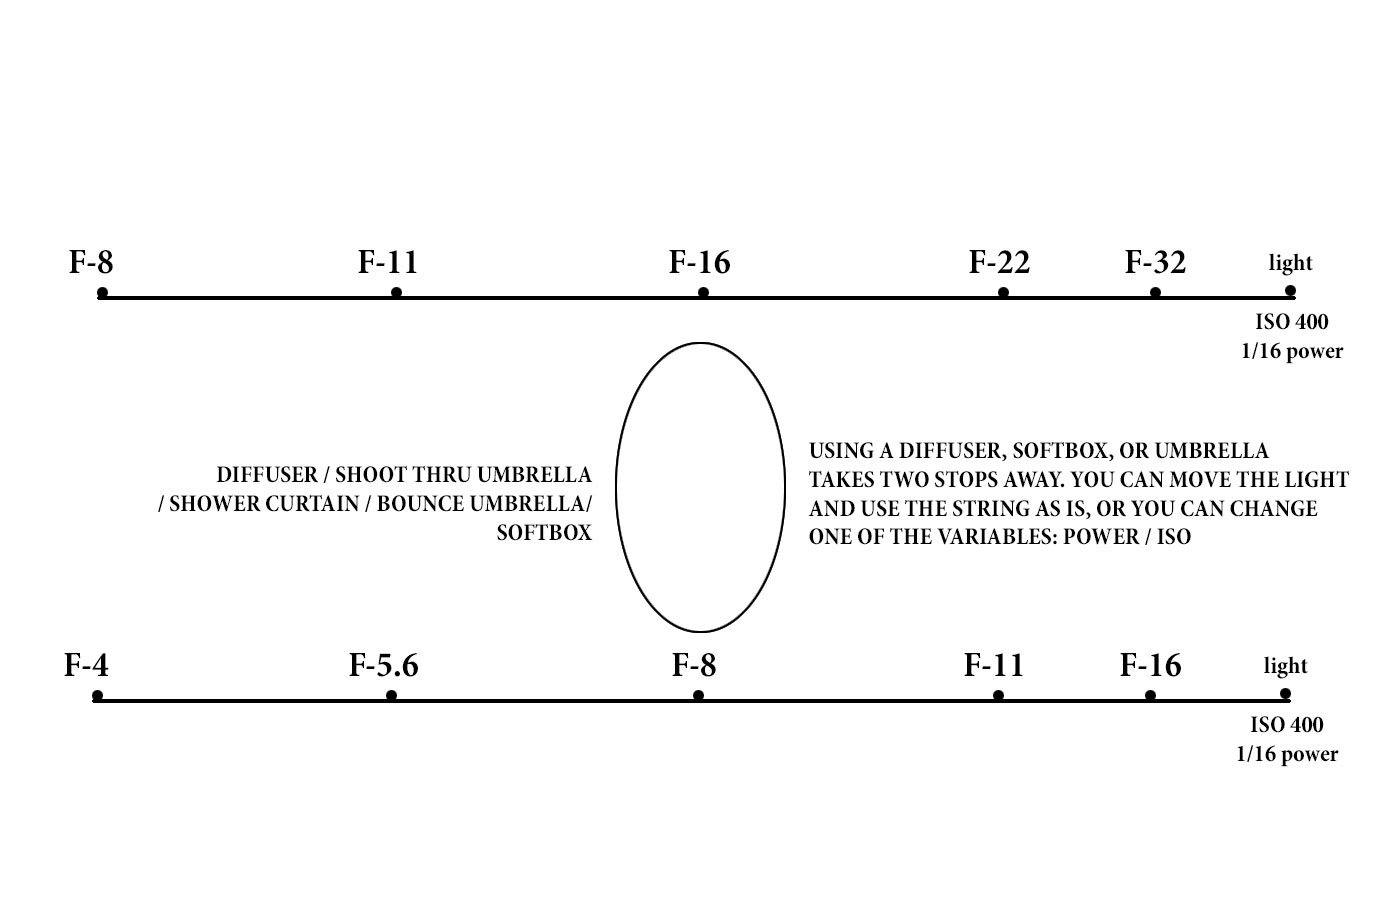
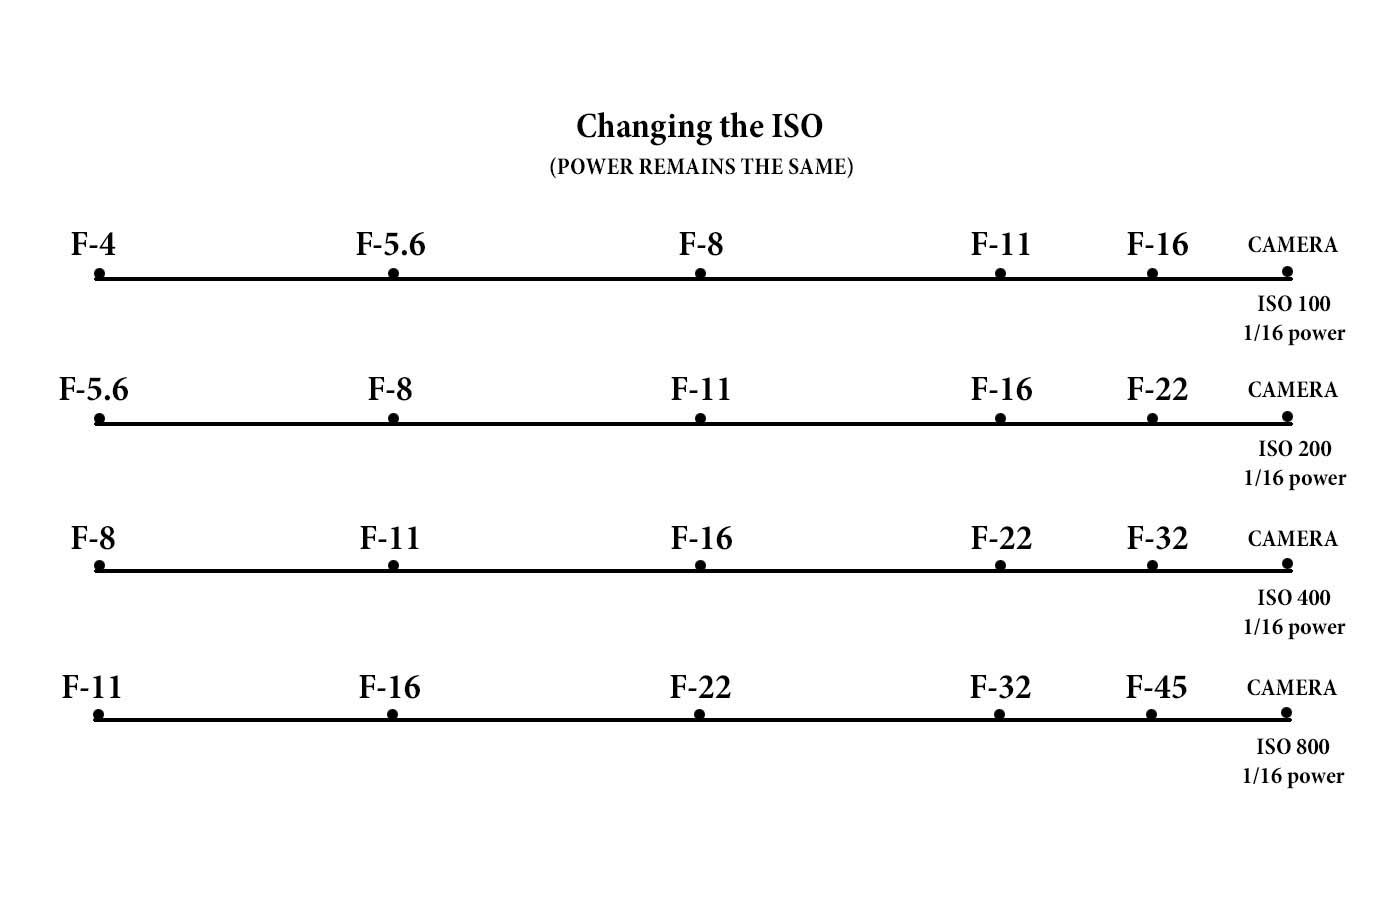
You can also leave the power alone and adjust the ISO for equivalent exposures.
Using any sort of diffusion will take two stops away from your exposure, so adjust accordingly. (NOTE: If you are using a bounce umbrella, stretch the string meter from the back bounce surface of the umbrella for best results.) Also, silver bounce umbrellas only reduce by 1 stop.)