
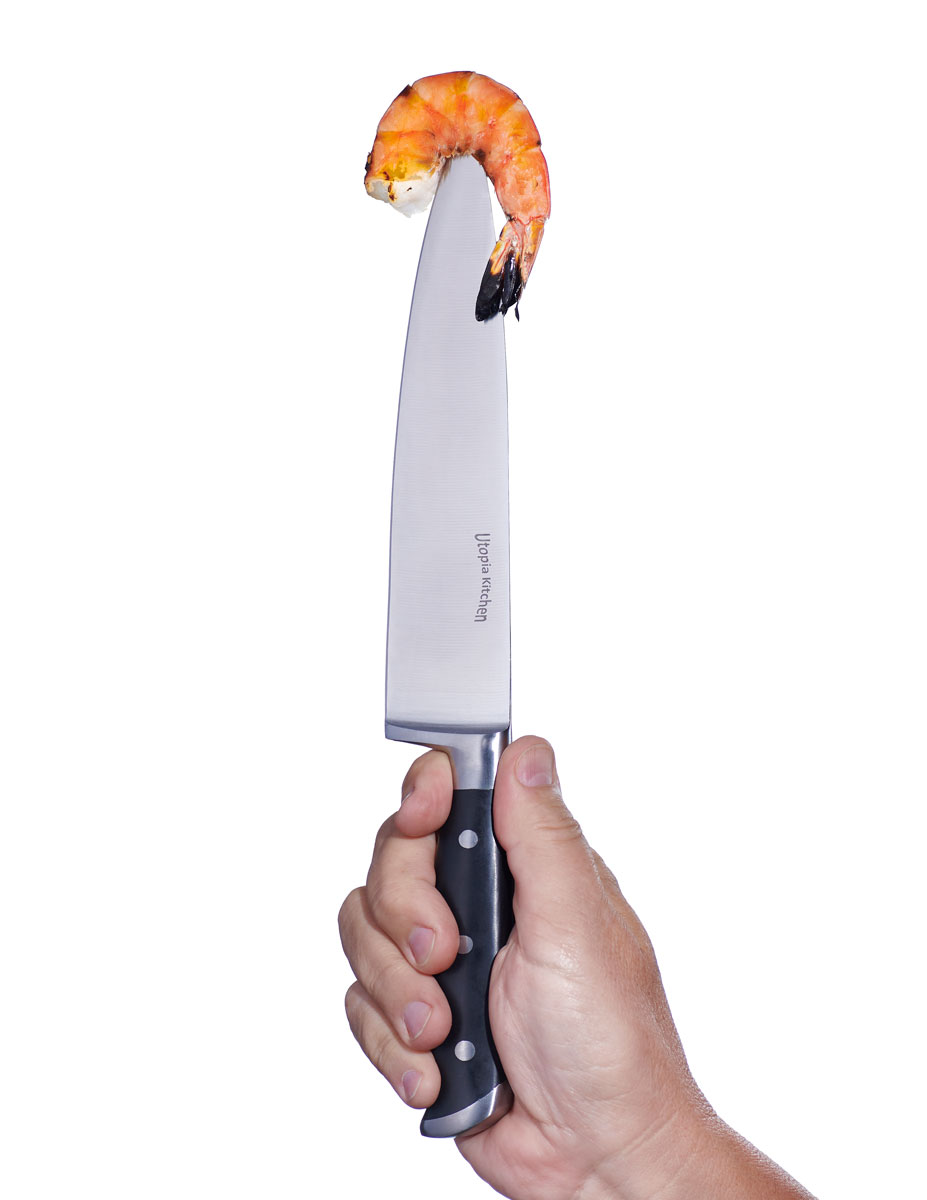
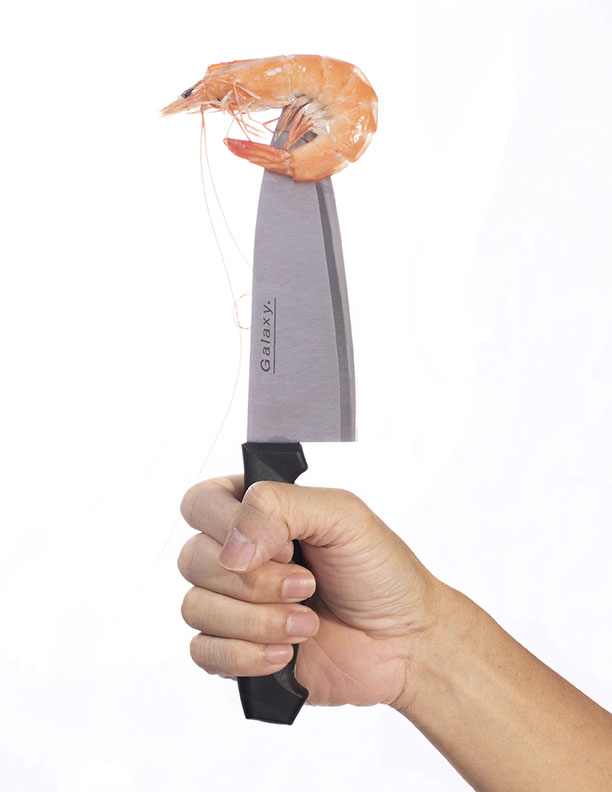
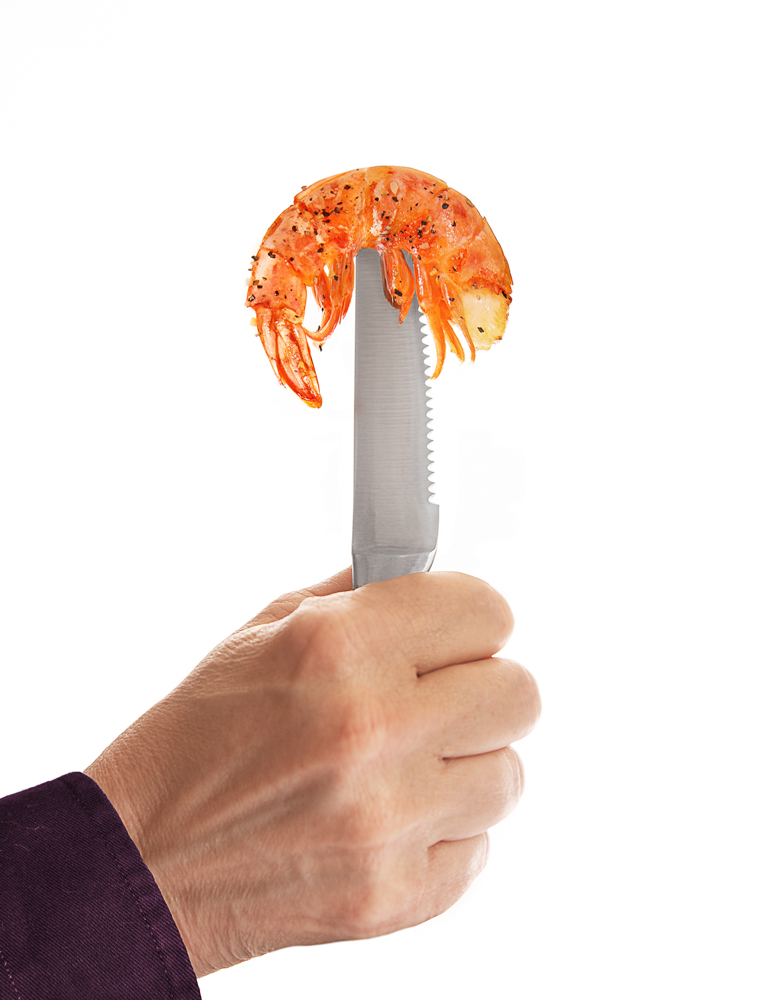
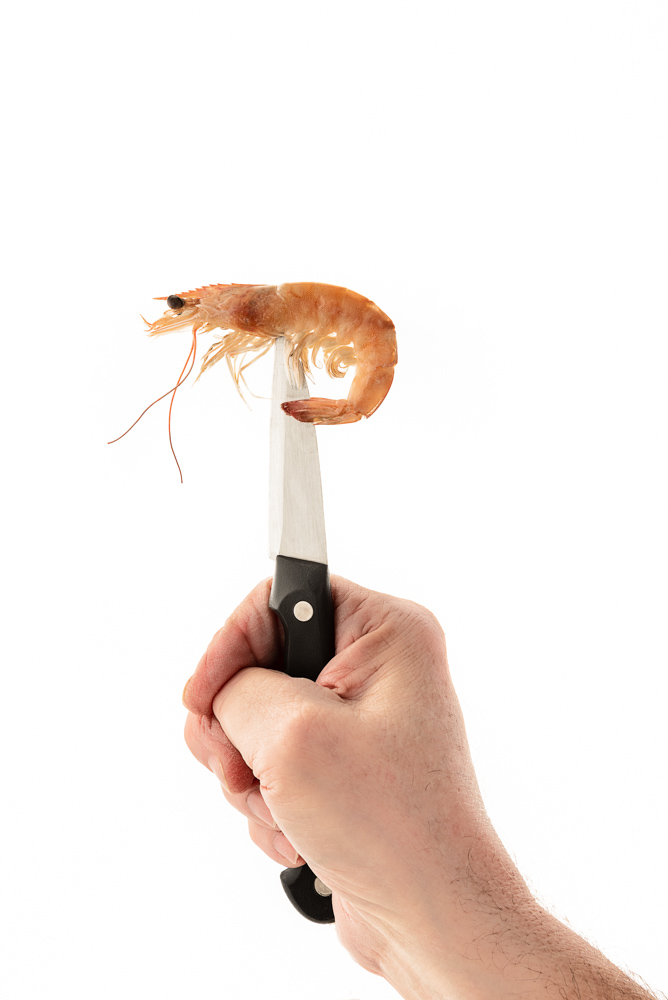
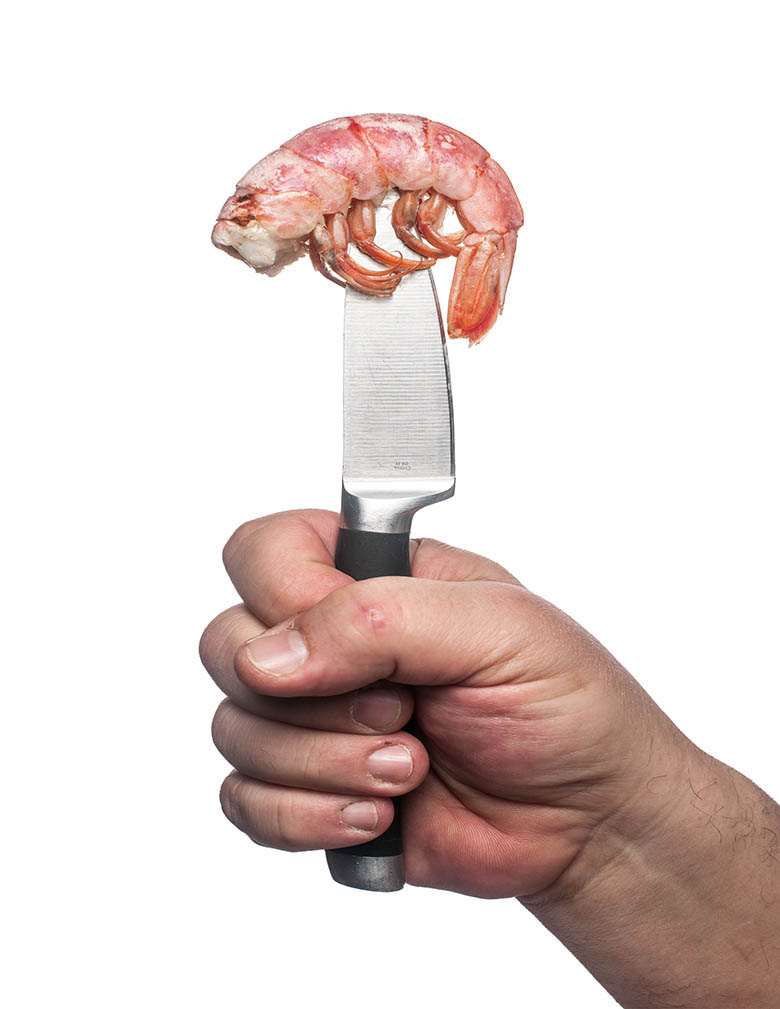
NOTE: I was simply unaware that there are multiple strains of shrimp in the world. I am a photographer not an ocean biologist (although I always wanted to photograph Jacque Cousteau) so was blissfully ignorant of the complexity of shrimps.
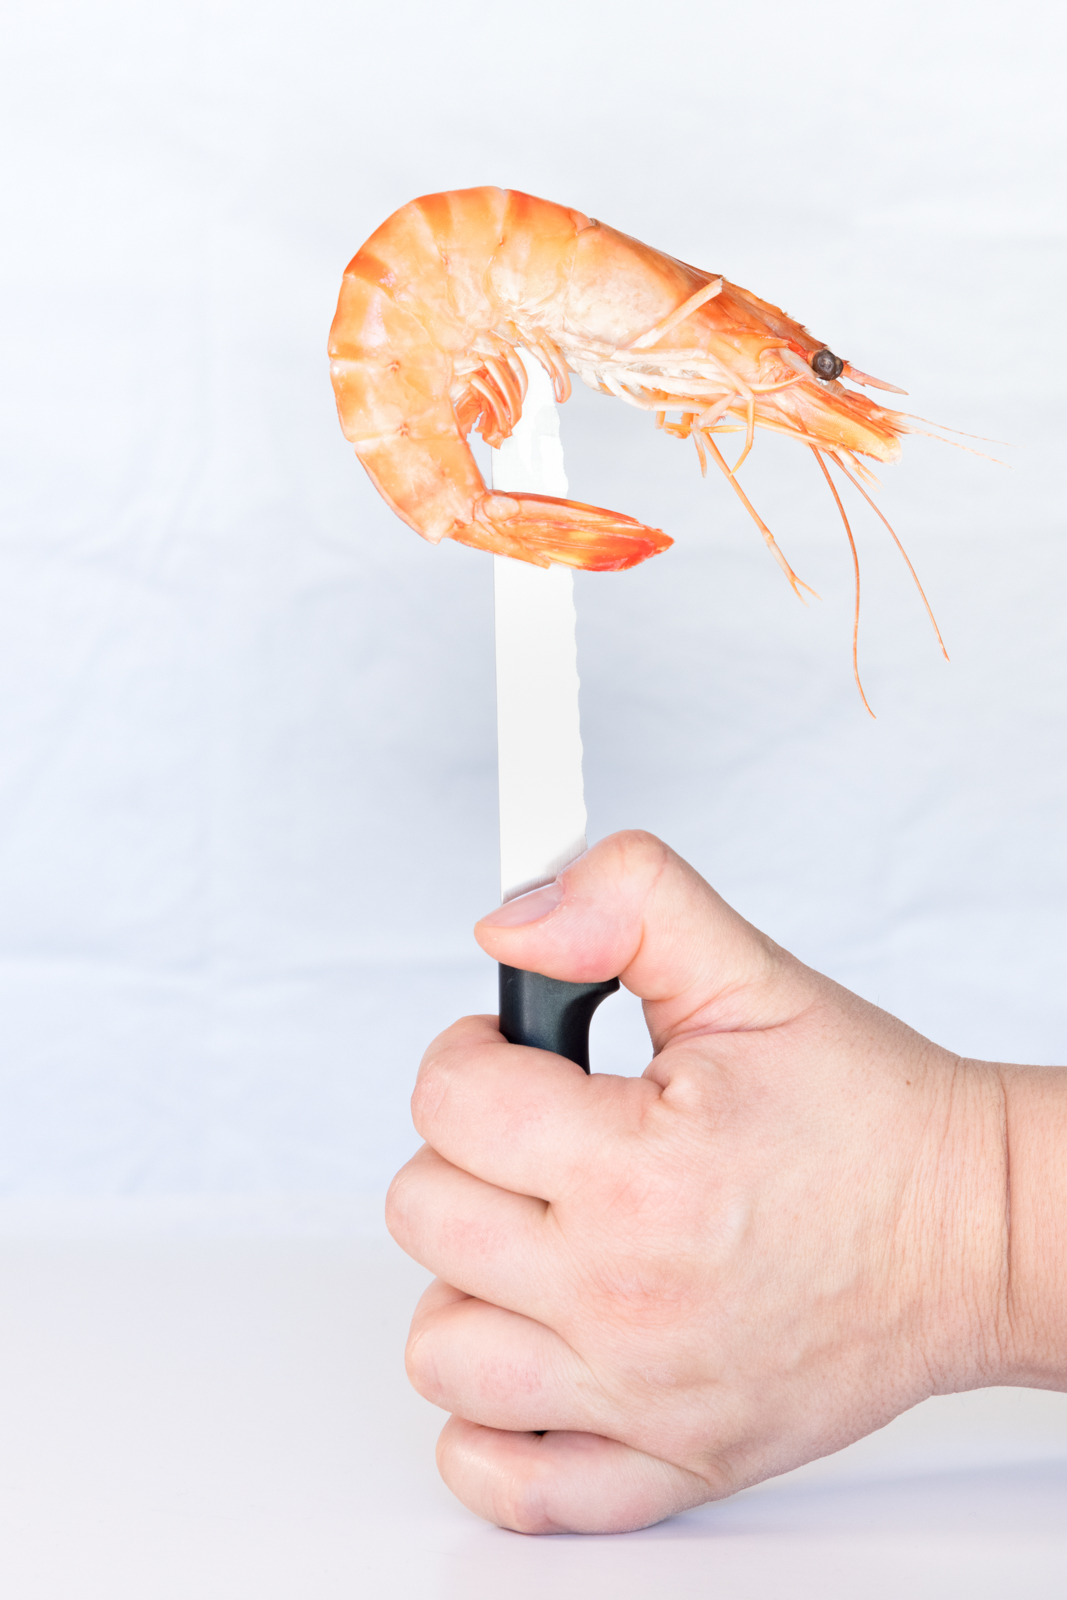
I am referring to what is known as “Gulf Shrimp”.
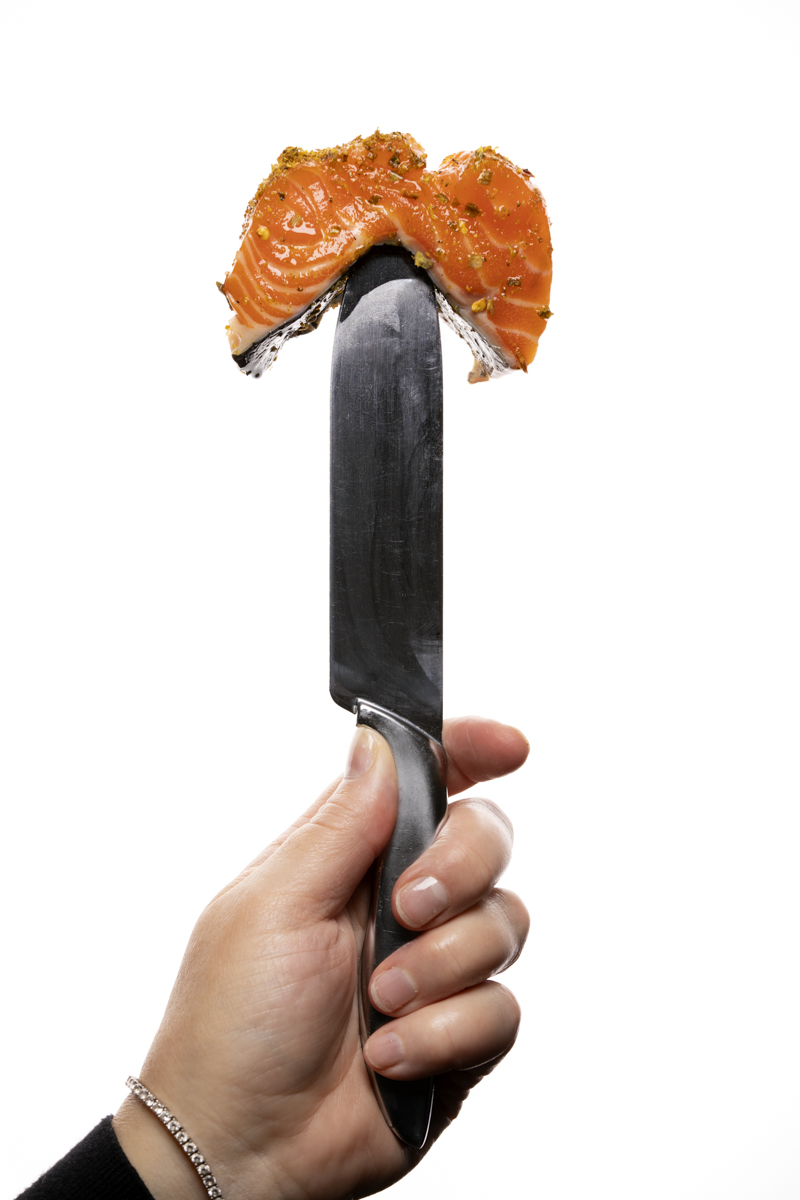
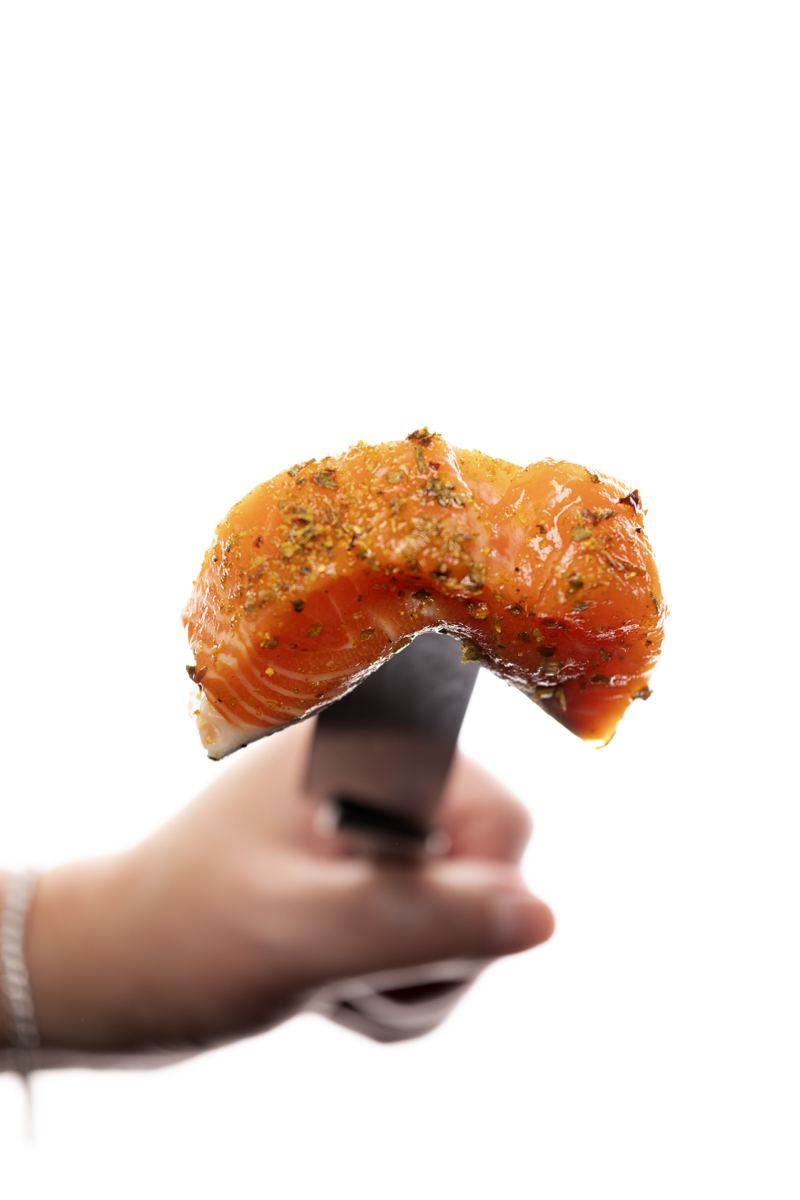
If you are unable to get a Gulf Shrimp, please feel free to use a small chunk of Salmon, or a section of Octopus. Whales are not an option… size issues.
Thanks and sorry for the confusion.
THE INCREDIBLE SHRIMP SALAD ADVERTORIAL
First… what is an advertorial?
An advertorial is an ad camouflaged as an editorial. Magazines are required to note that what is being shown is indeed an ad, but those declarations can be a bit small and sometimes well hidden.
The reason is that an editorial carries some clout. If it looks like the magazine itself is endorsing the product, that may give it a bit more attention as well as credibility. Advertorials are very popular and you may see them in almost every magazine.
They are usually multi-page and will have a more ‘magazine’ layout that may (or in some cases may not) blend into the current publication.
This client is using the imagery for three purposes:
A double-truck layout for the lead-in to a 6-page advertorial, a brochure cover and backside, and a pop-up newsletter signup on their website.
The targeted magazines include “O“, Real Simple, H&G, and Vanity Fair.
The brochure will be the cover and backside of their new media kit and will be printed in a quantity of 2000. Website usage is not currently measured.
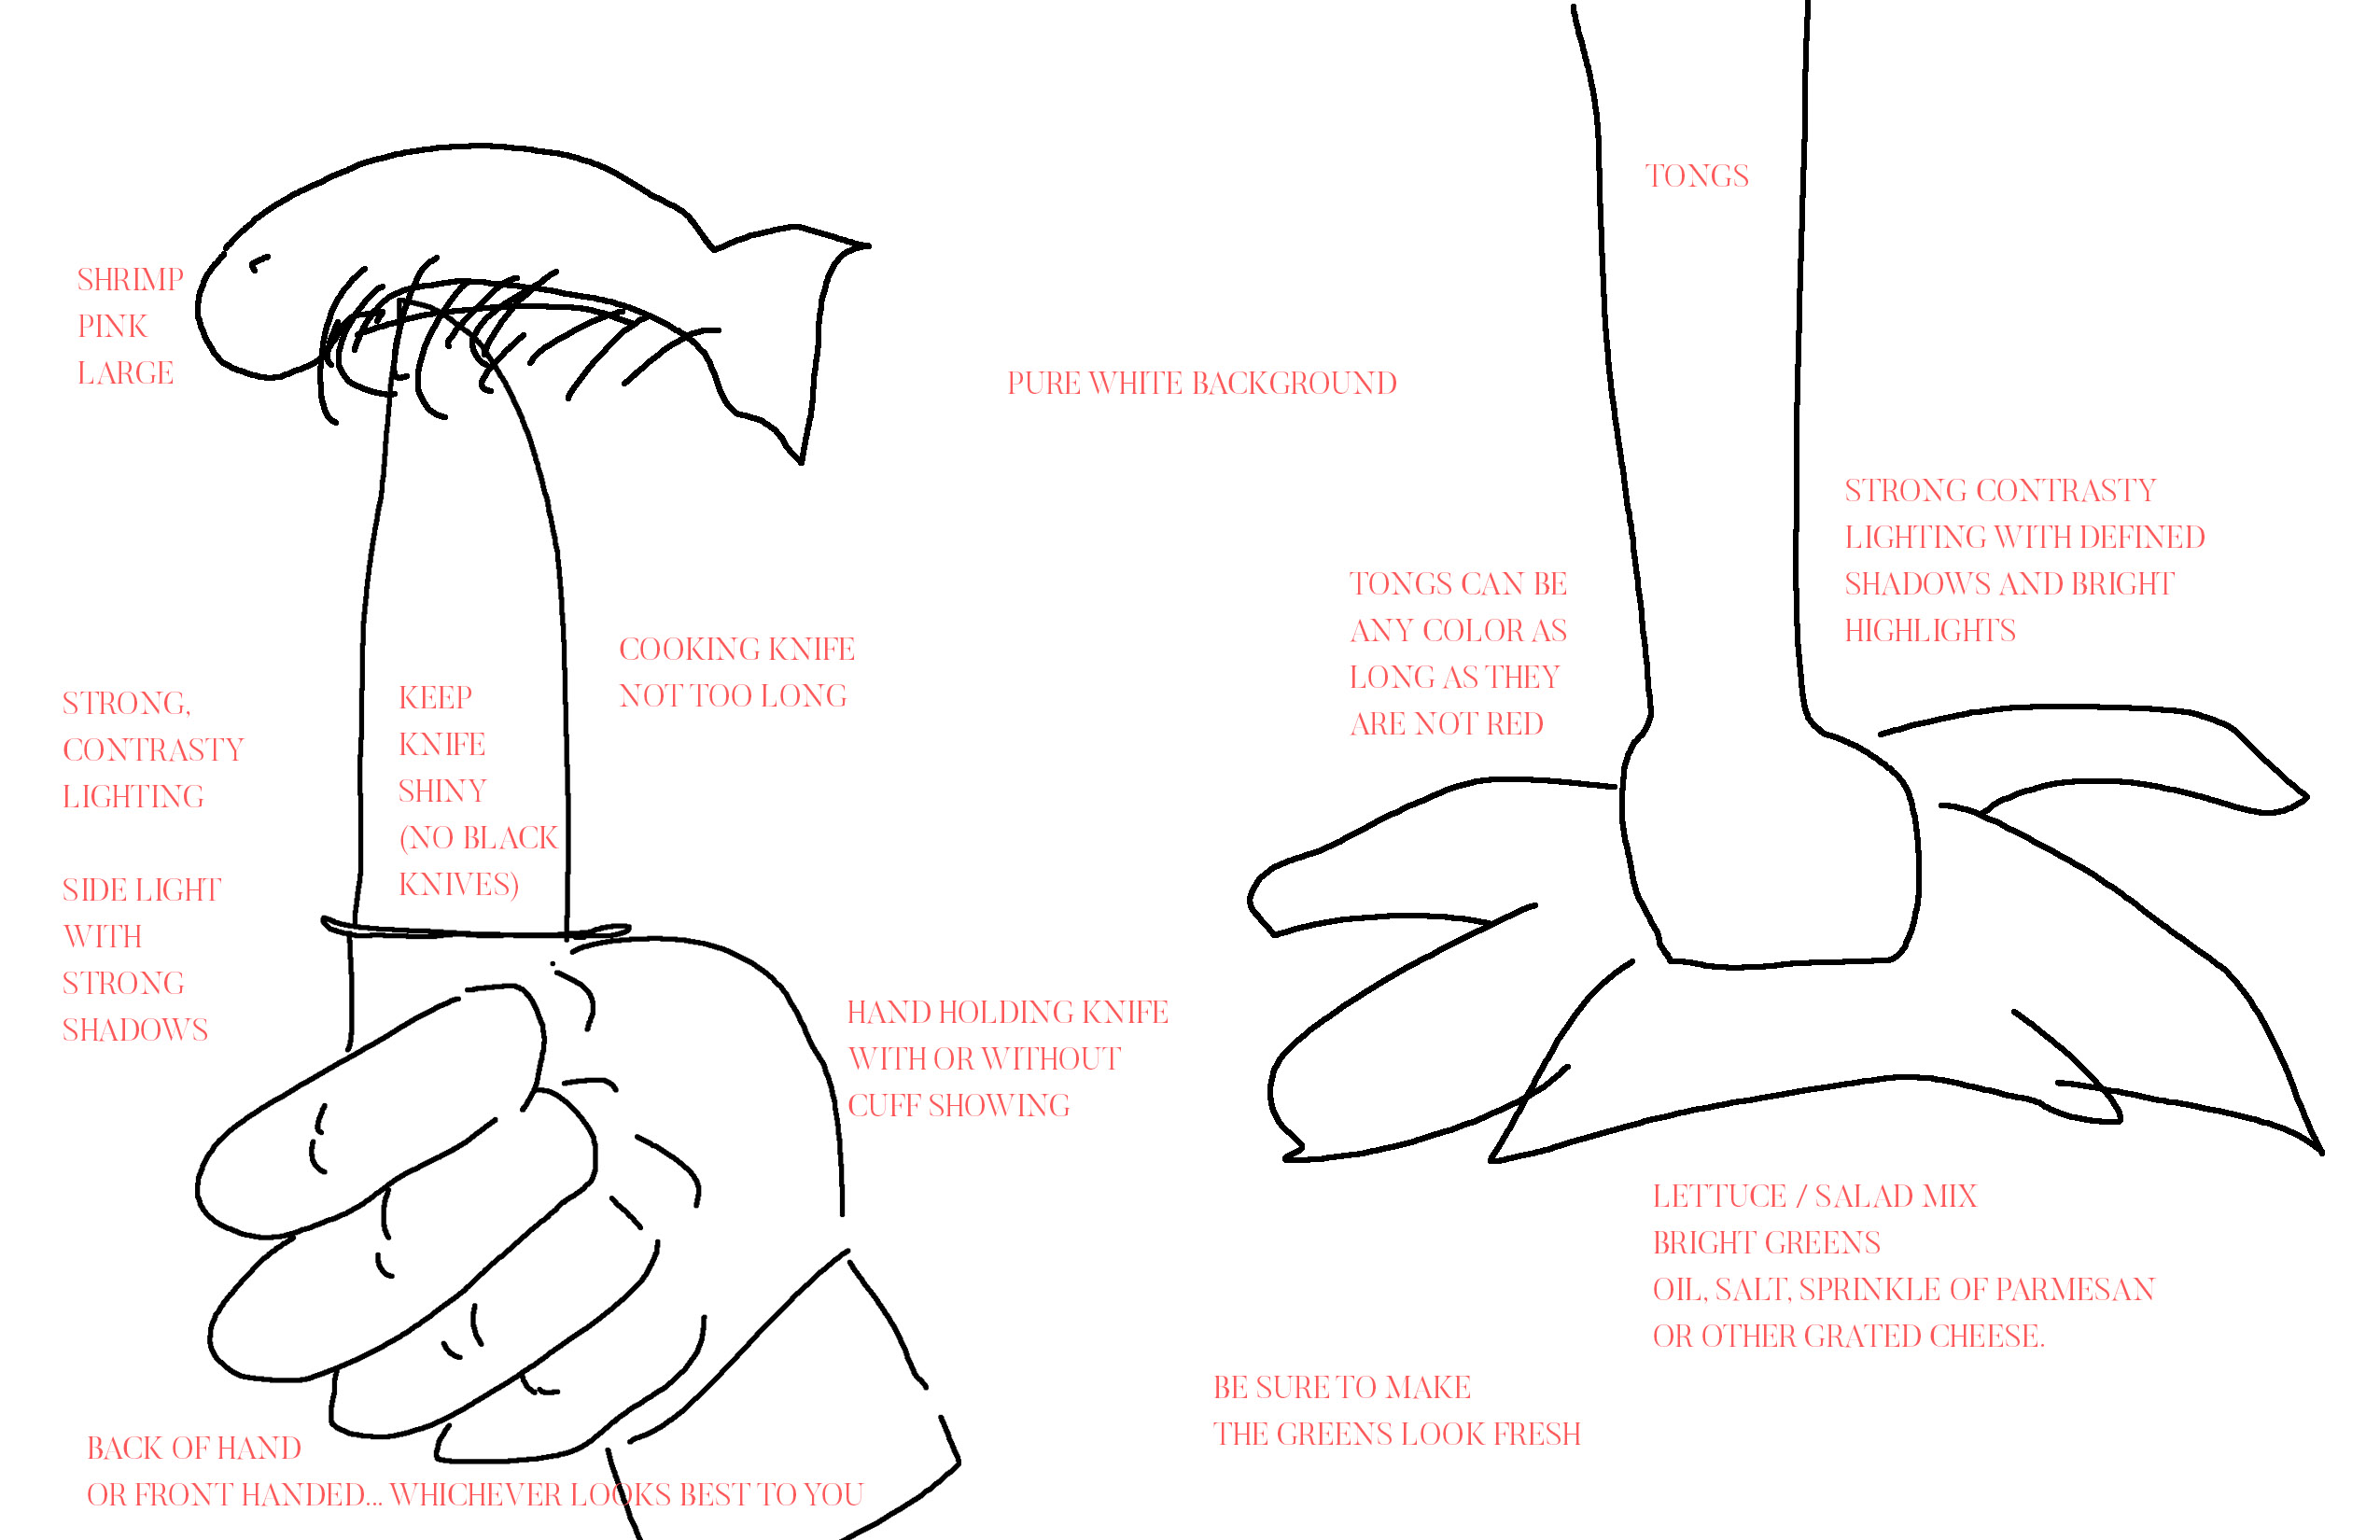
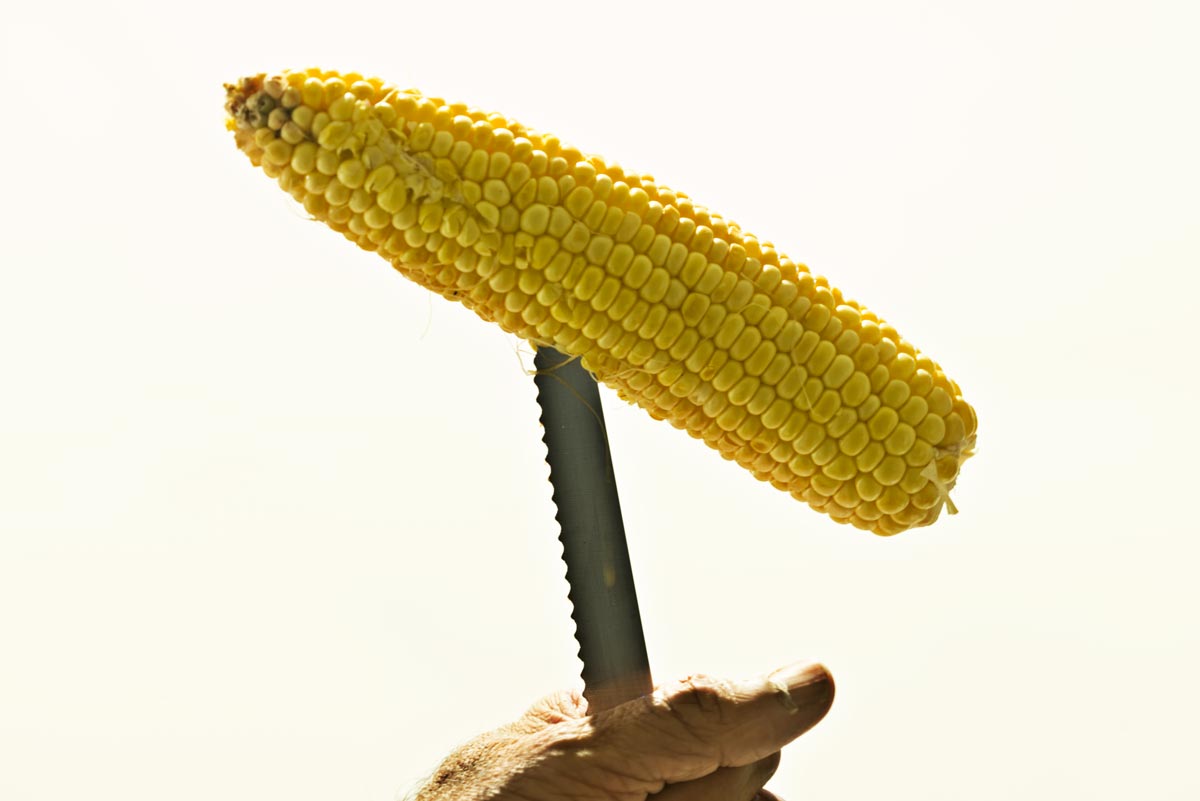
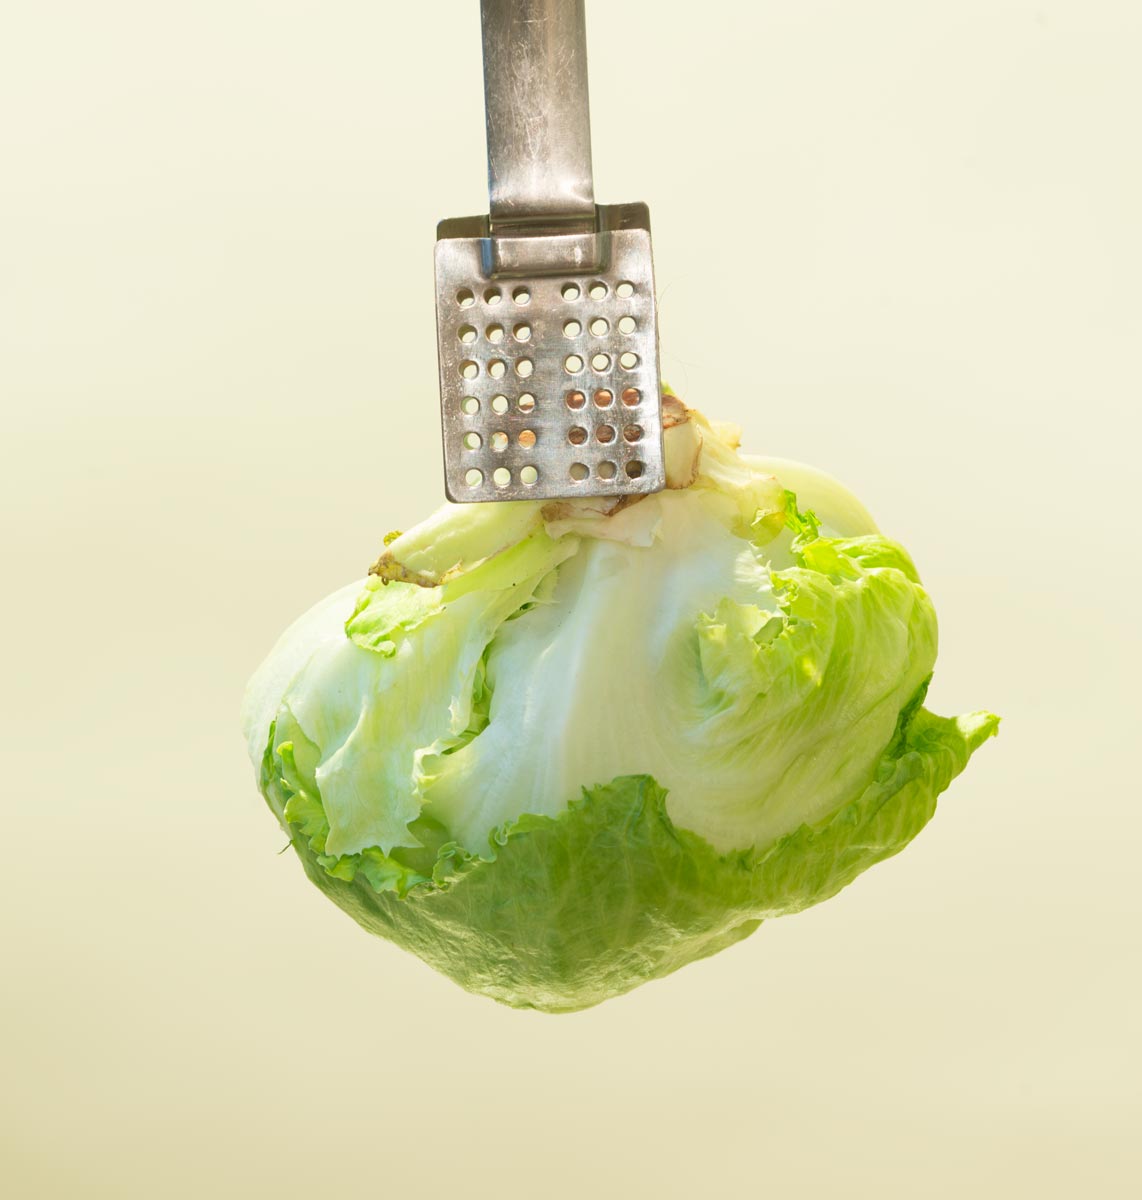
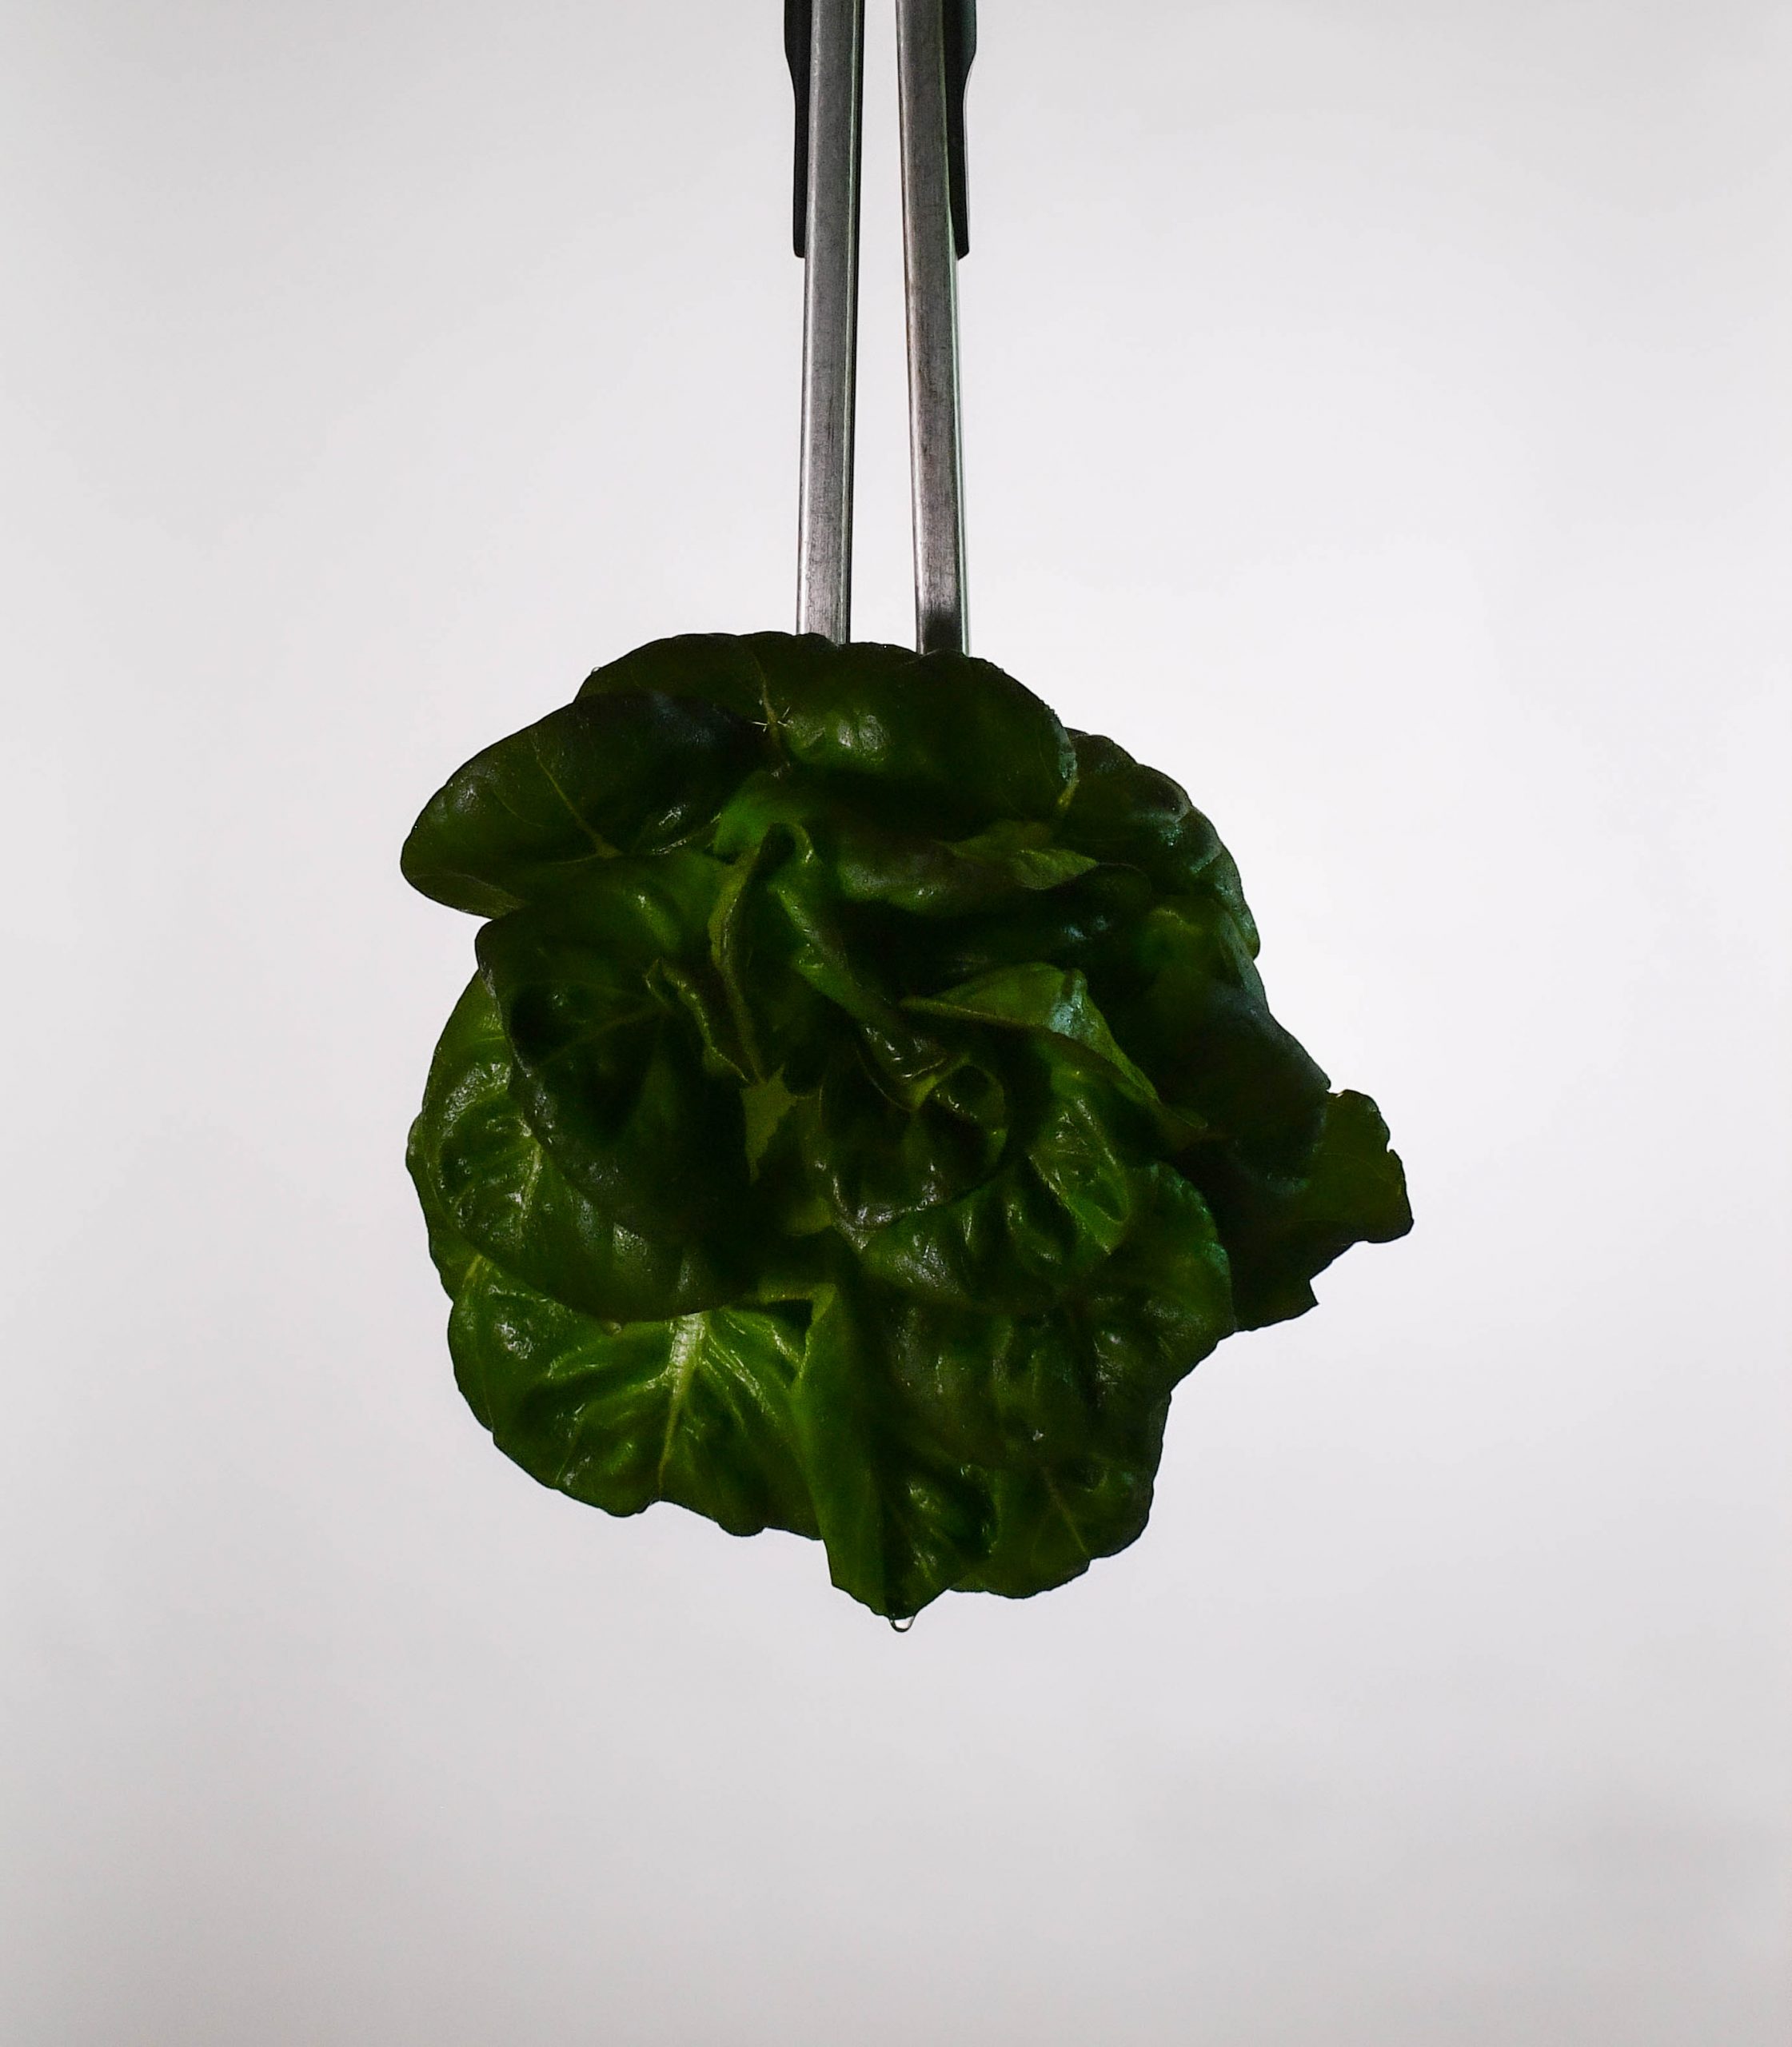
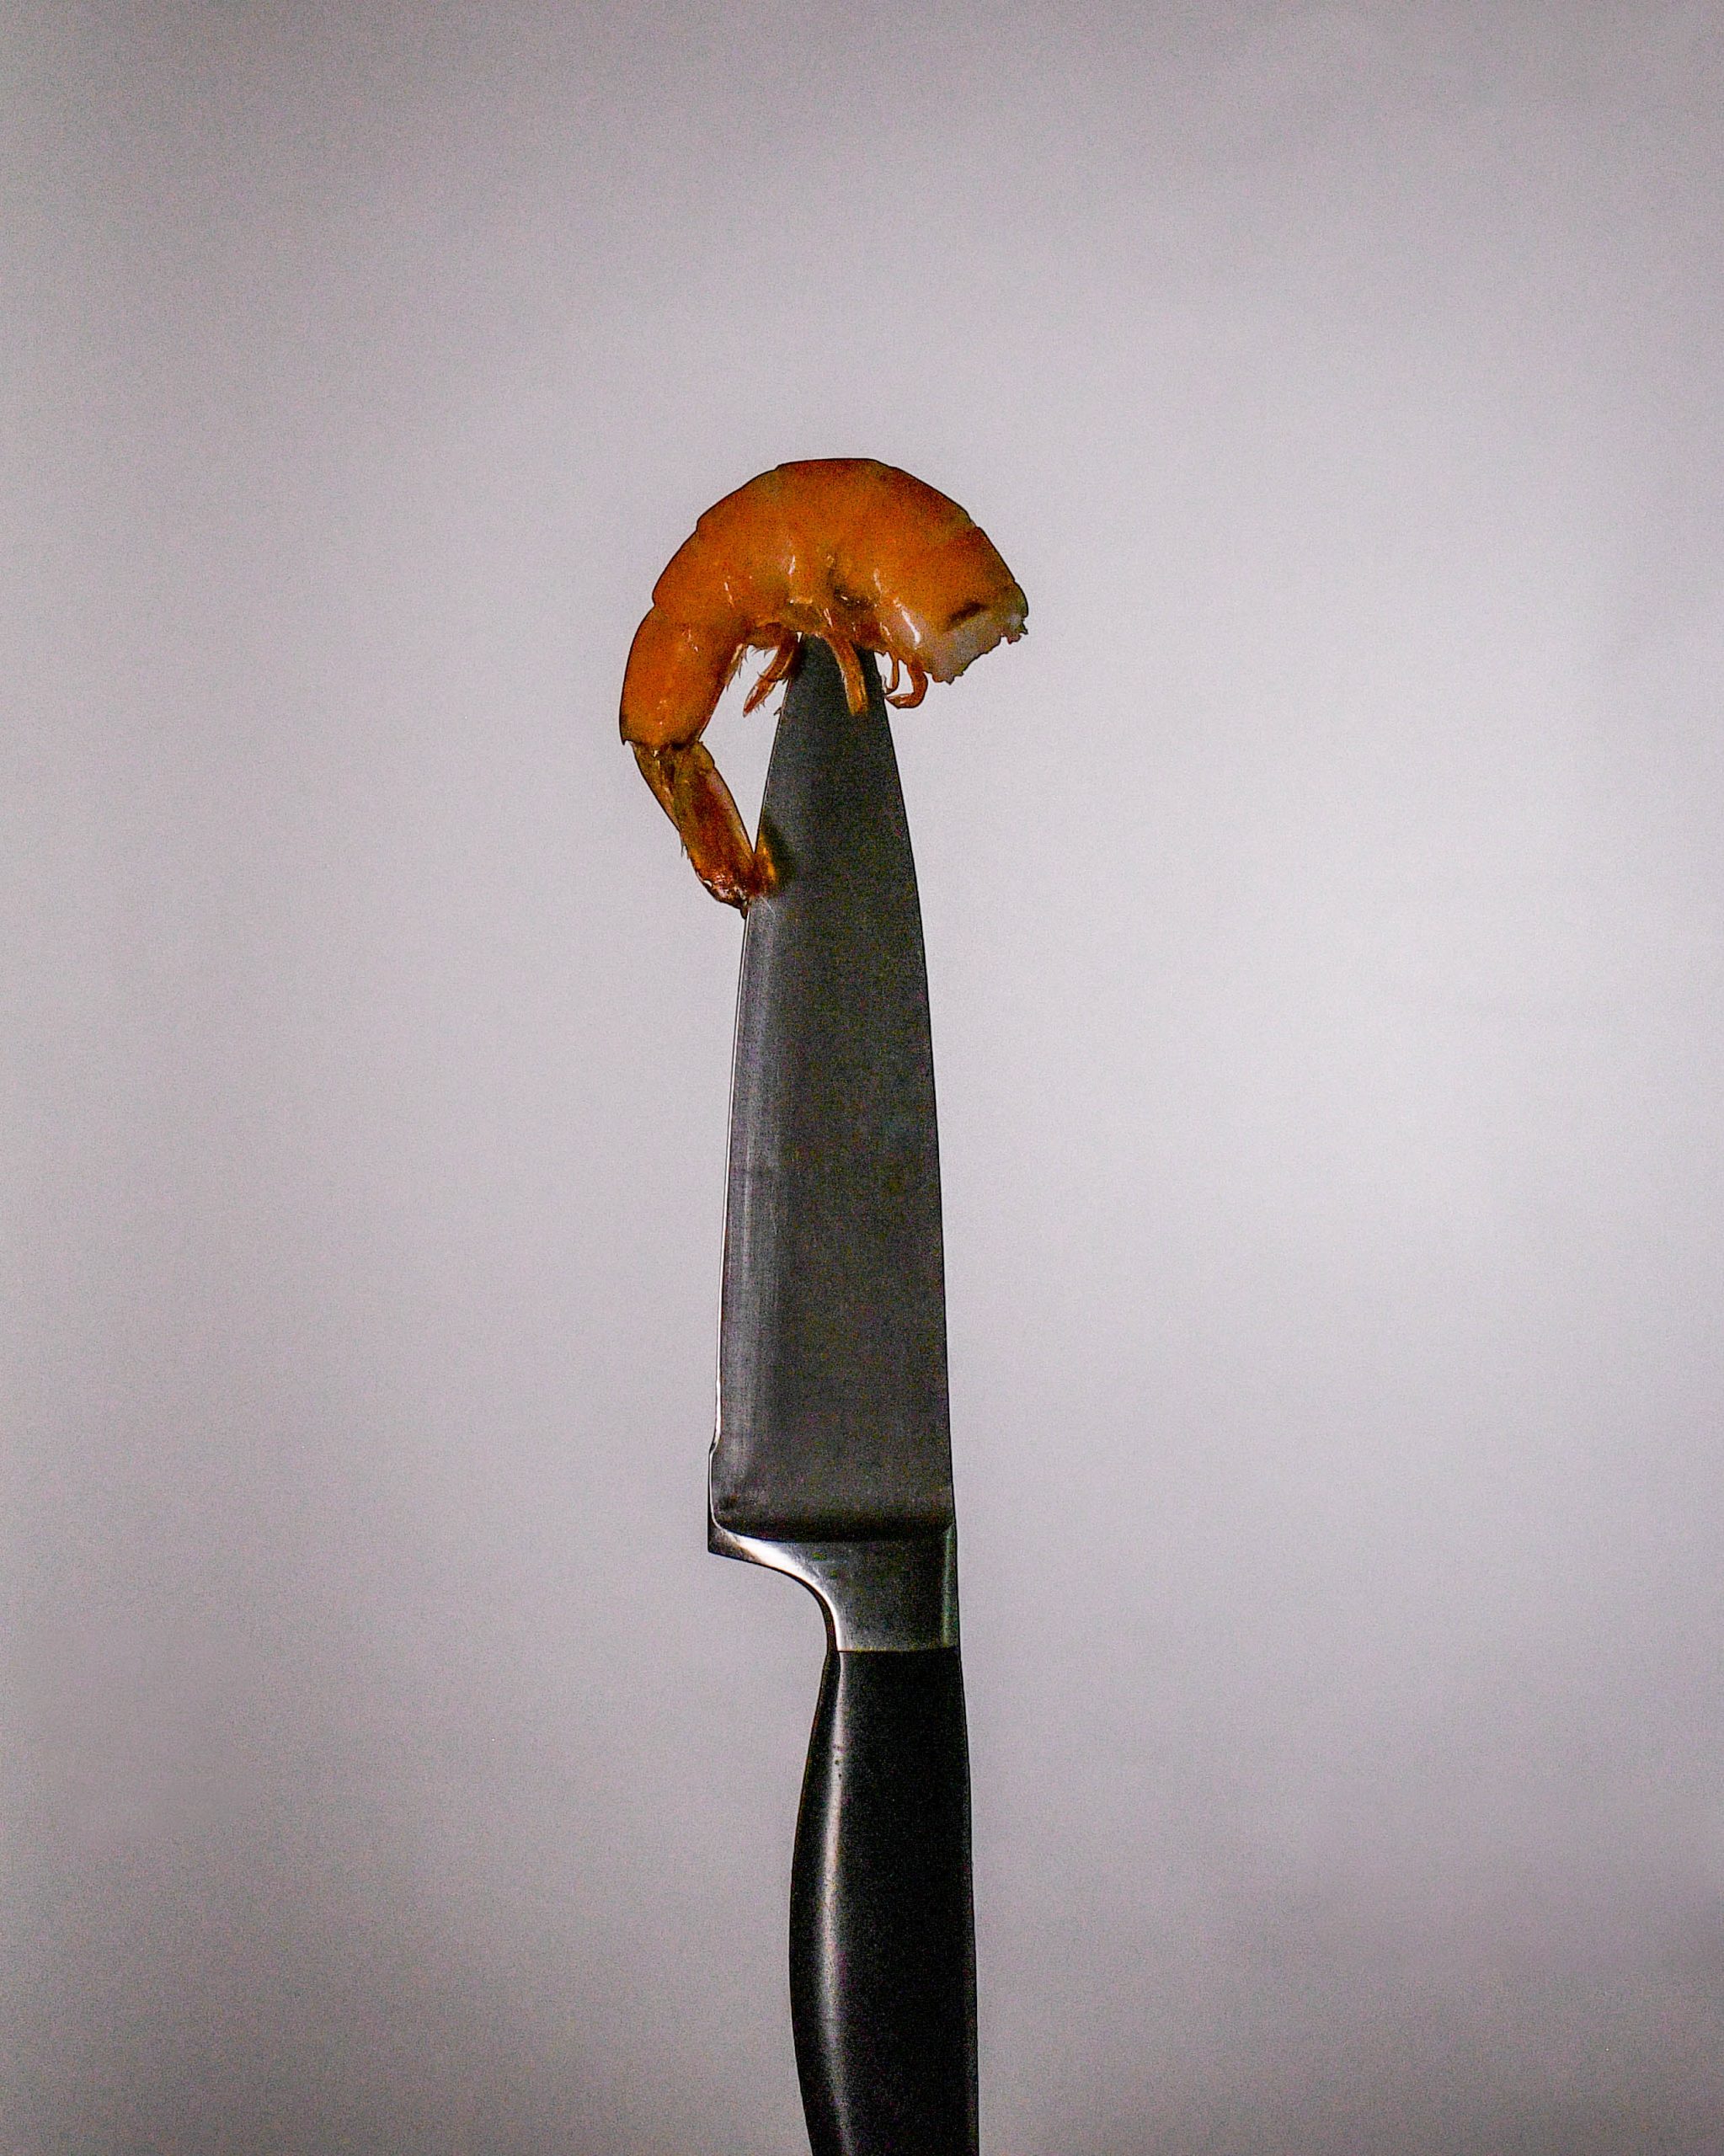
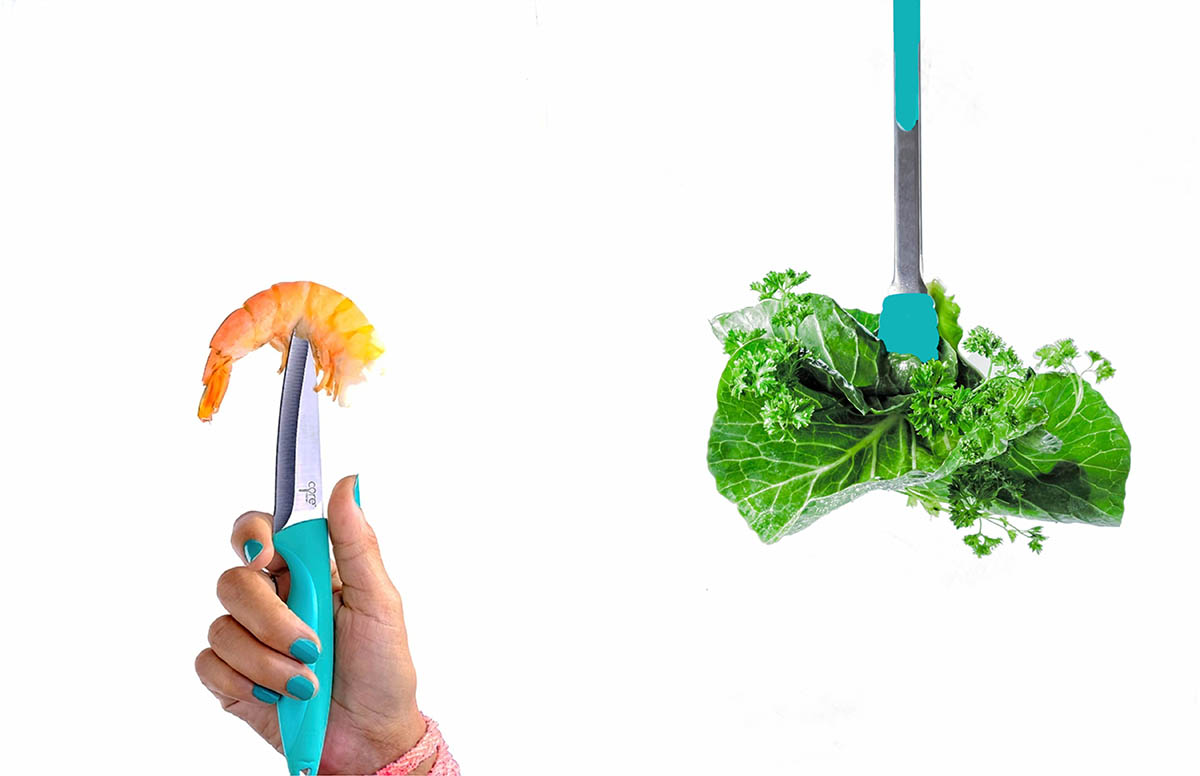
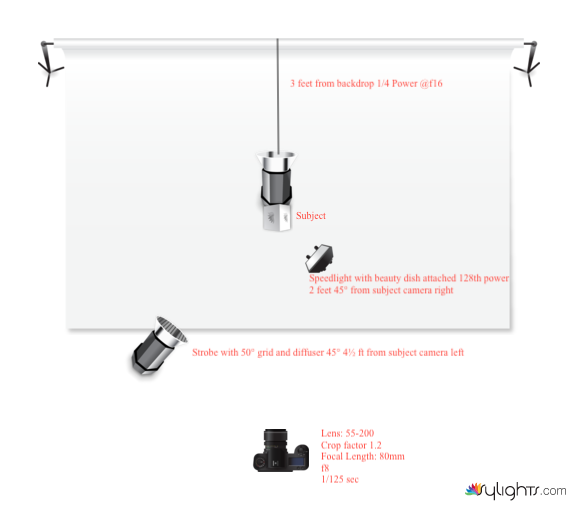
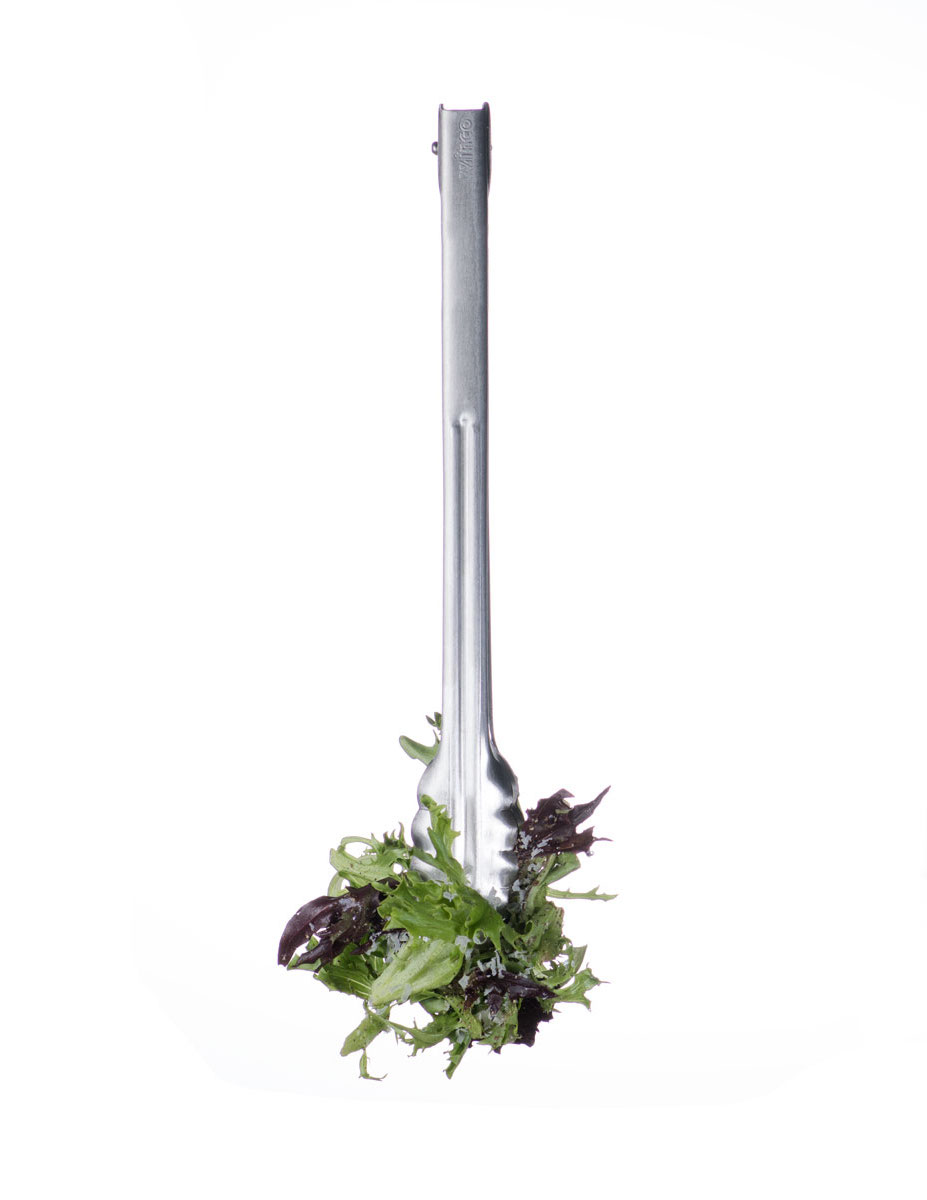
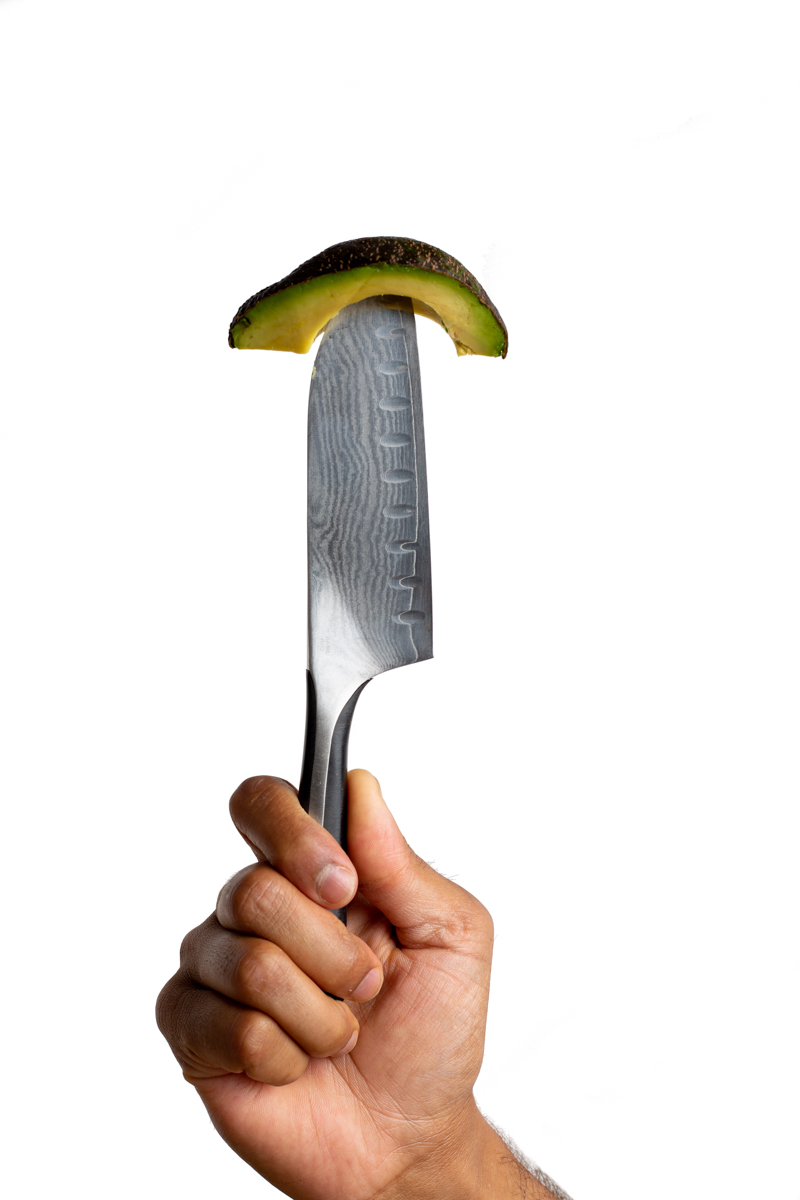
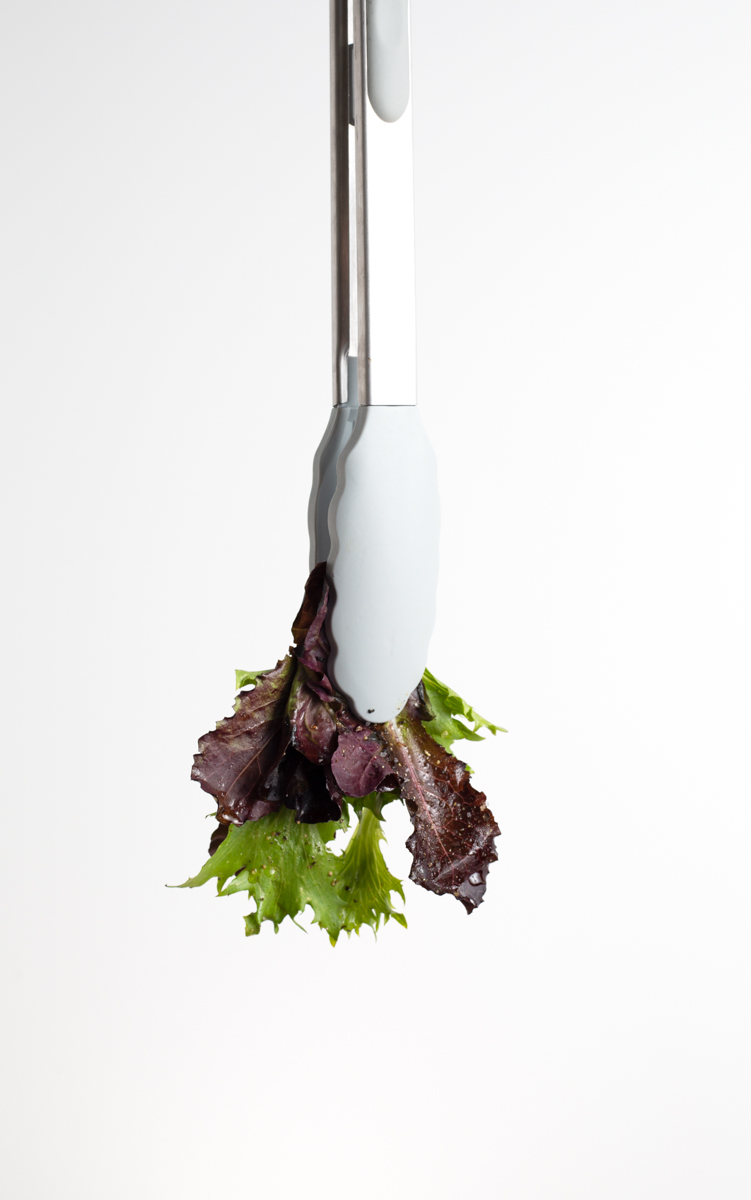
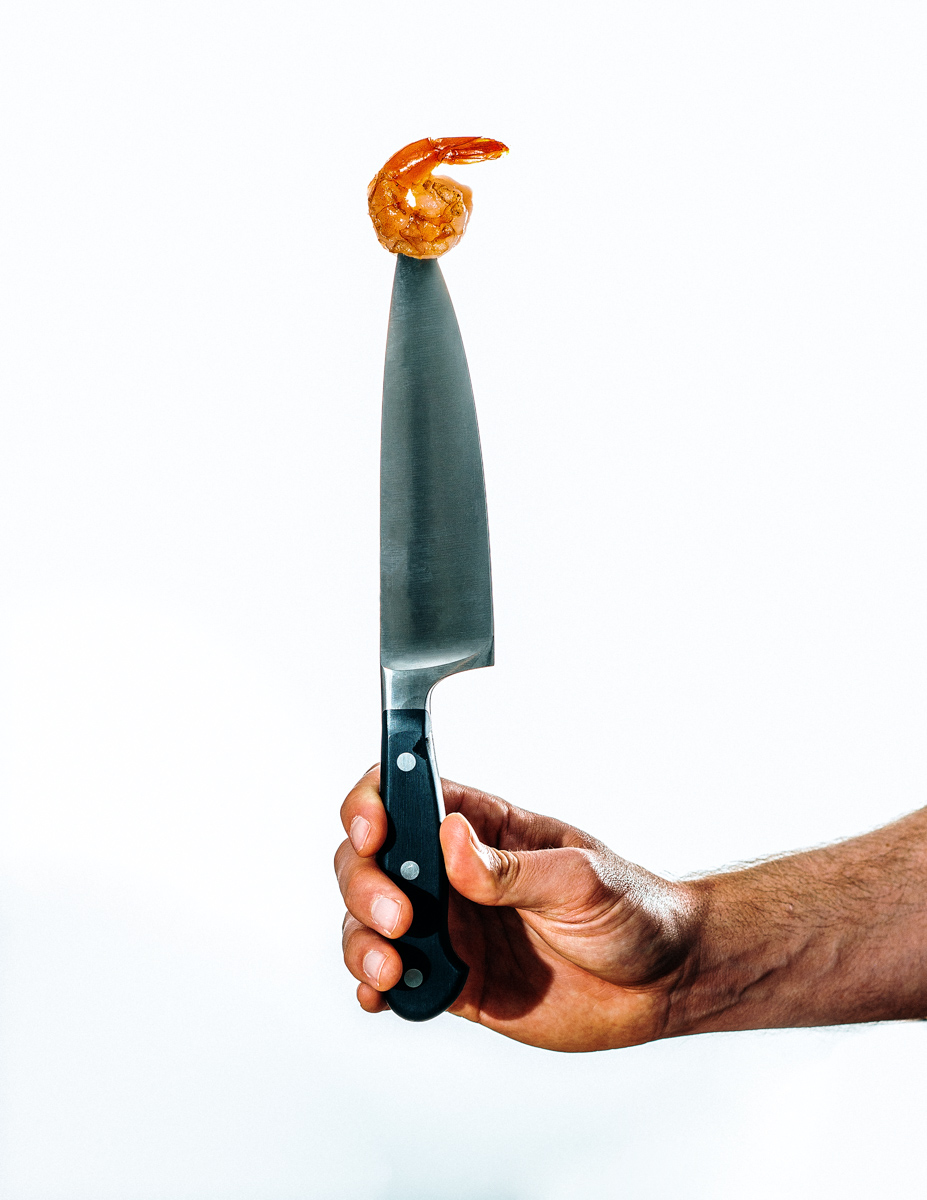
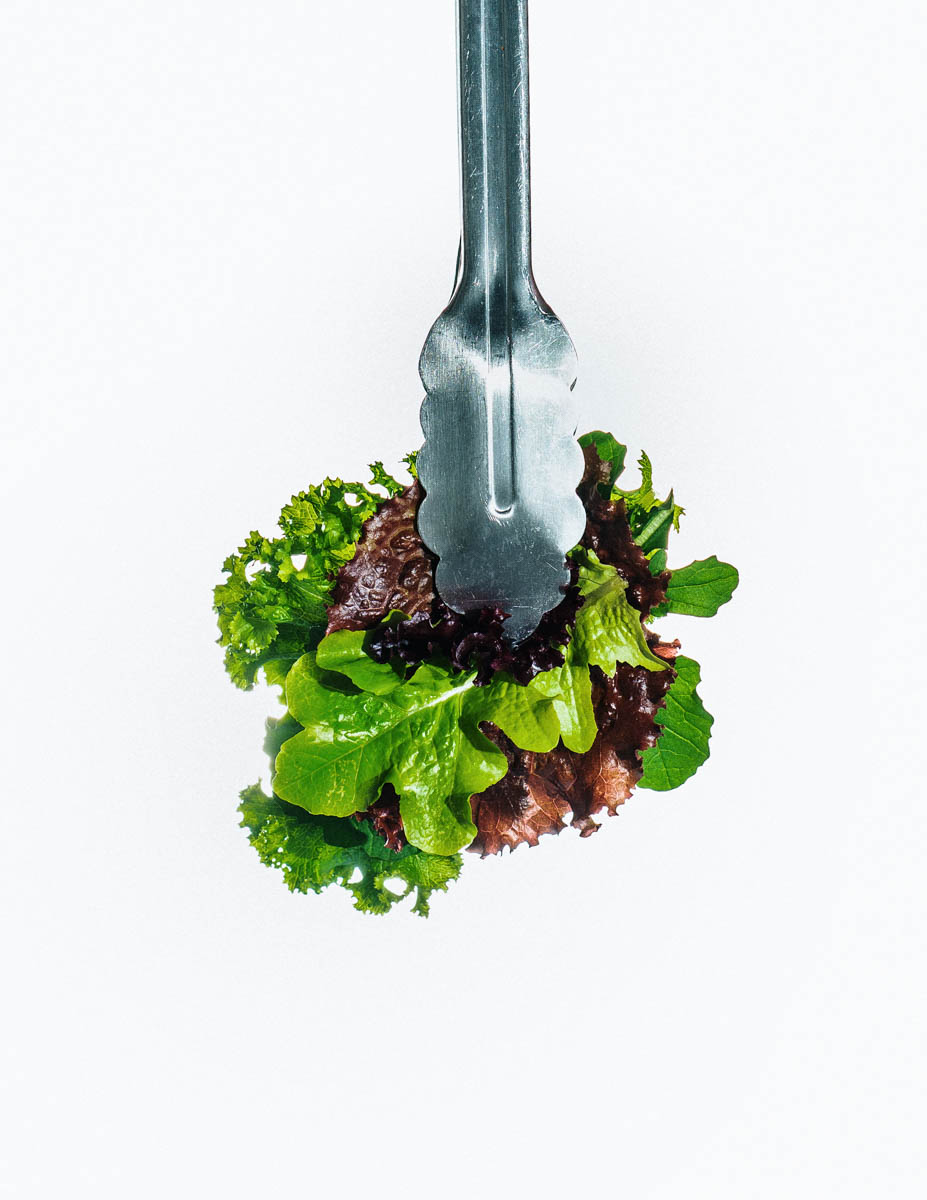
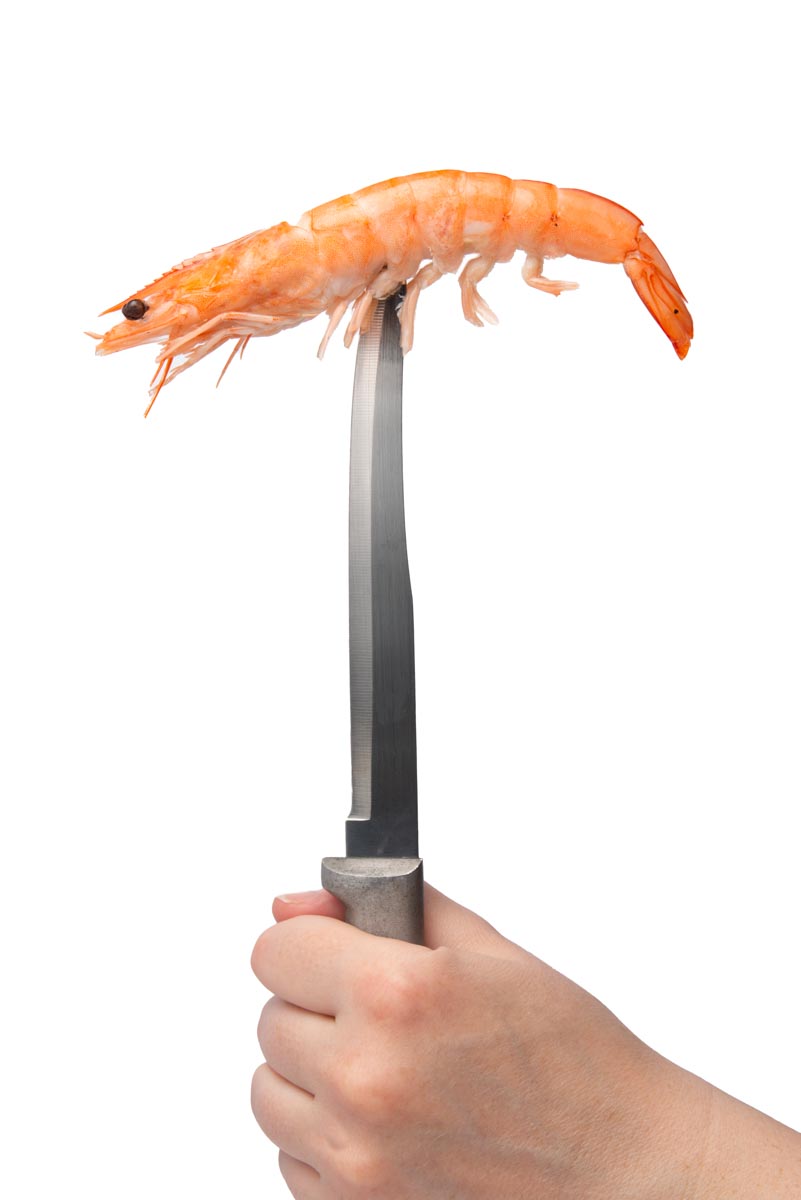
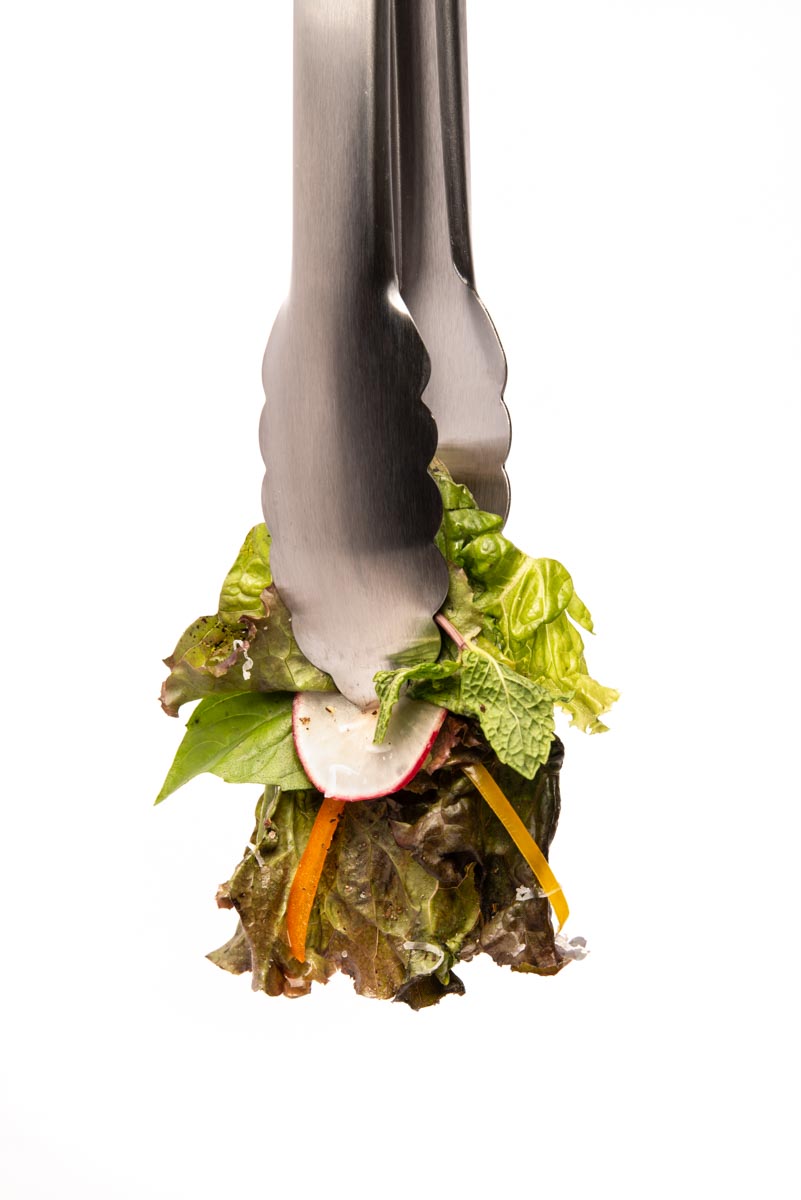
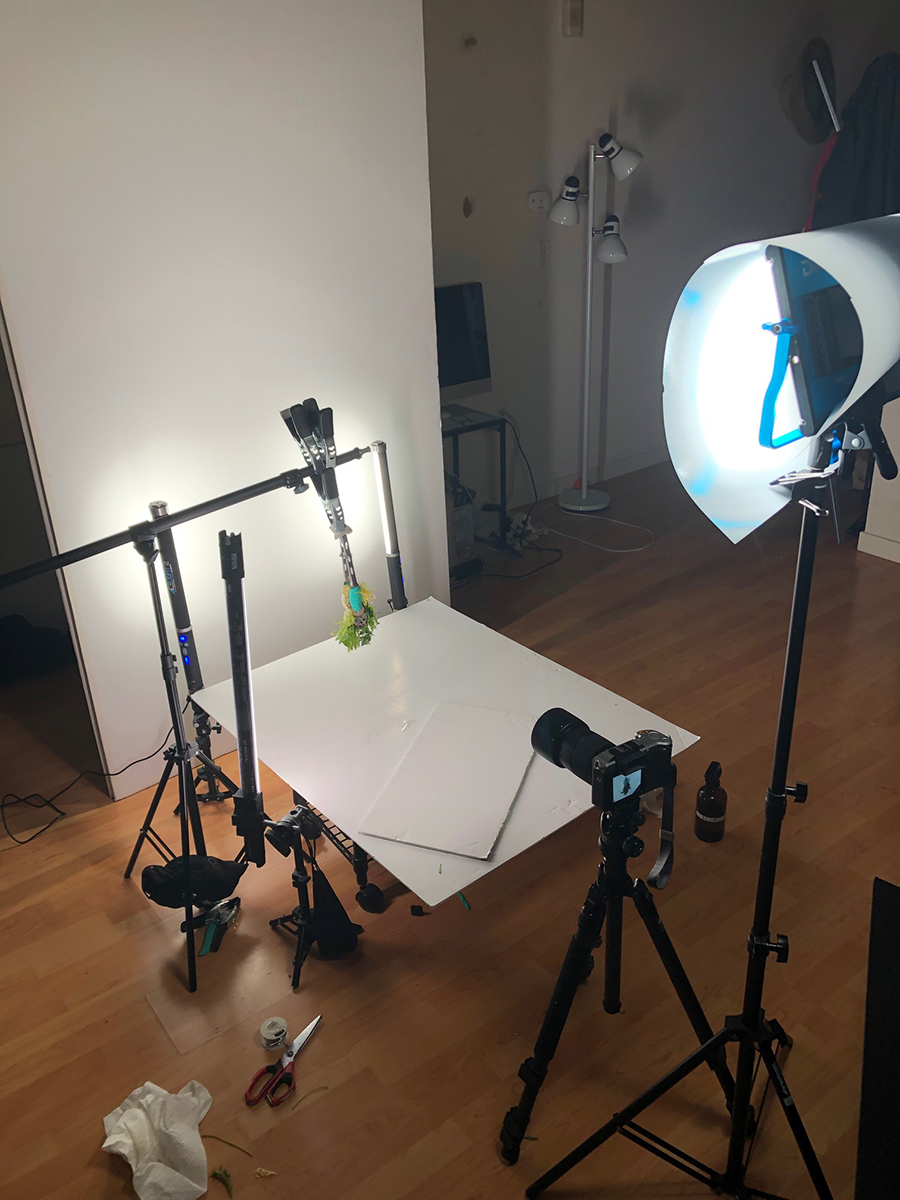
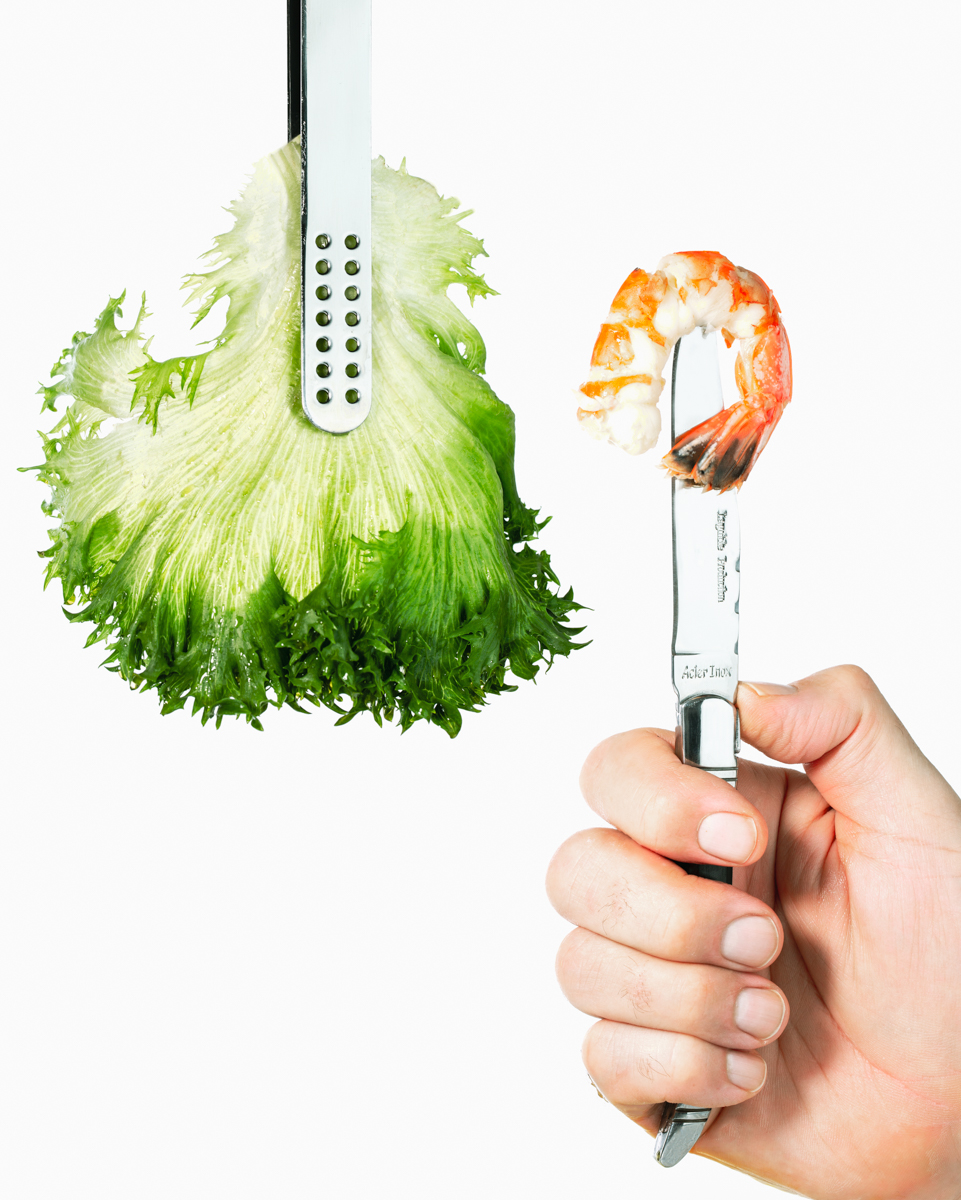
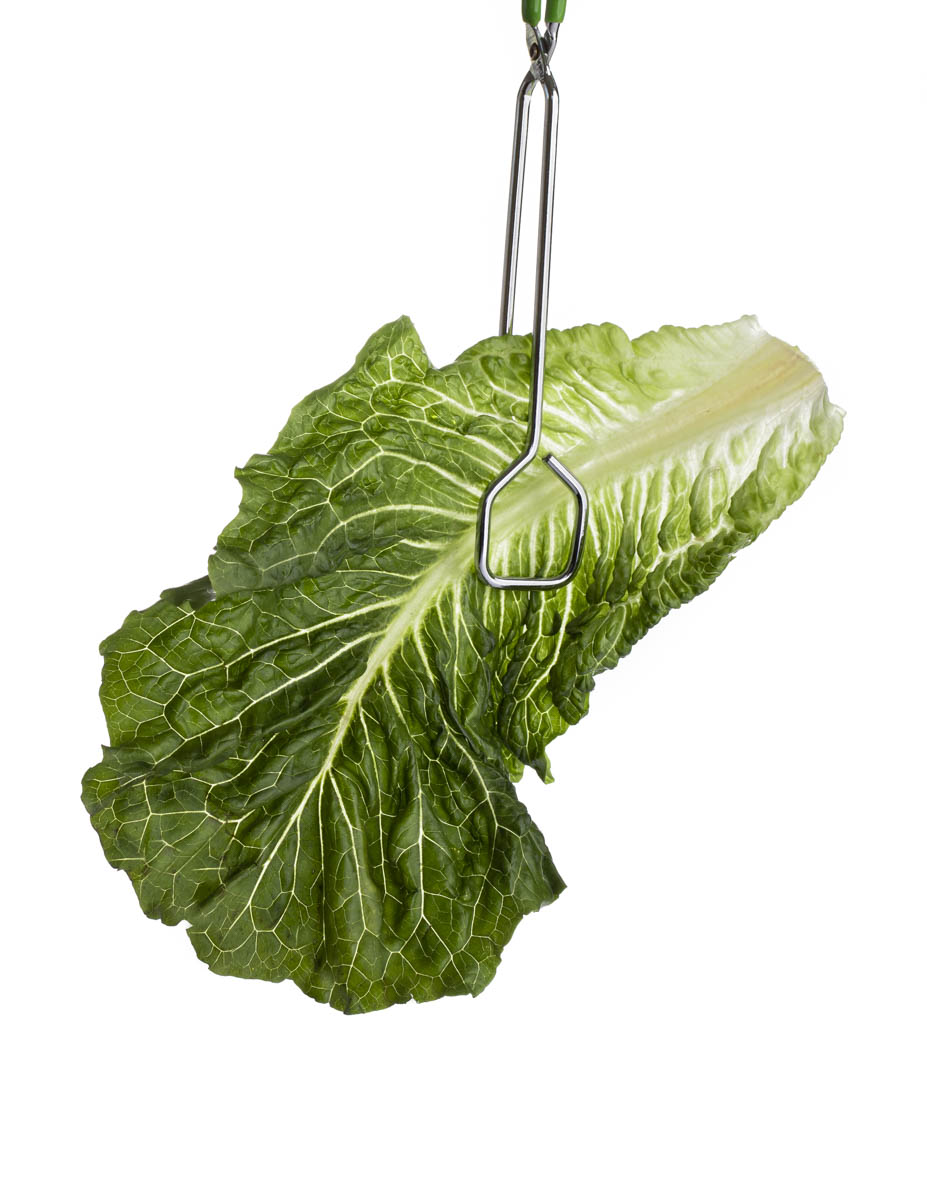
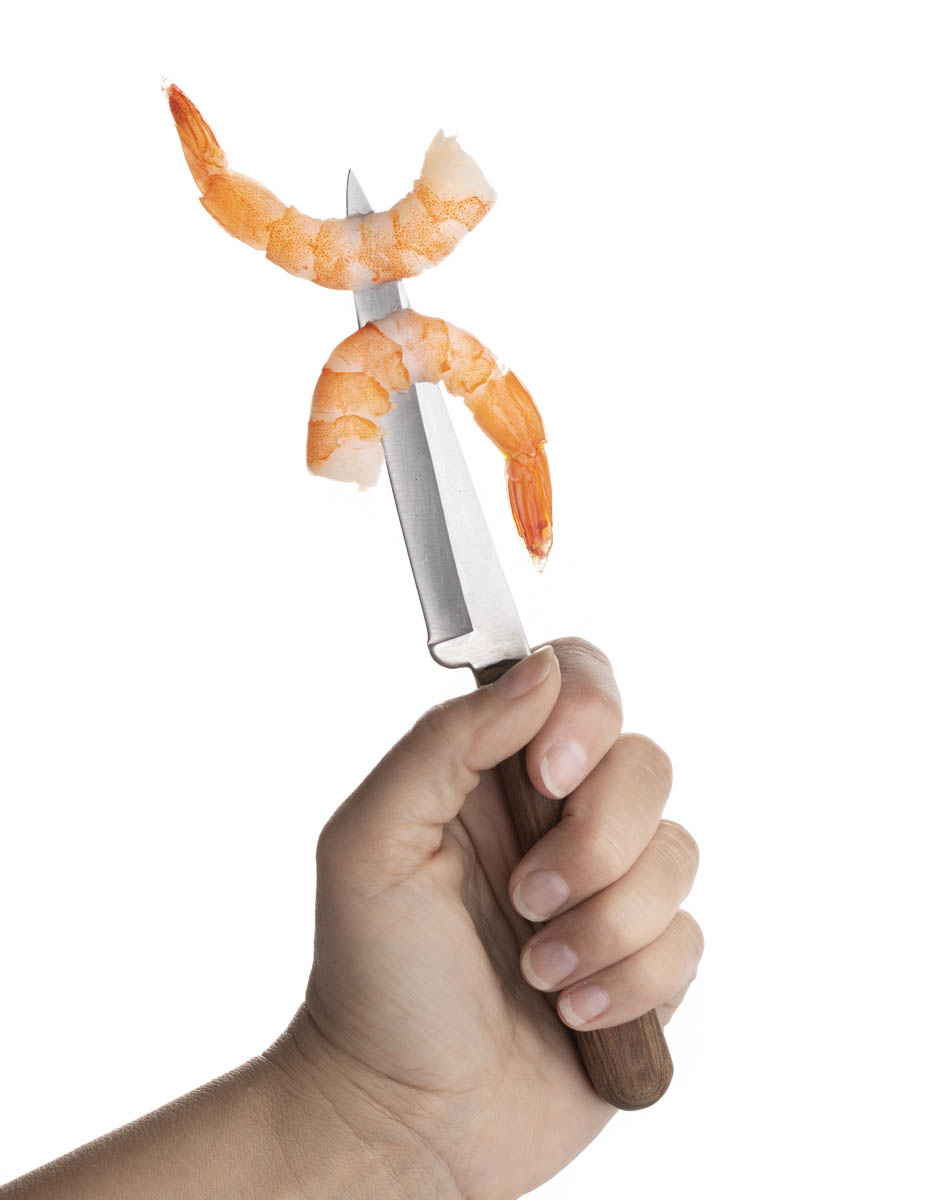
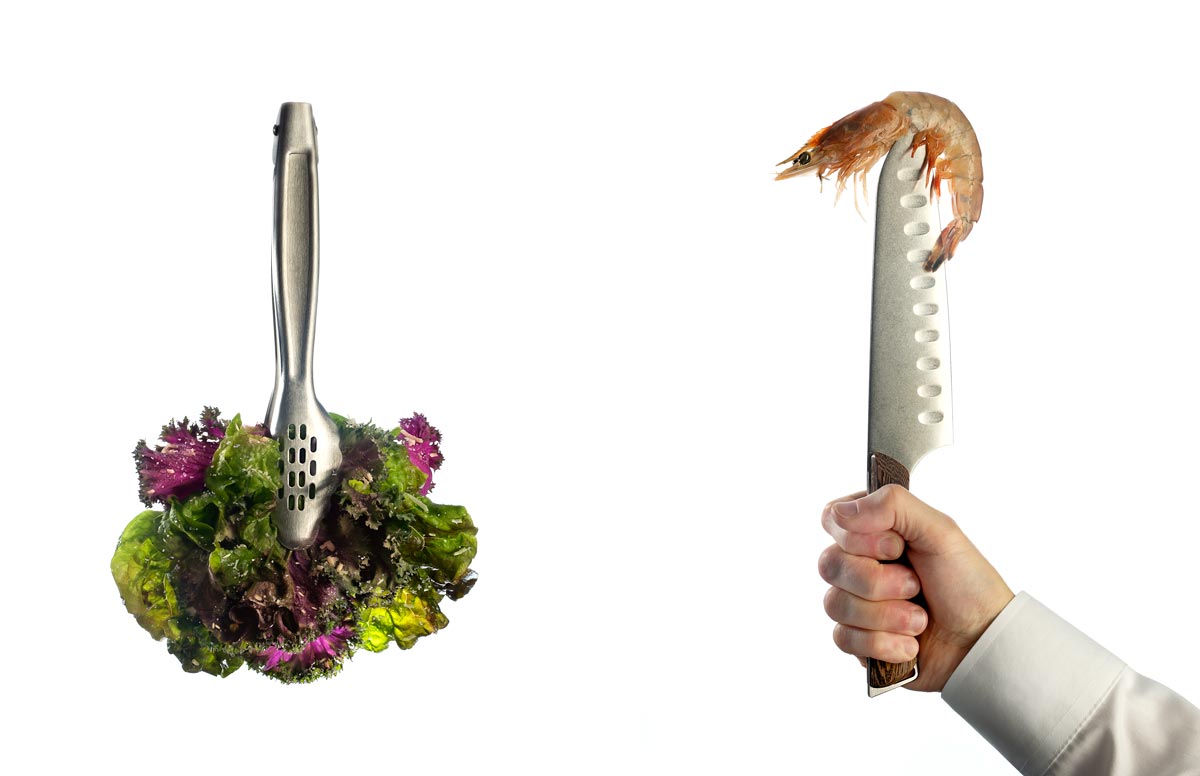
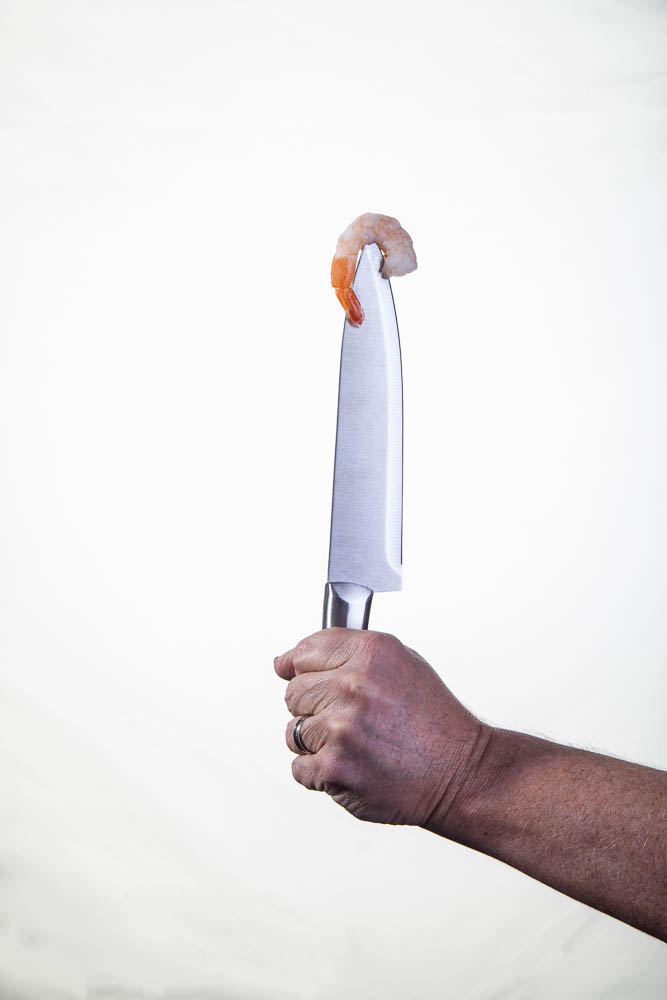
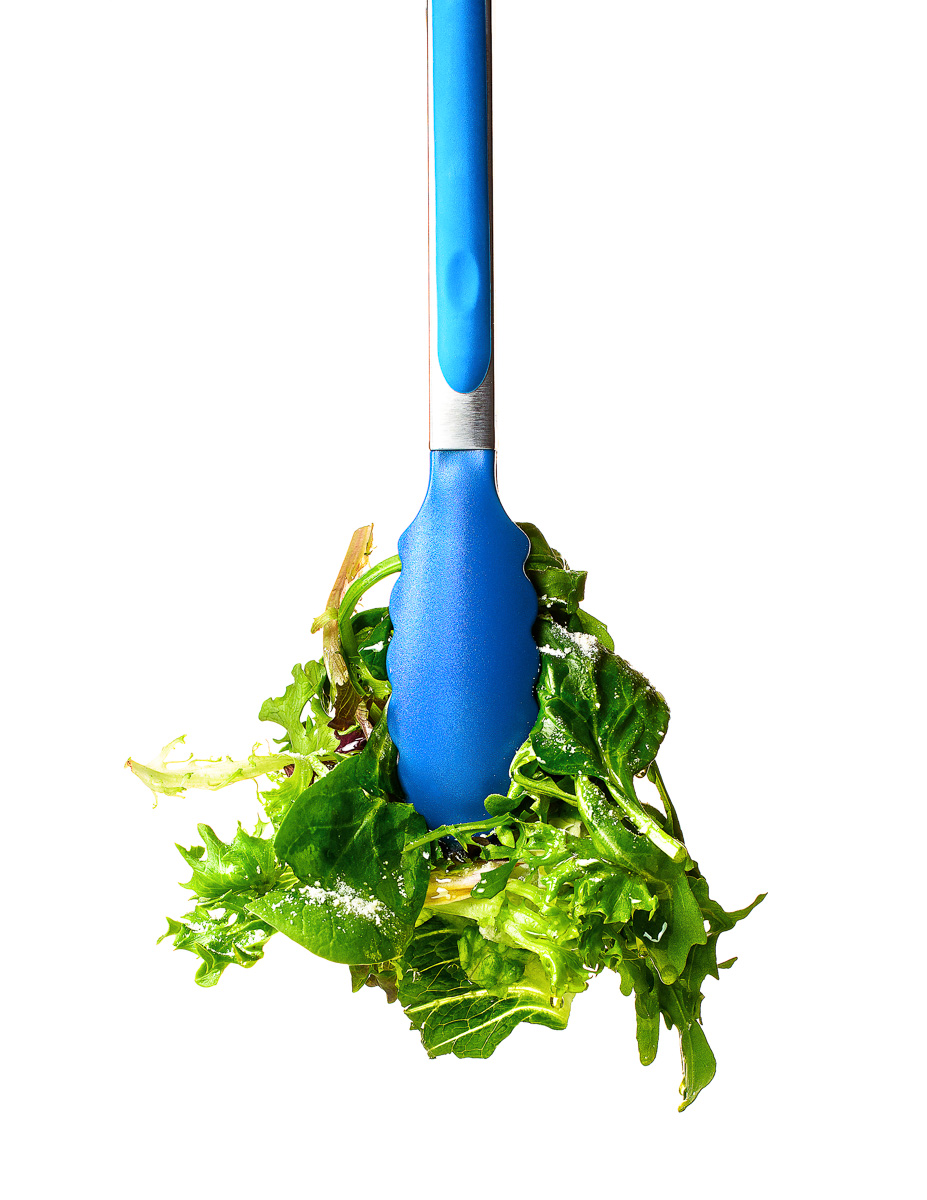
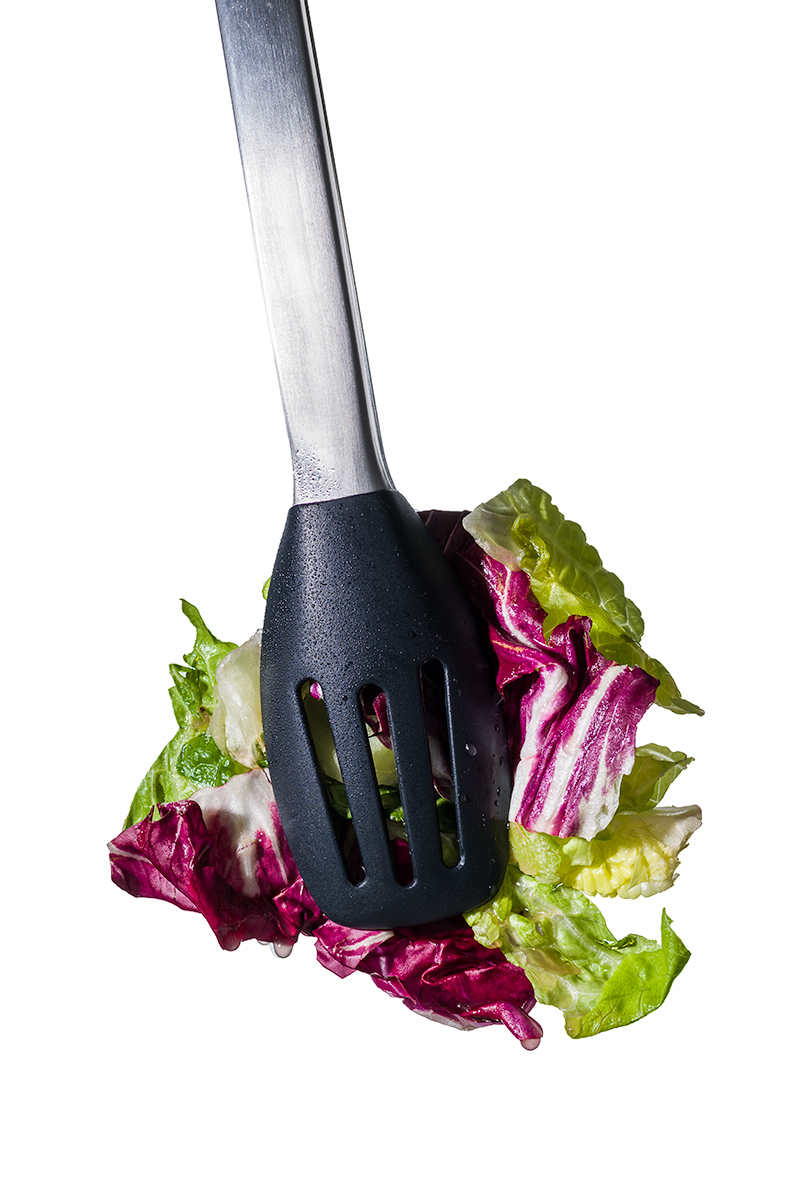
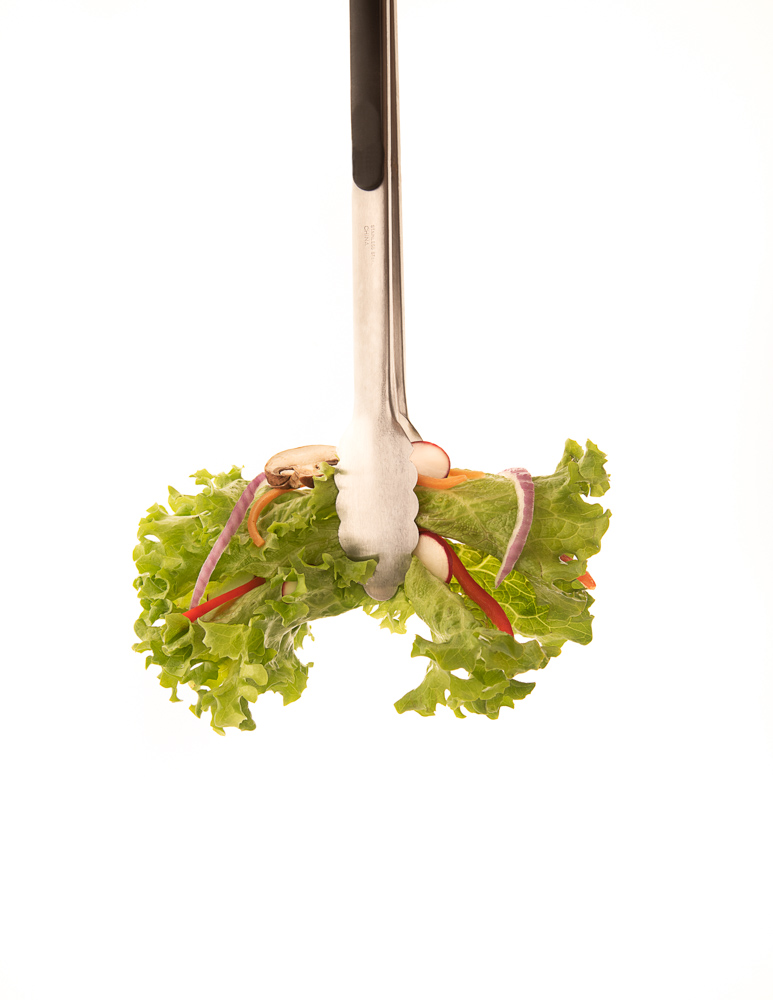
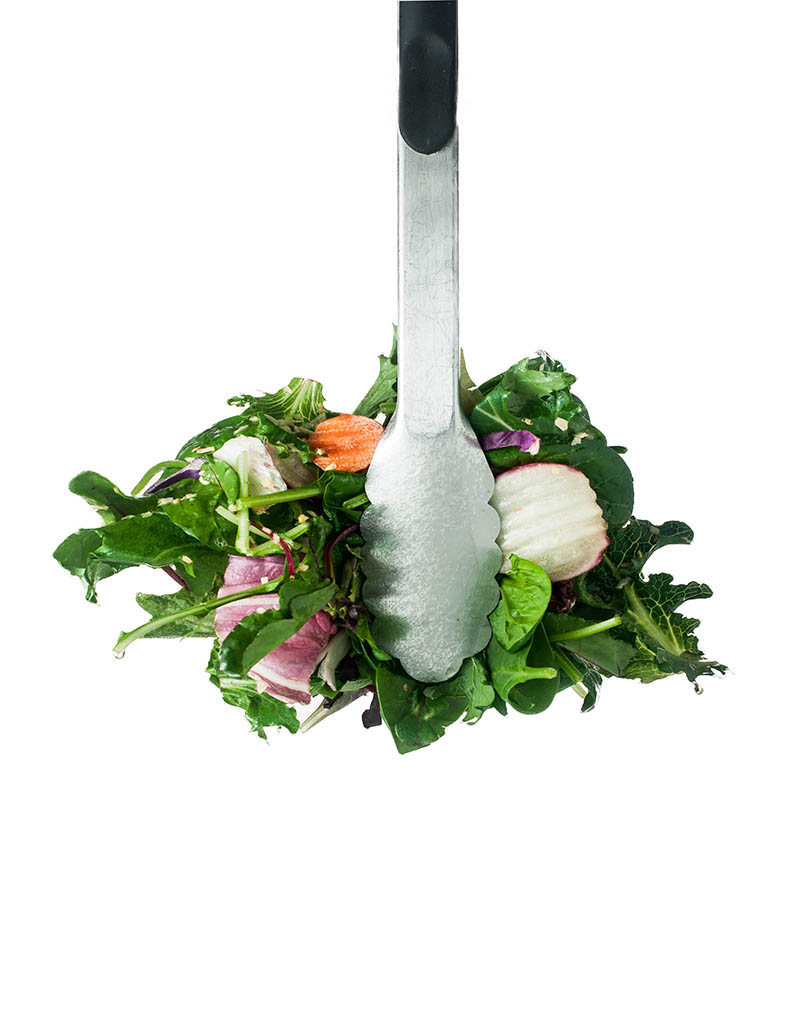
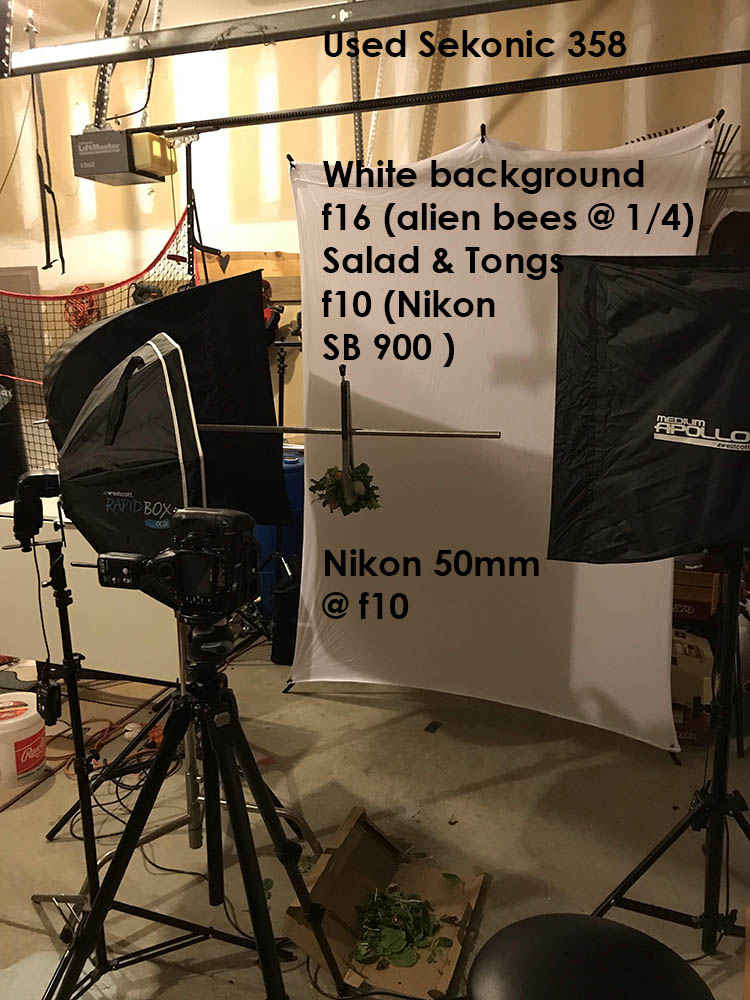
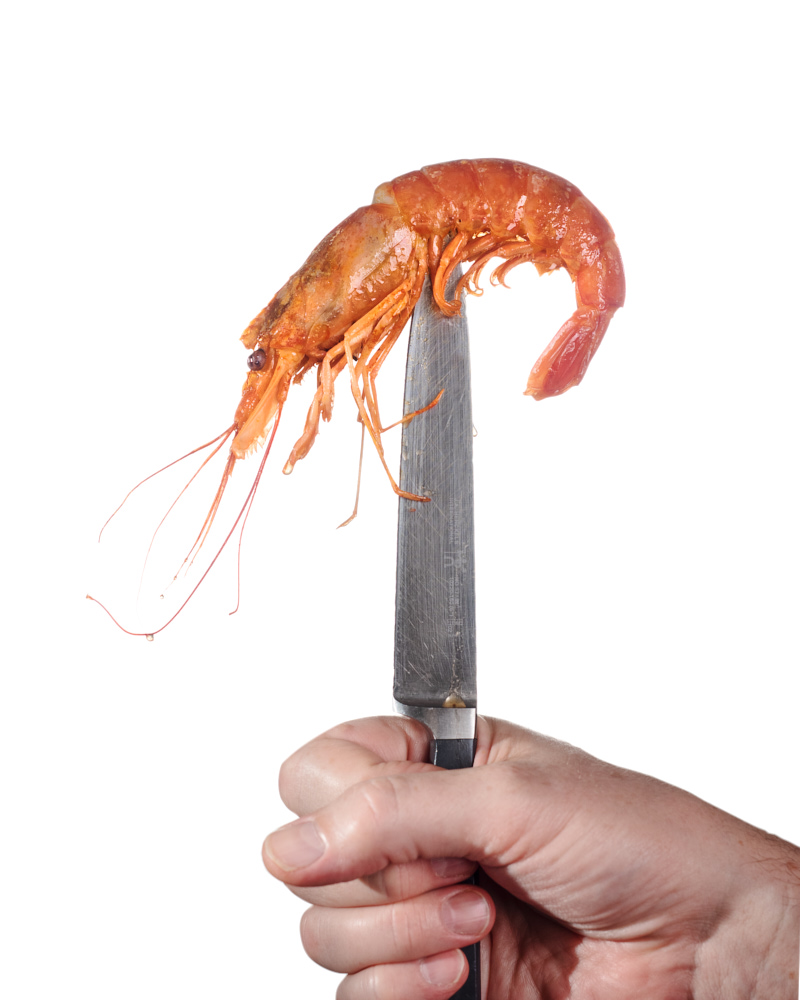
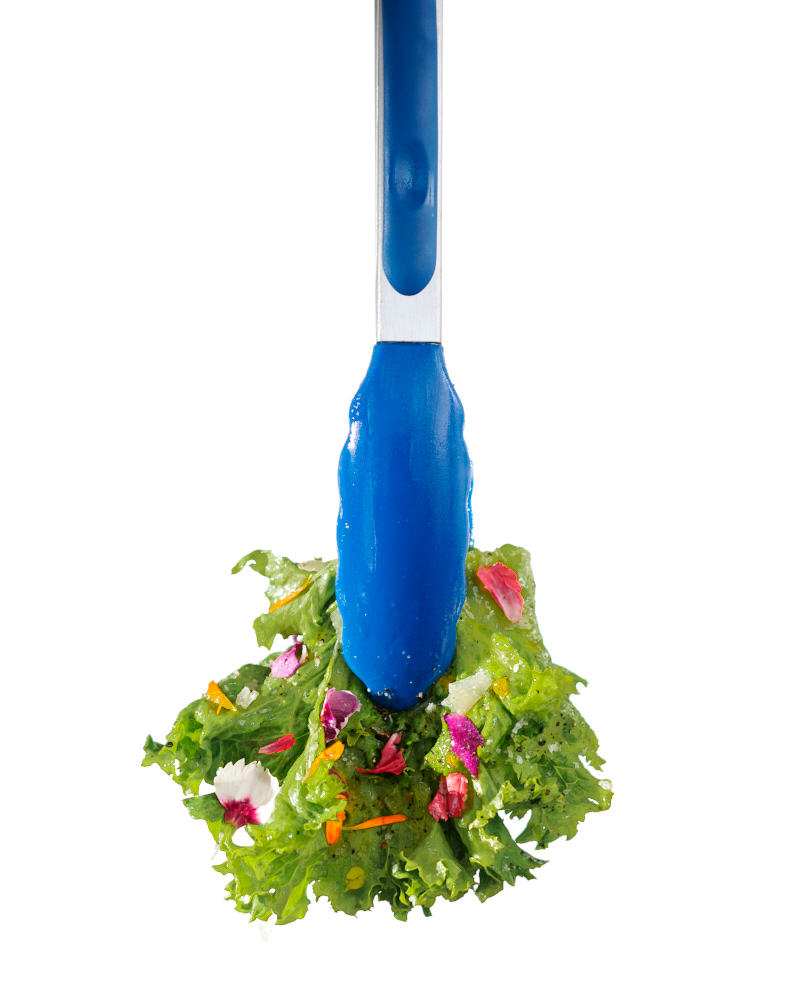
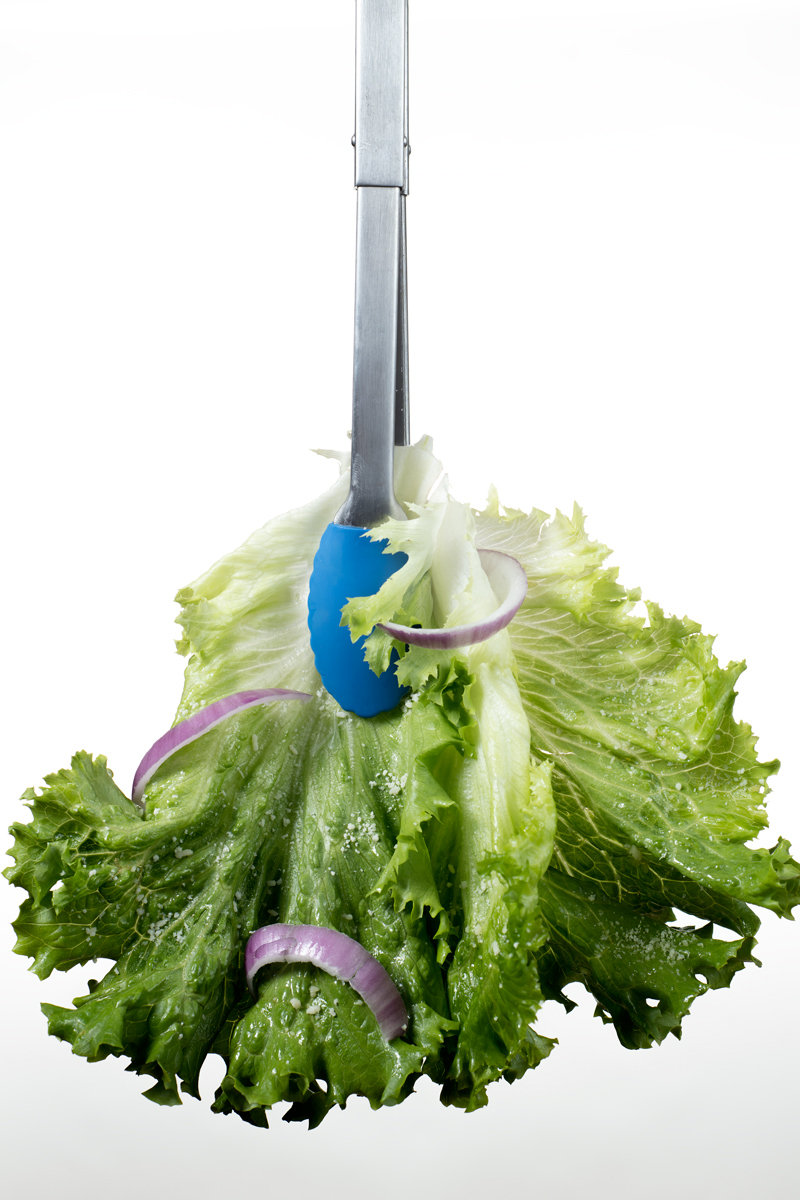
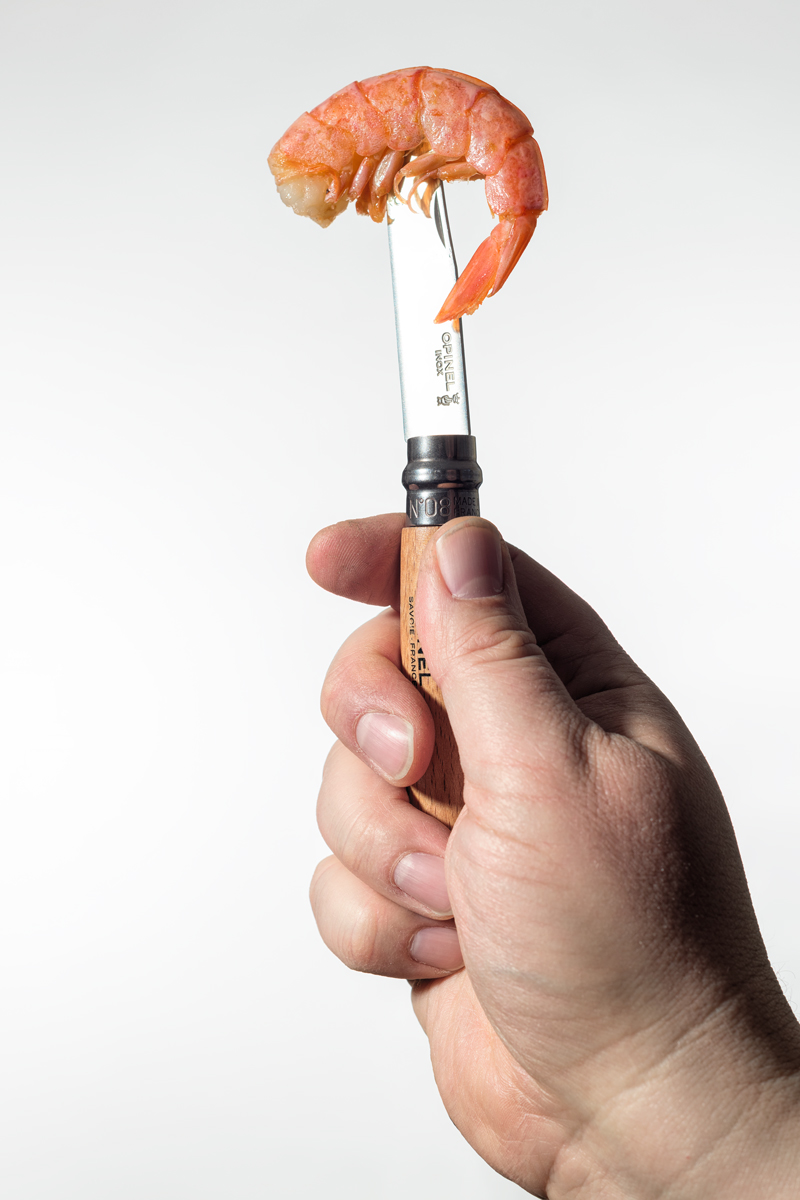
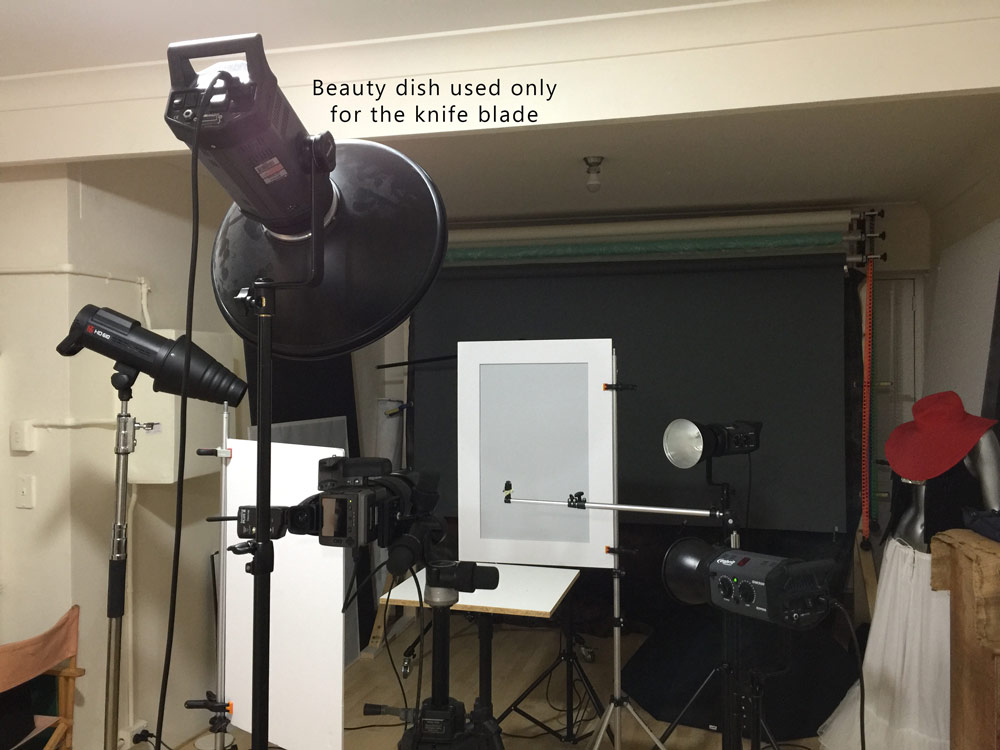
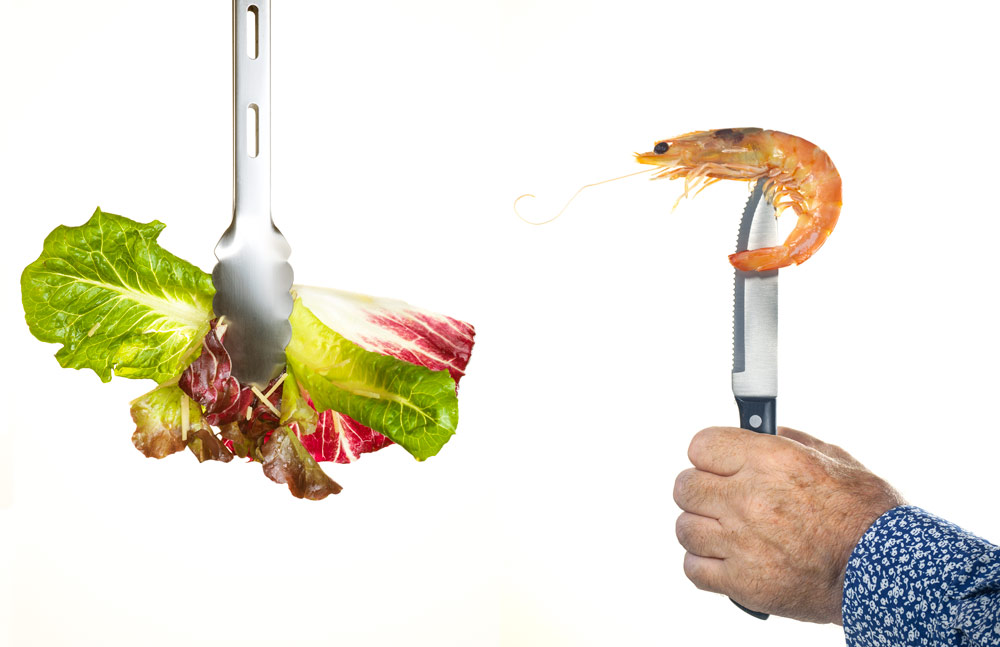
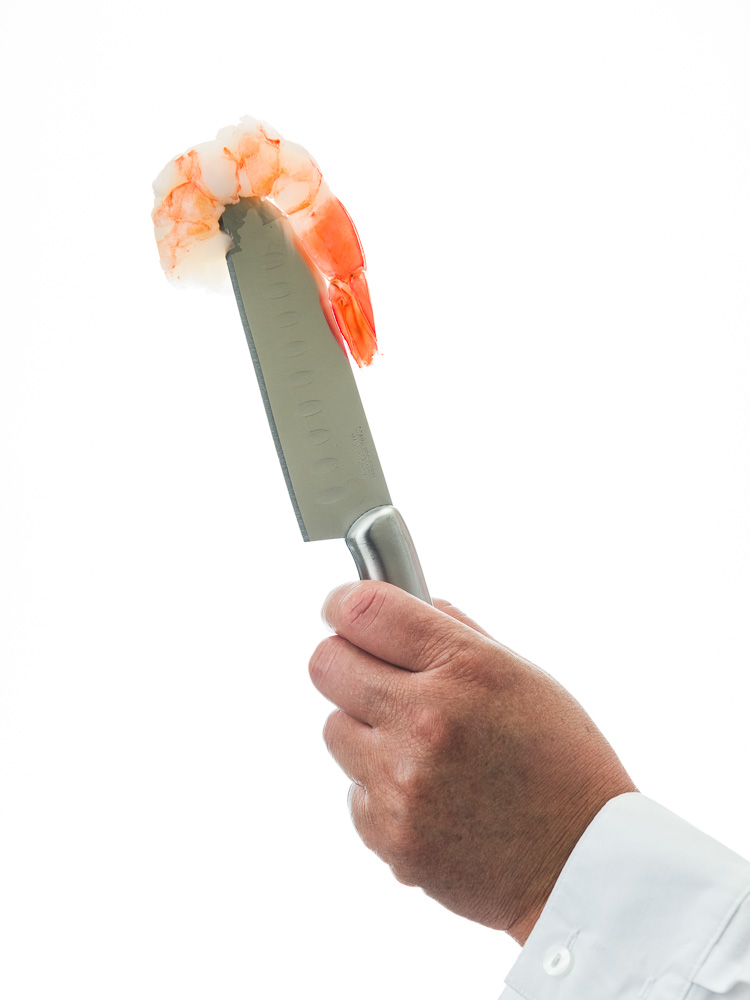
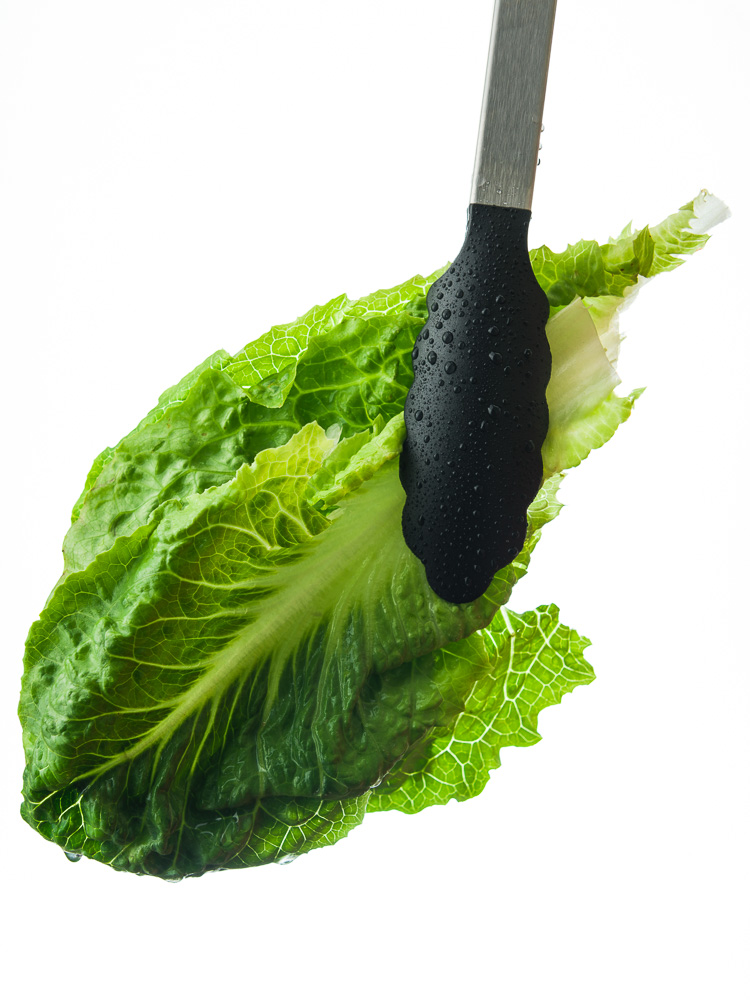
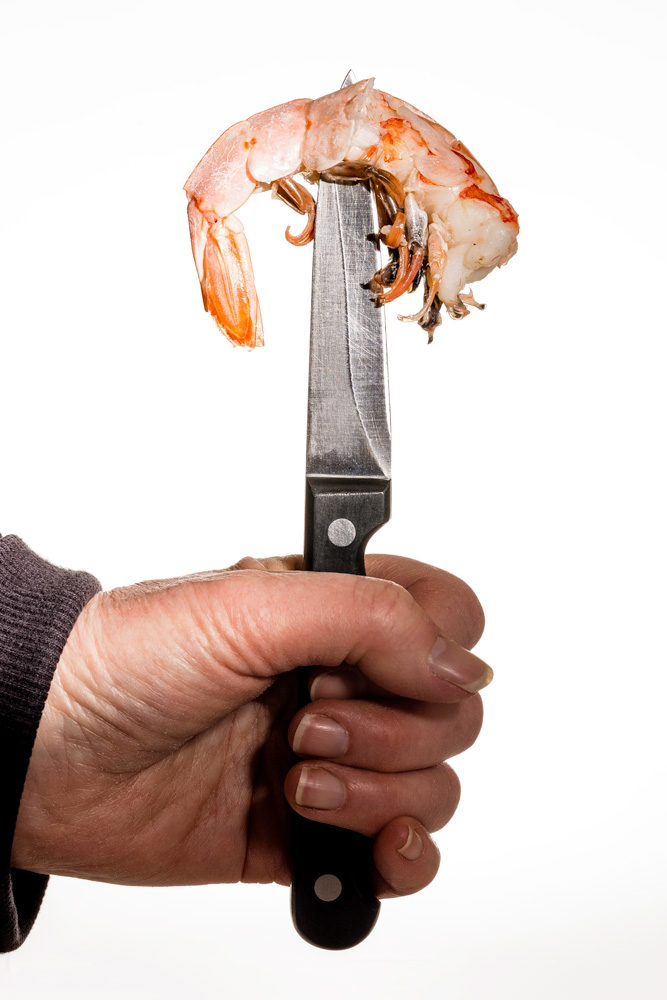
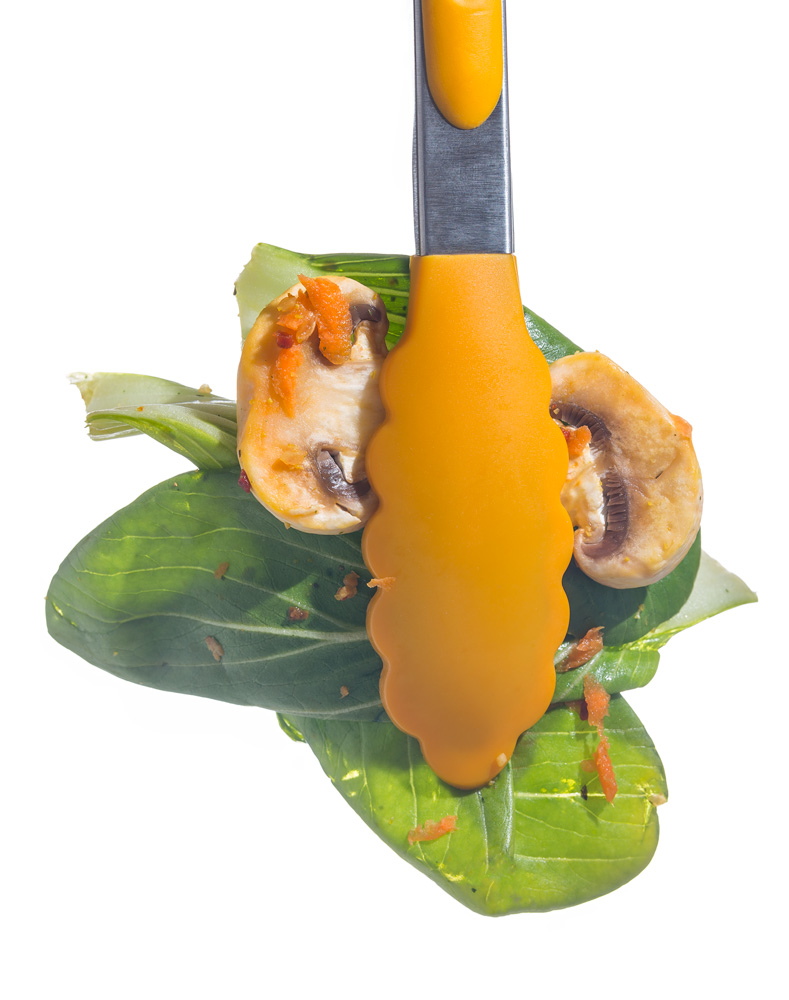
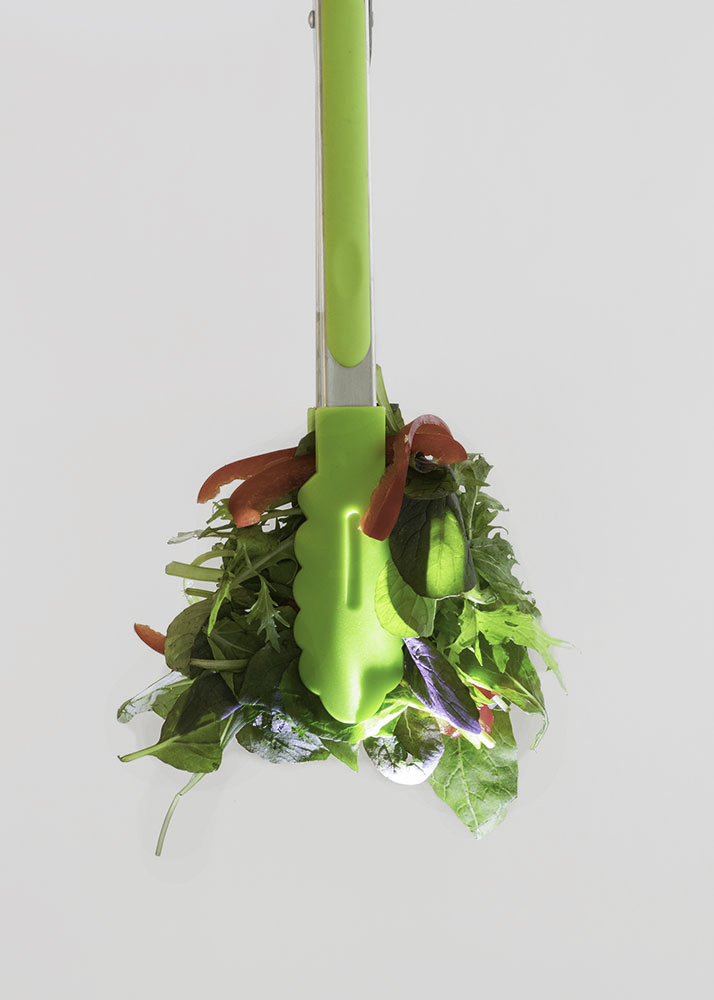
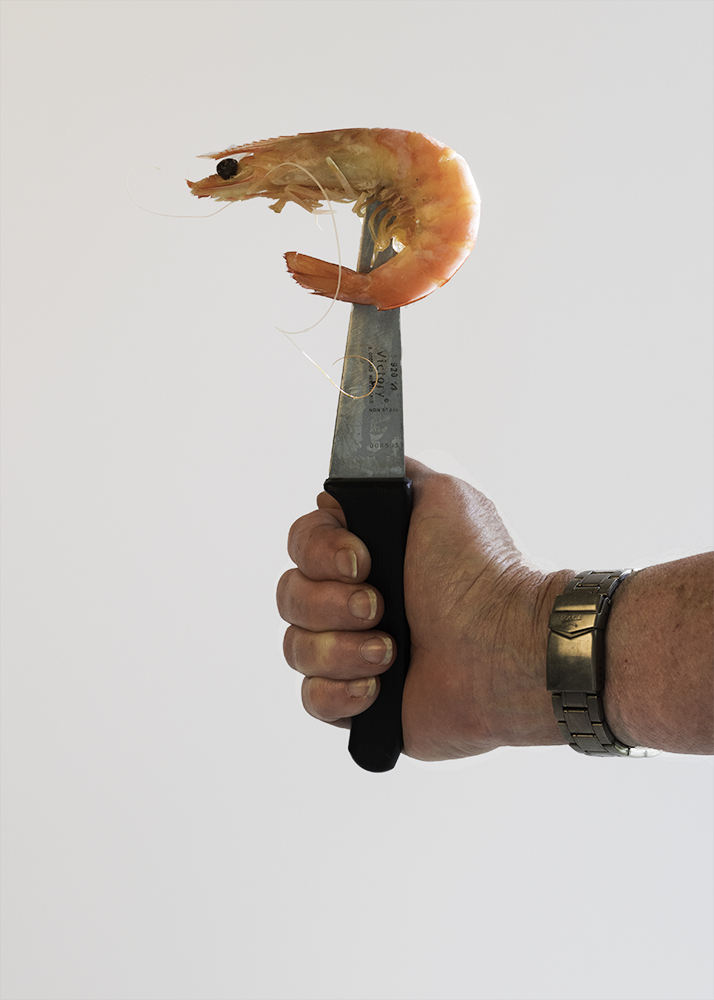
Let’s look at the image and the instructions from the creative team.
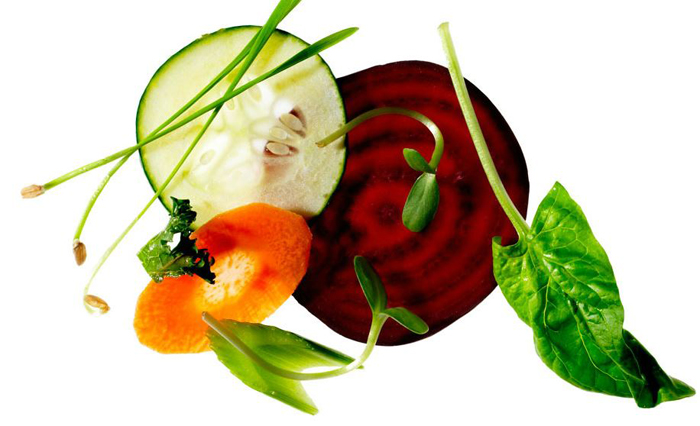
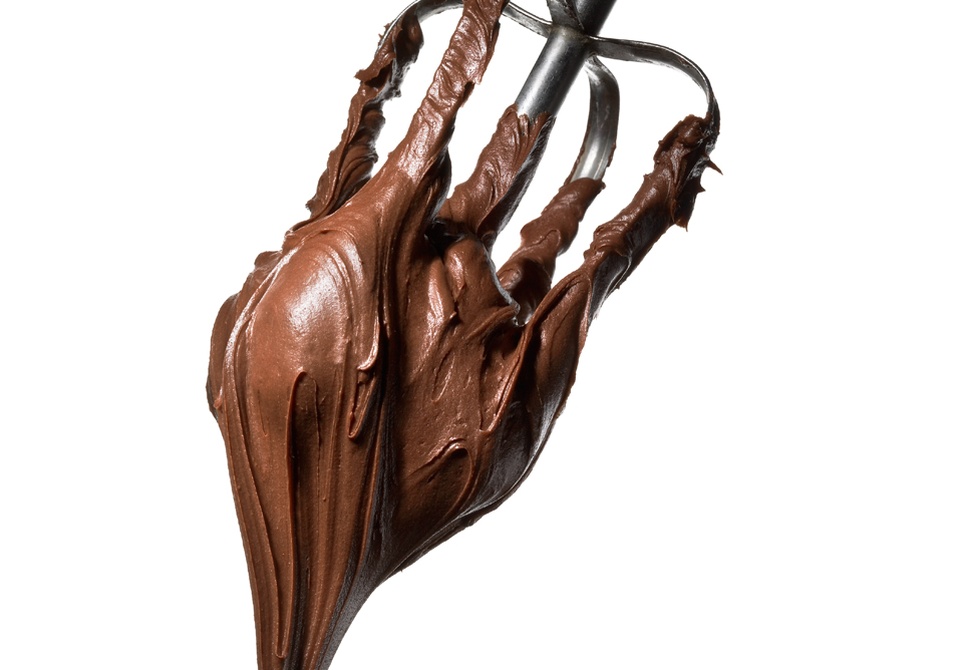
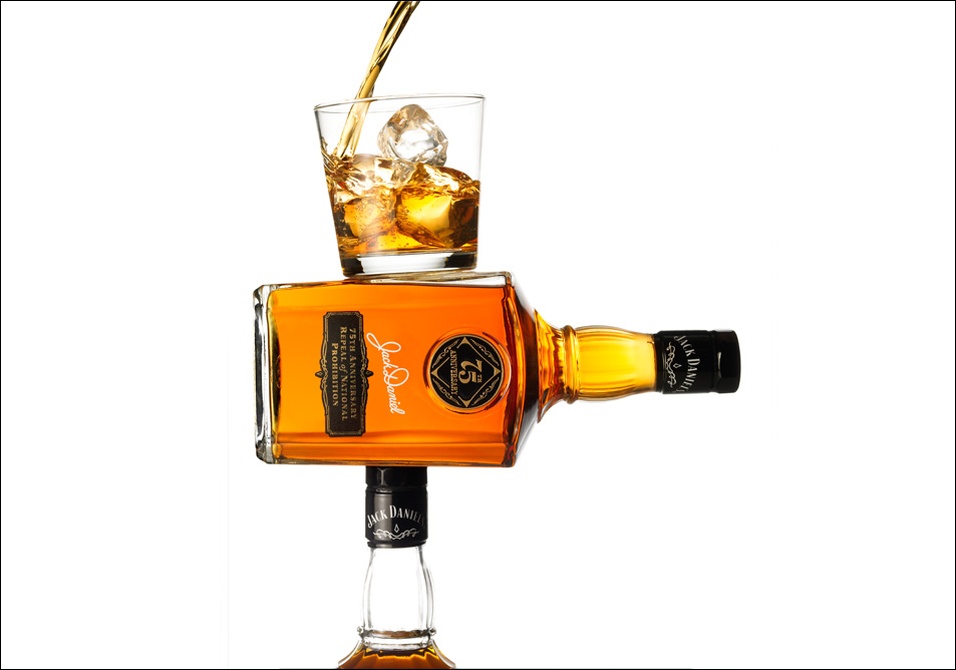
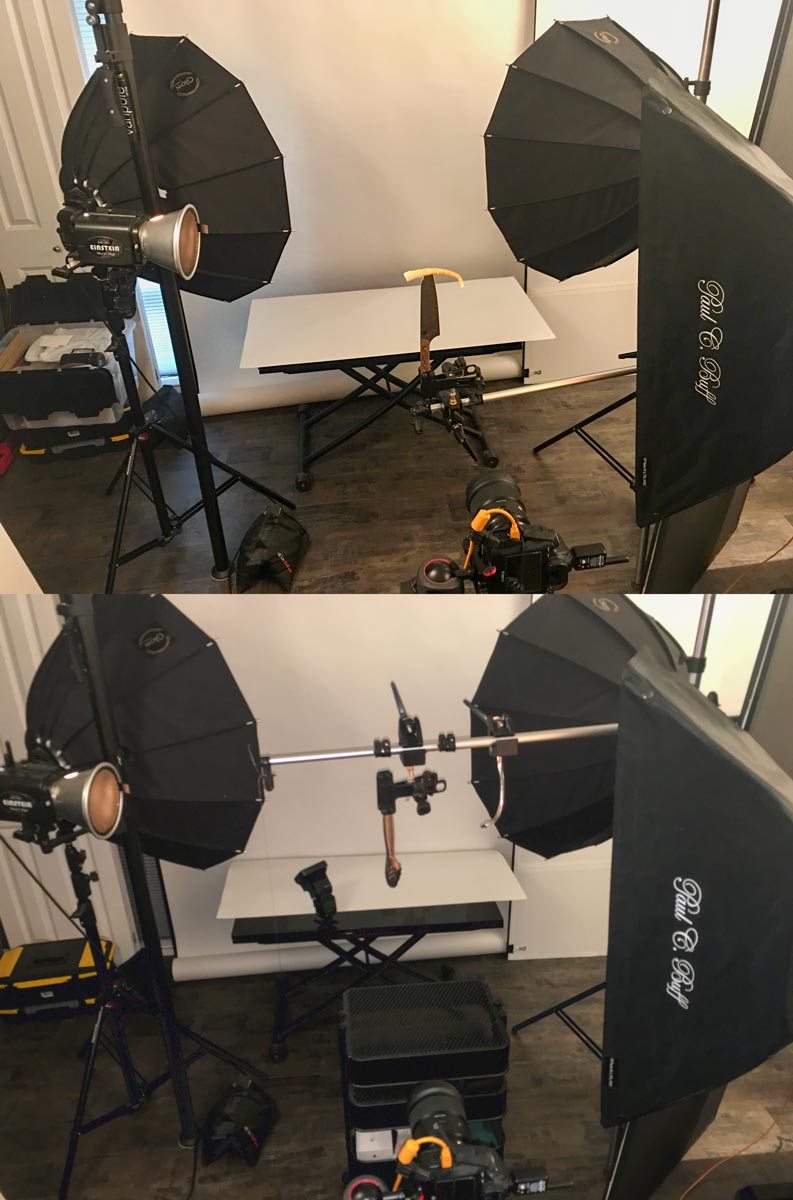
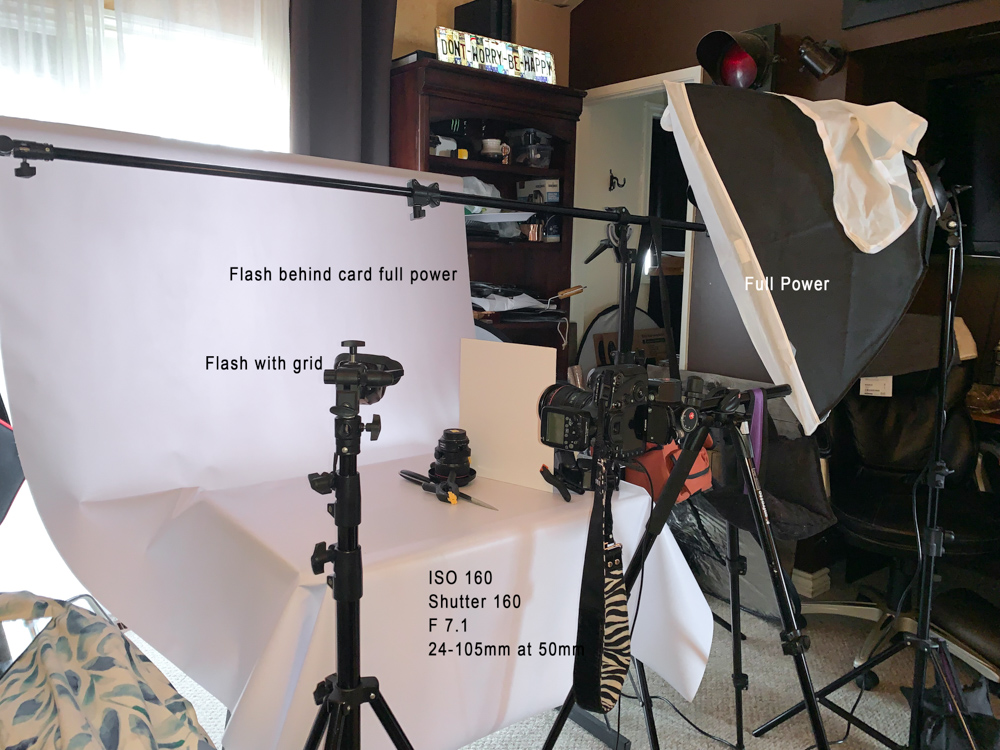
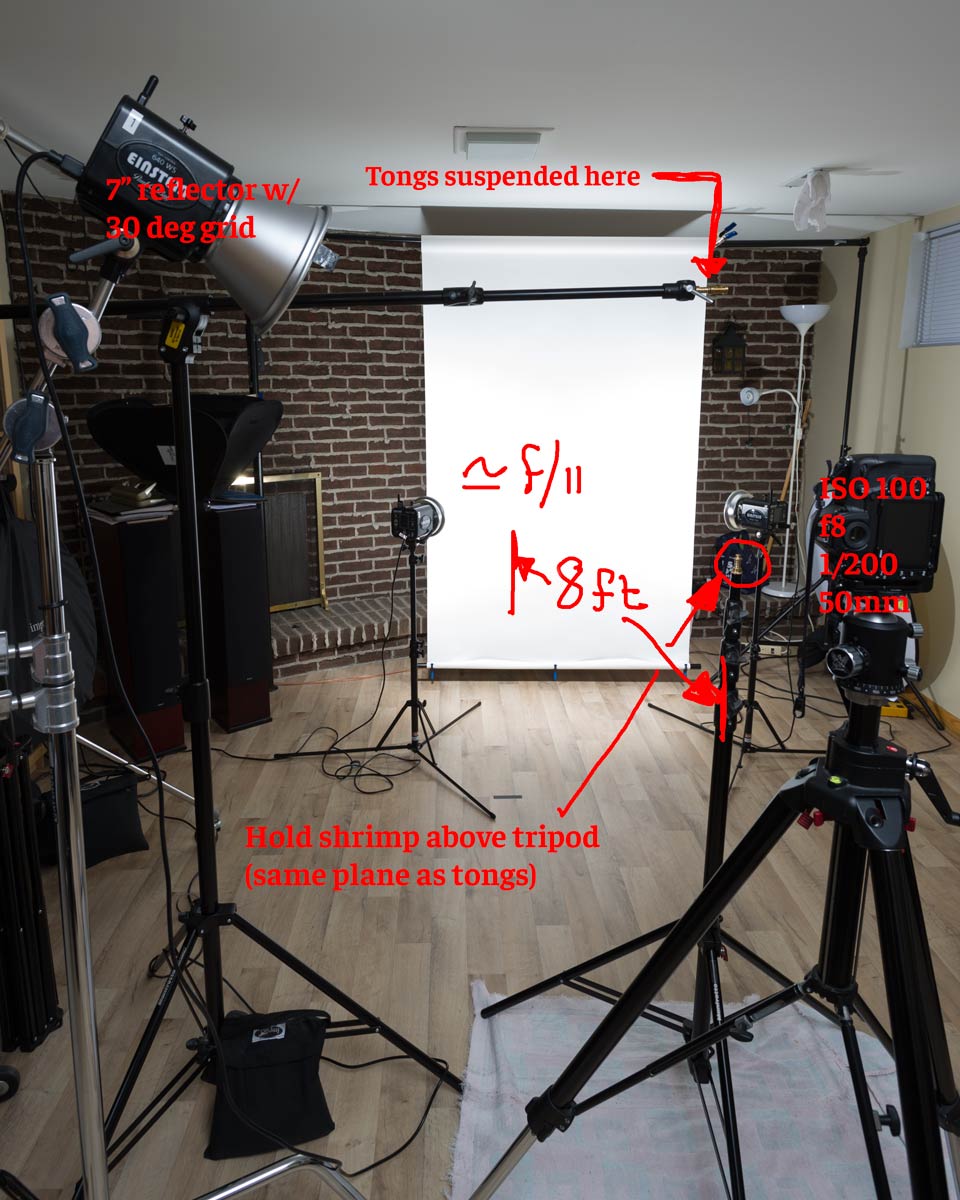
They want it on a bright white background. This should be fairly simple to create with either white paper or a large white card. Set it at a distance that will allow you to light it individually from the subject. If you have it 4 feet behind the subject, you should be able to light it with a bounce umbrella, a small softbox, or even a bare speedlight or two.
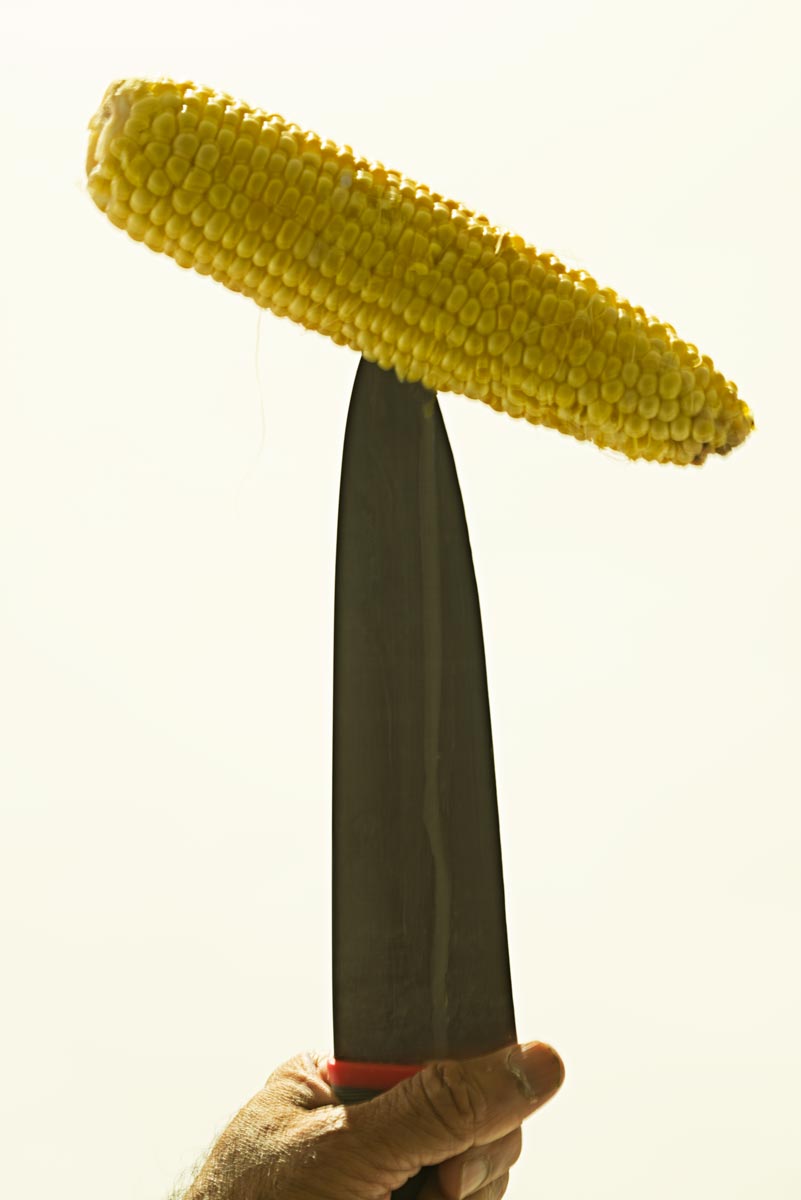
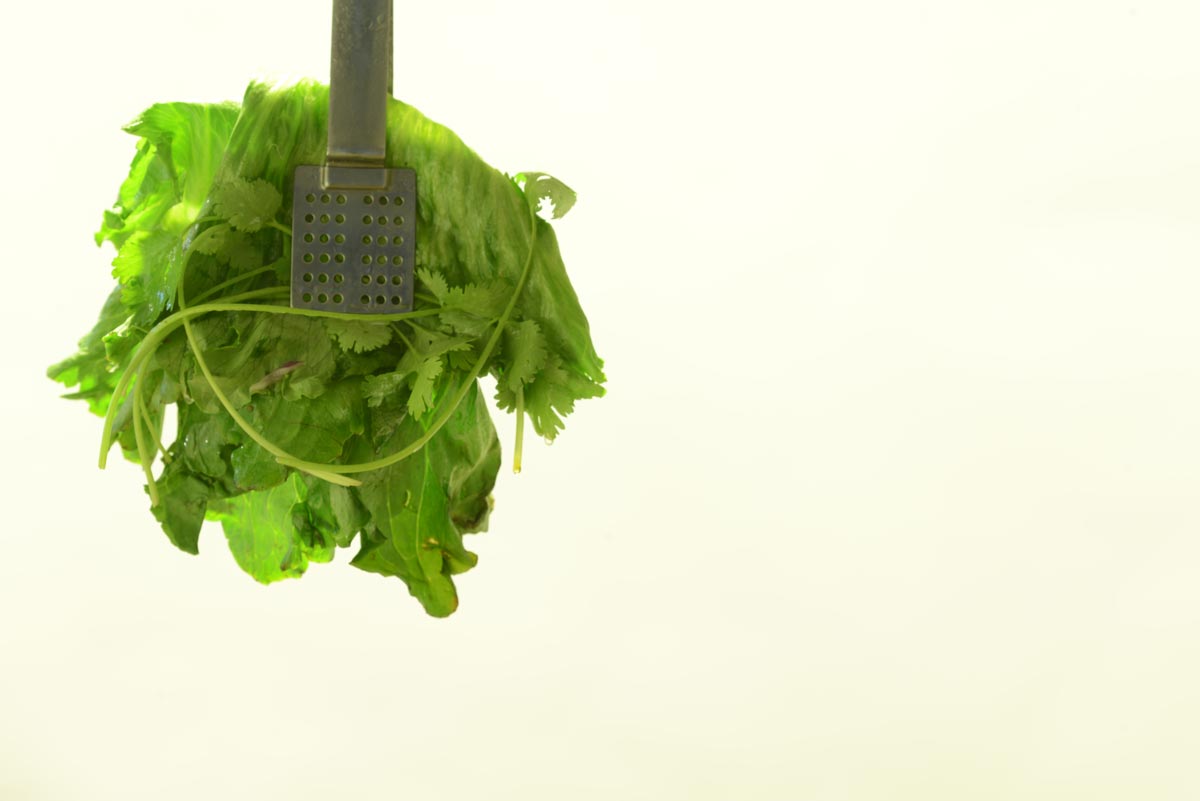
They indicated that they want dramatic lighting with distinct shadows. That means we have to light the product separately from the background. It also means we may have to have two lights working together to light up the ambient parts of the image and a stronger light that can give us distinct highlights and shadows.
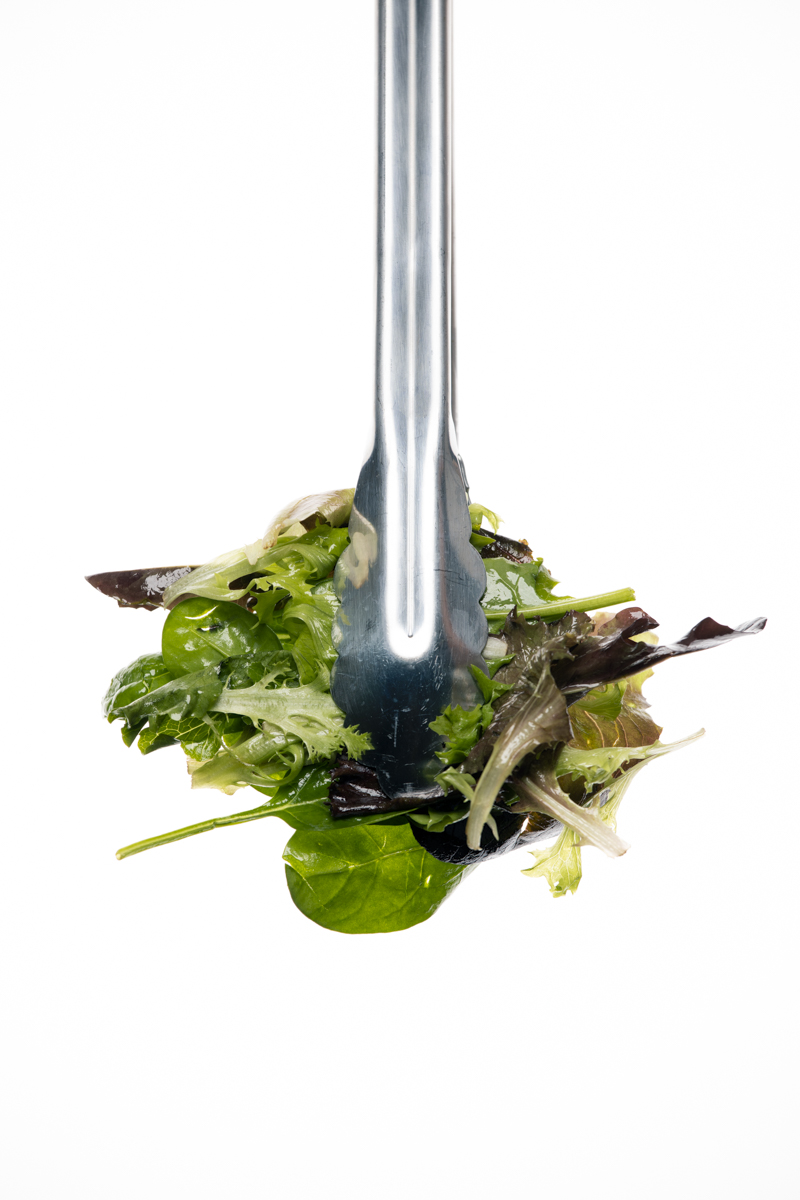
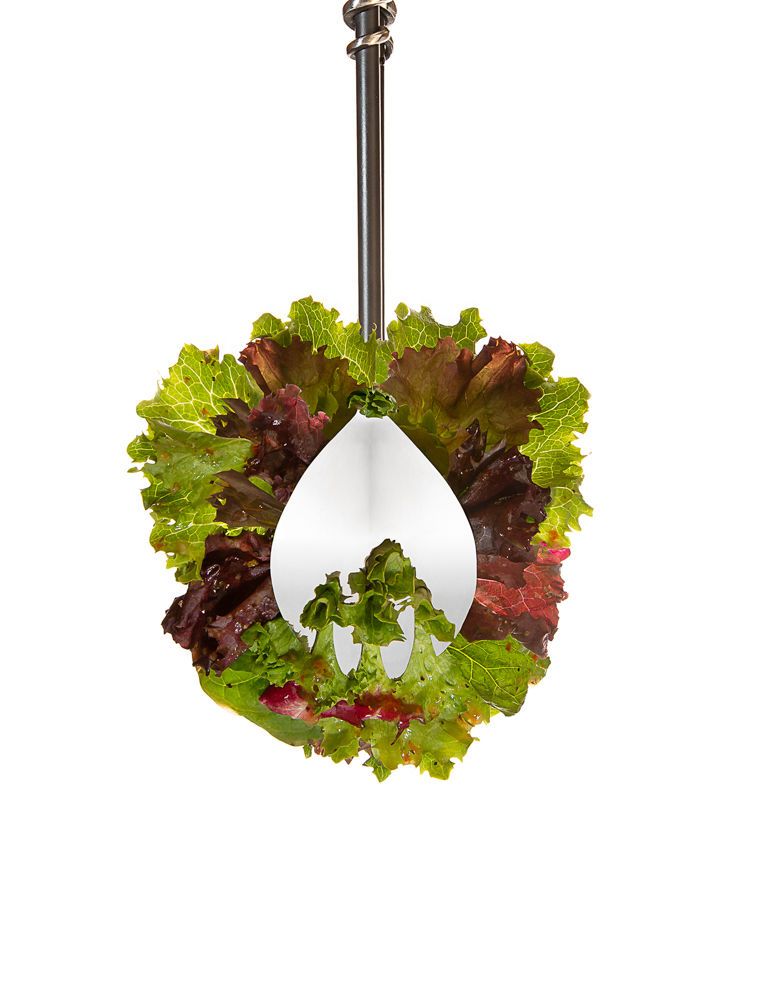
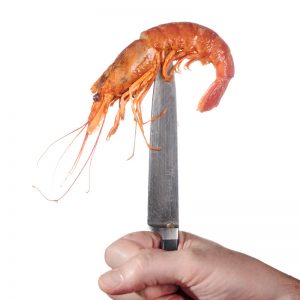
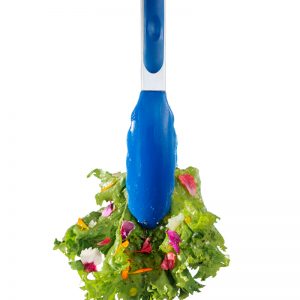
The AD’s sent a few images to give you an idea of what they are referring to lighting wise.
How do we do contrasty lighting AND keep the ambient alive?
By controlling the ambient.
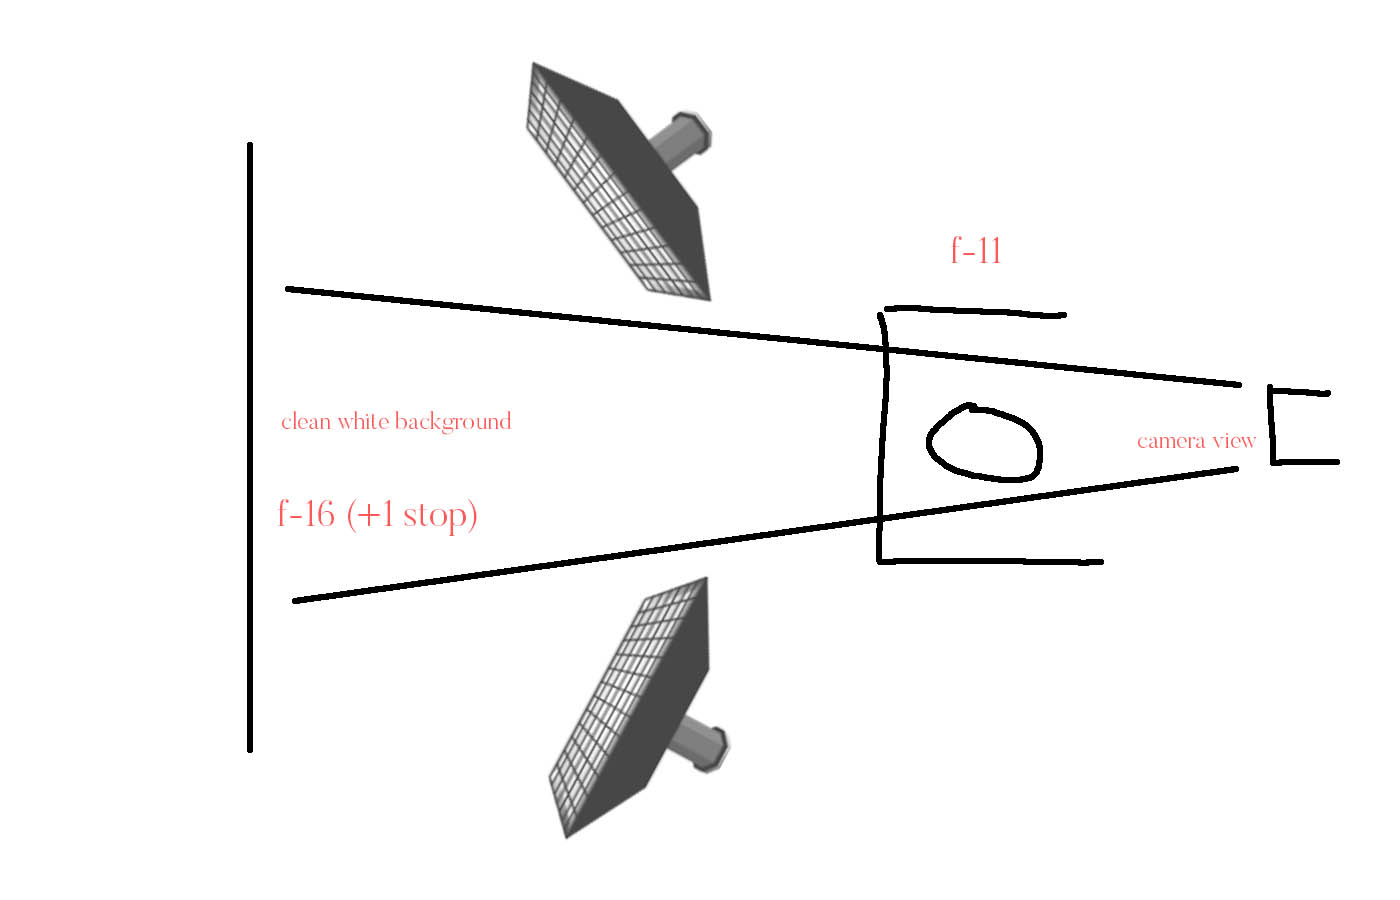
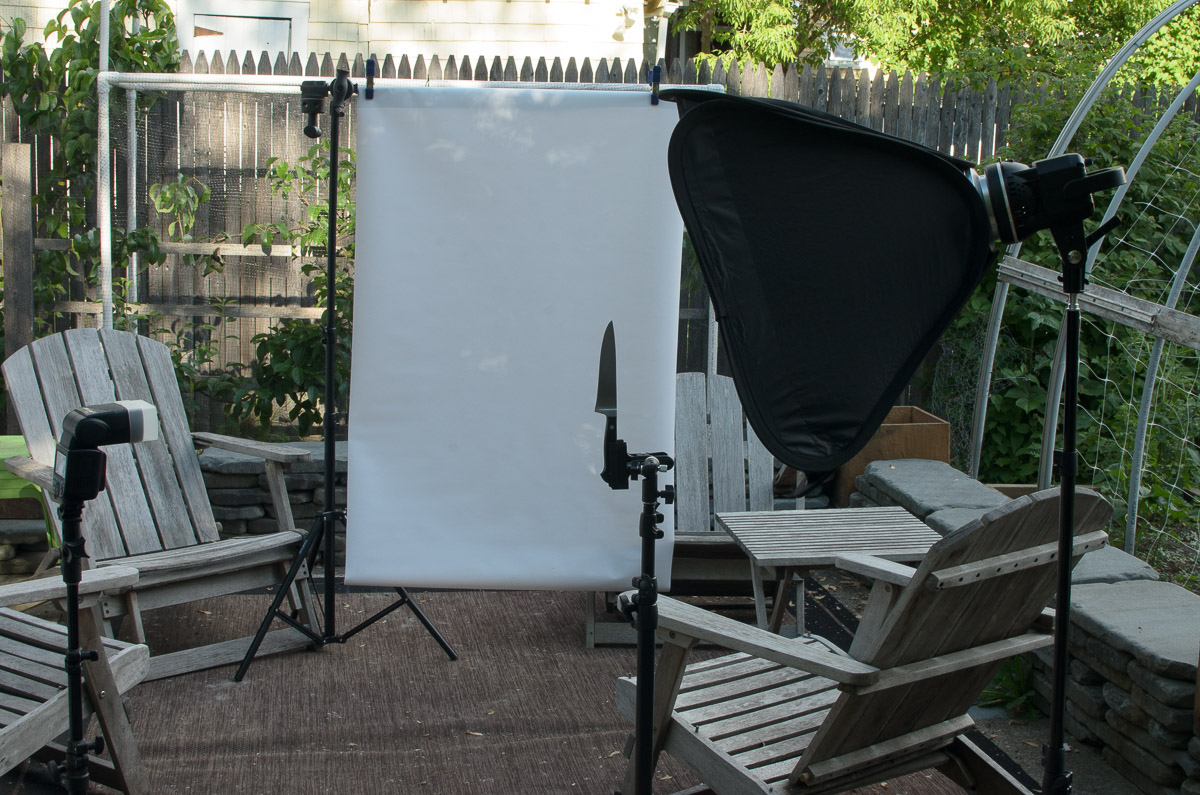
KEEPING A CLEAN WHITE BACKGROUND
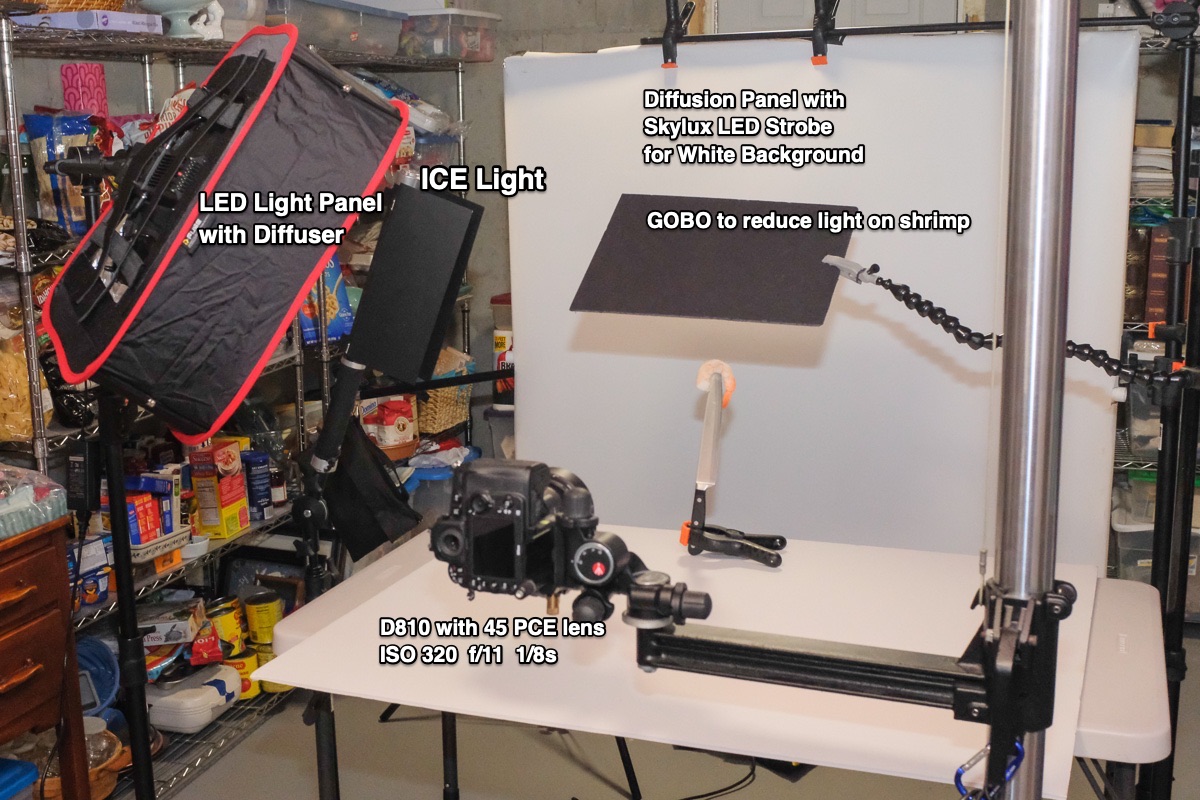
To do it well, light it separately from the subject. The goal is to have a very clean, evenly lit background so treat that as assignment part one.
I think an exposure setting of one stop over your exposure will maintain a great, clean, and even white background without causing flare or edge deterioration.
So if you are going to shoot your subject at f-8, you should light this white background to f-11. This is where you NEED an ambient flash meter. You must measure ambient since there is no other method available (unless you have your string meter set up – in which case you are in great shape).
If you do not have any way of metering that background light, you may have to figure out the exposure by using “guide numbers” for which I am not a big help. It’s math.
Ask on FB and we will figure it out together.
(Get a meter… seriously.)
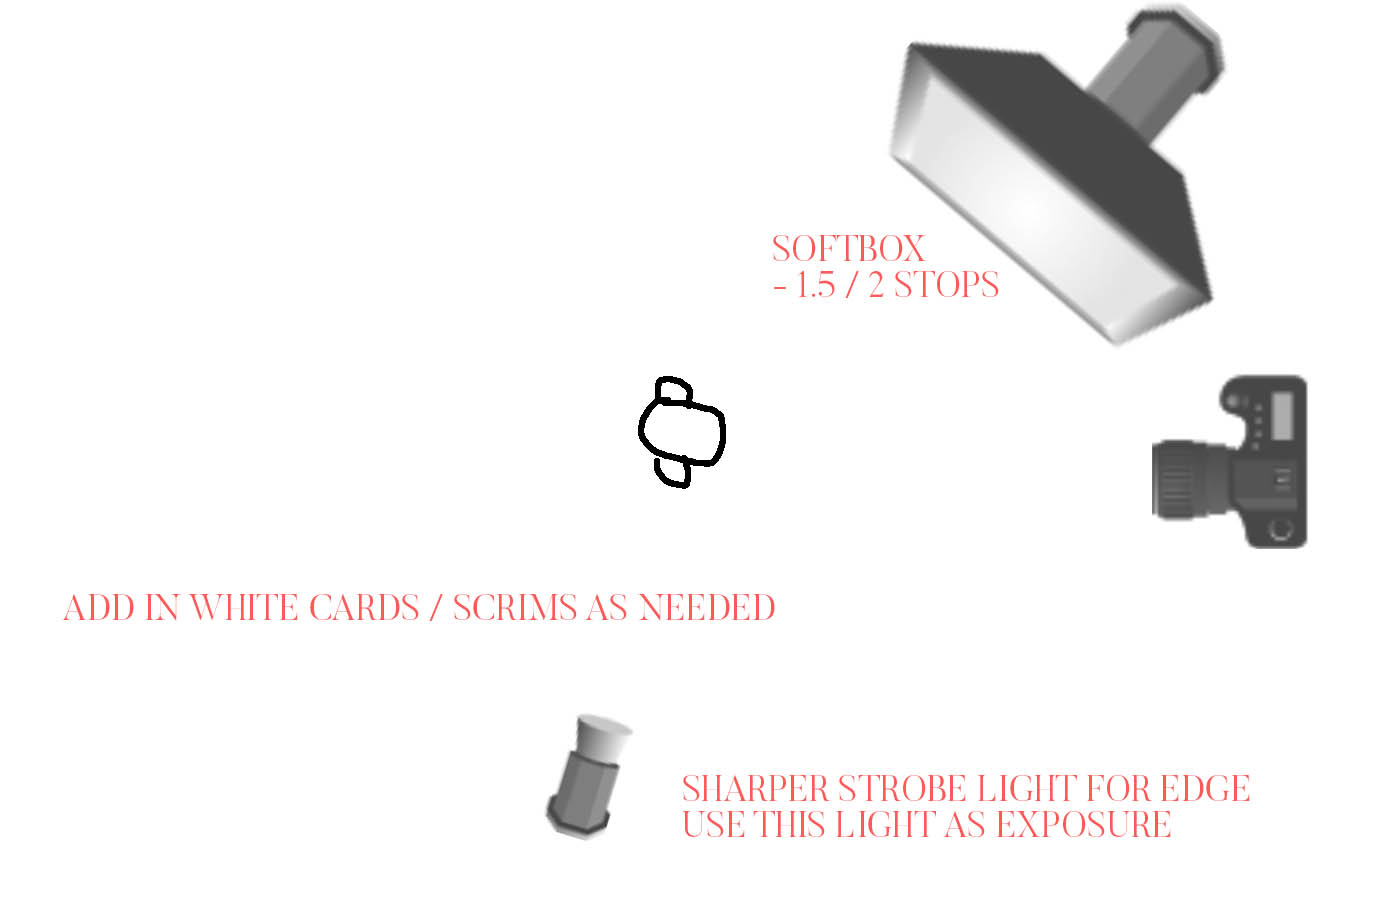
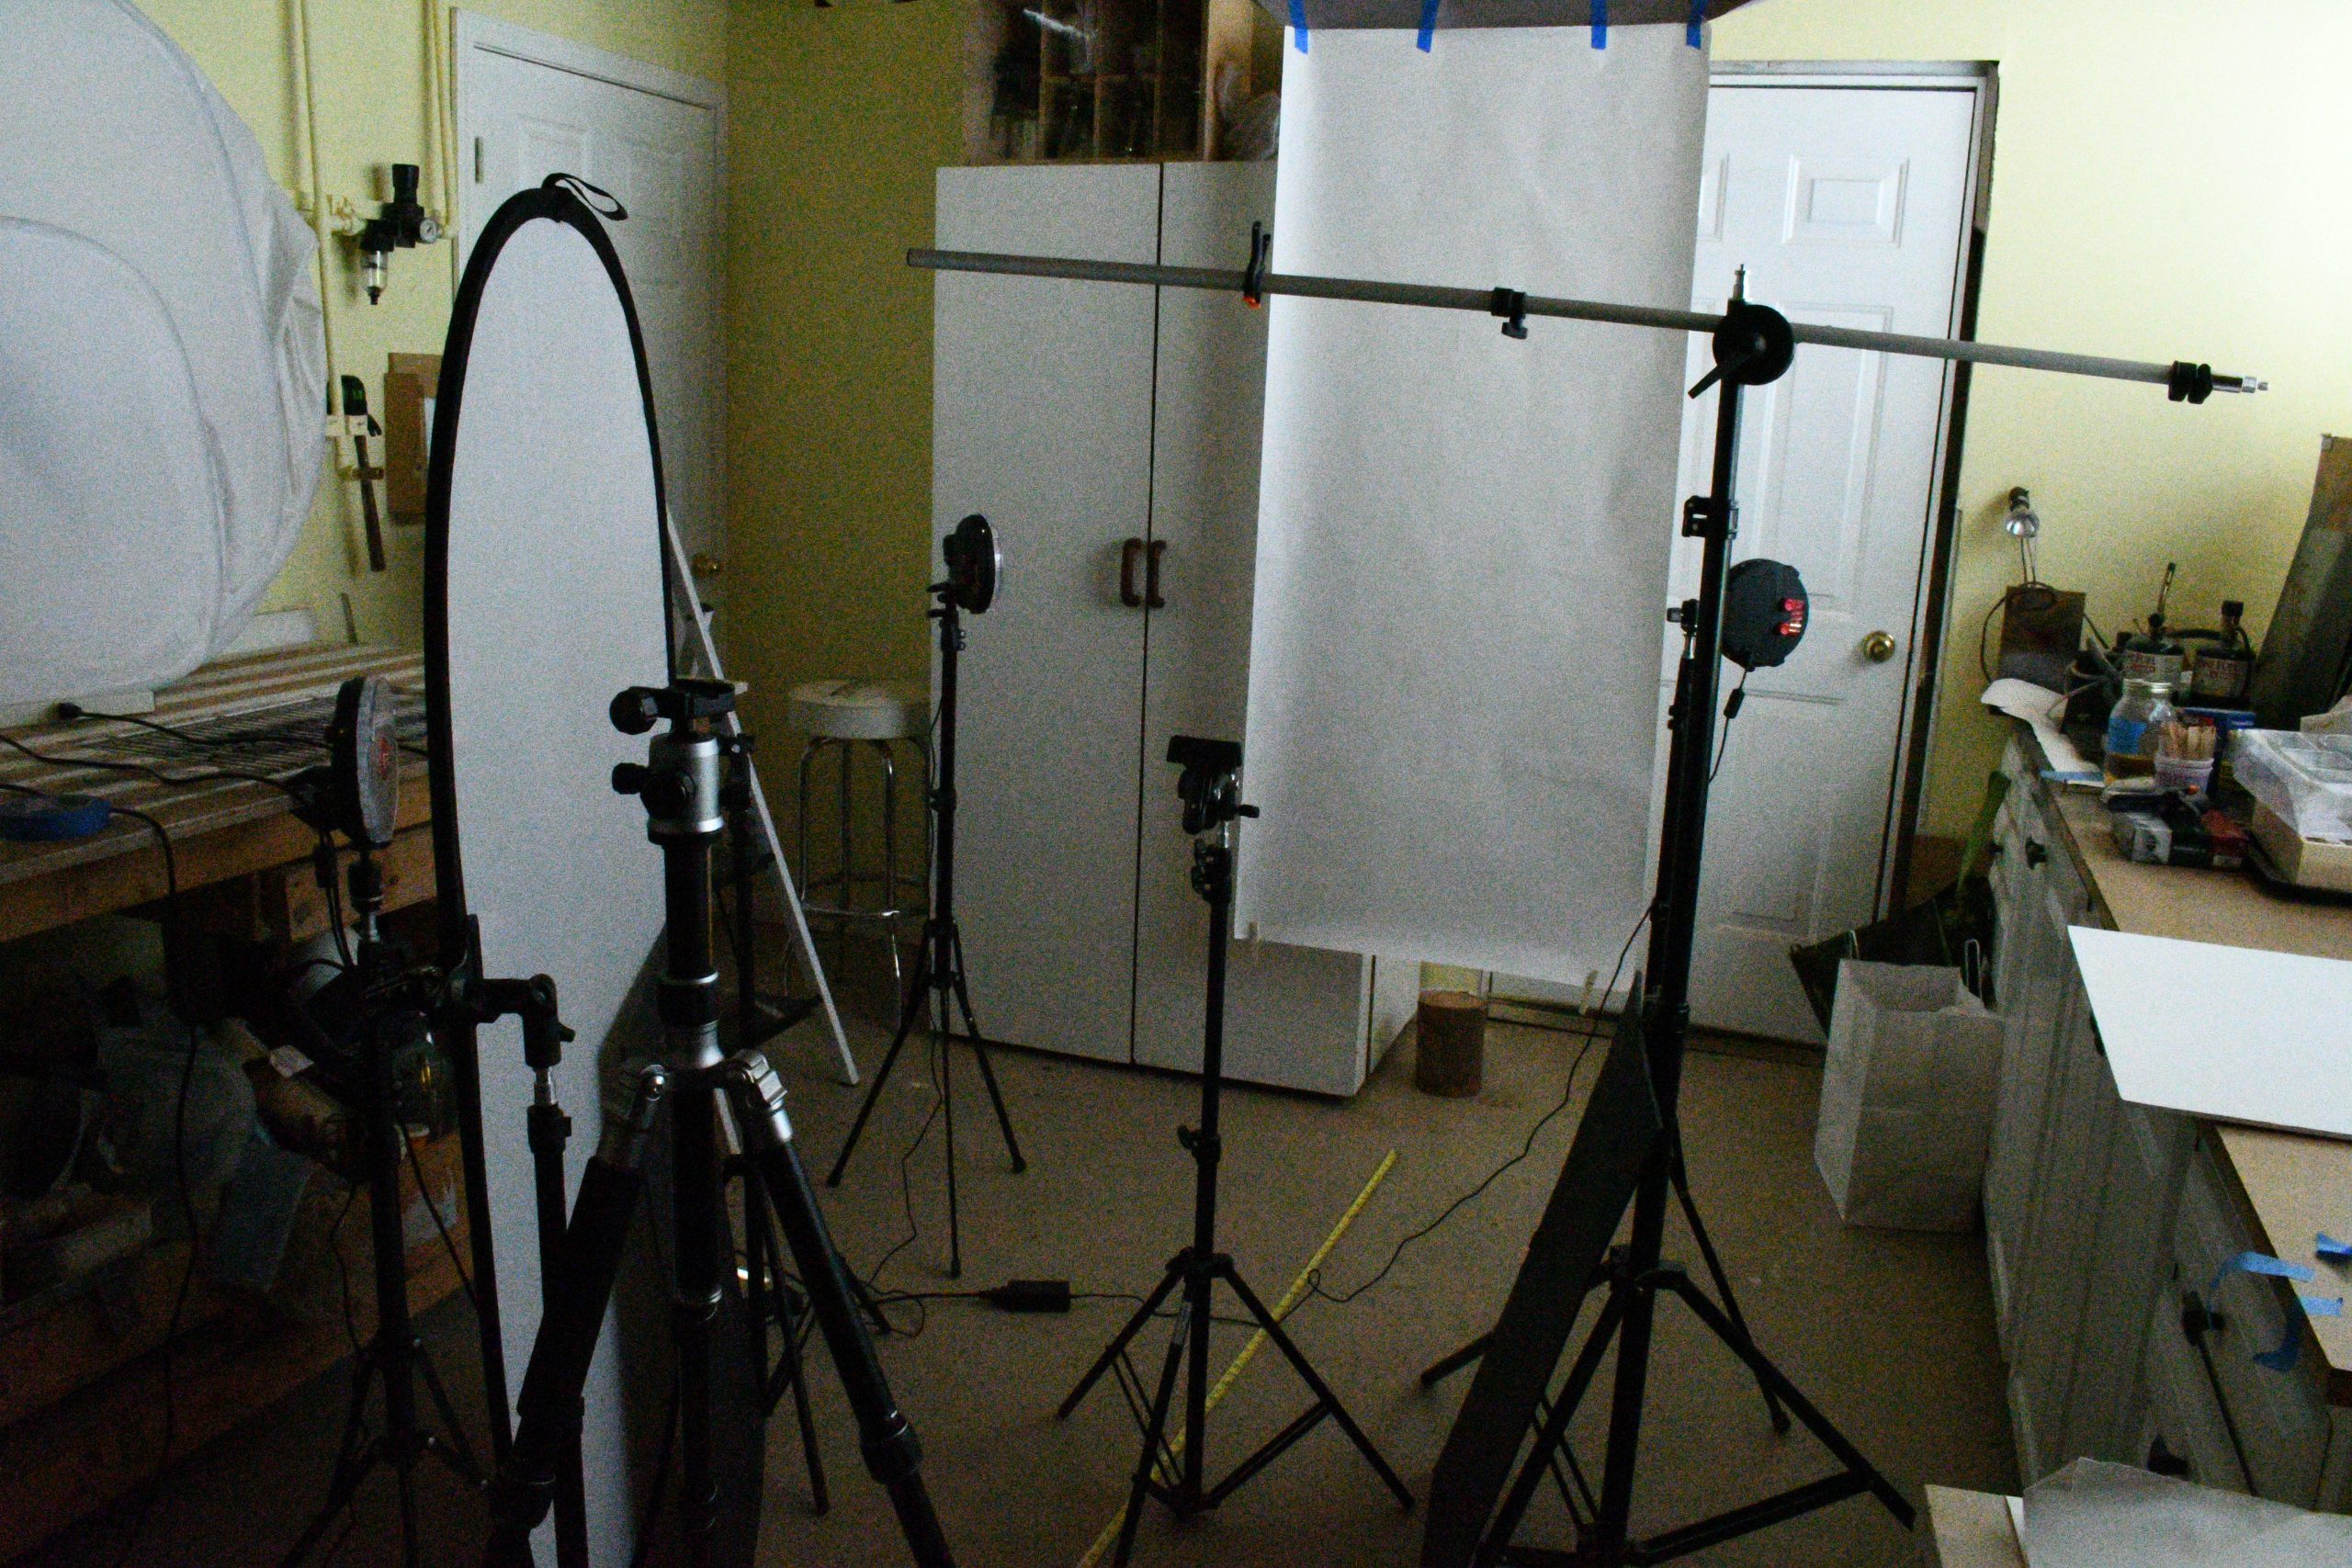
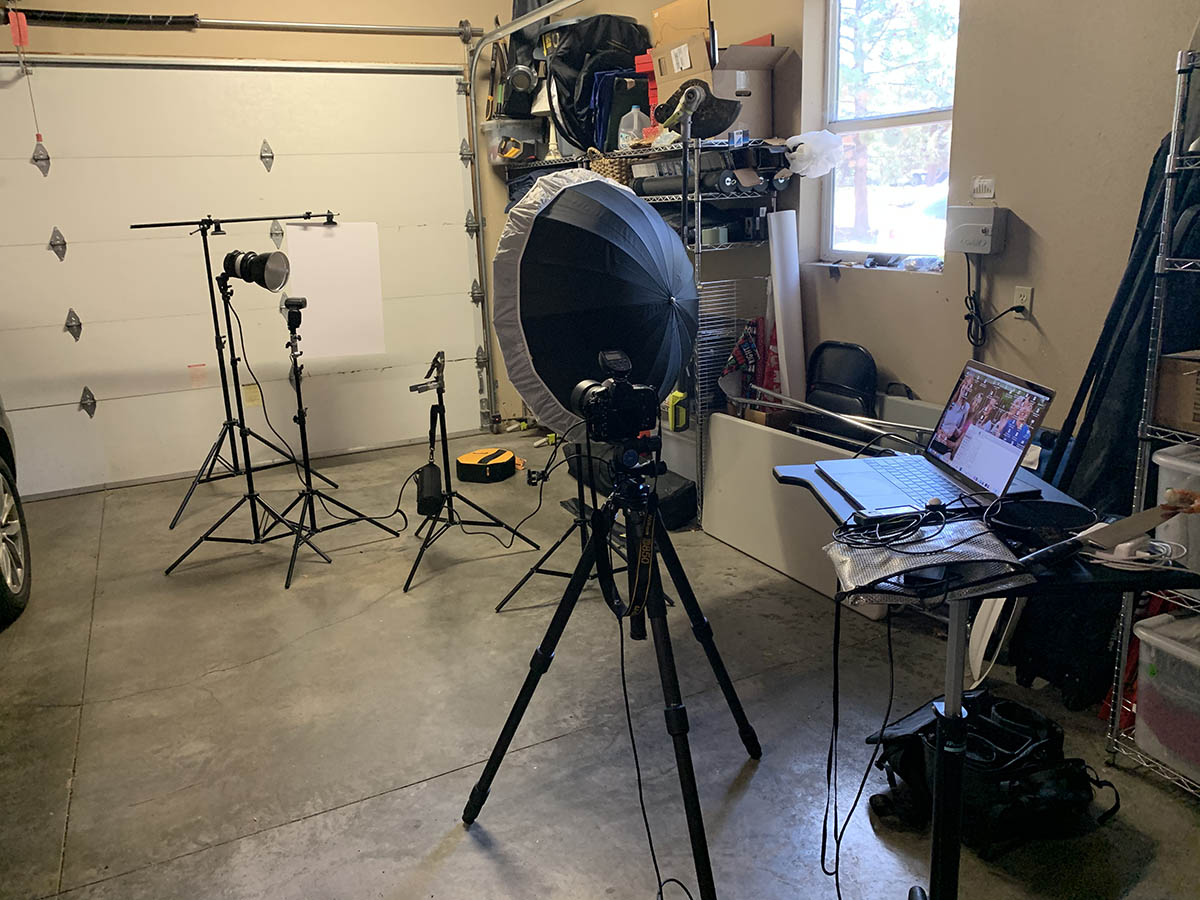
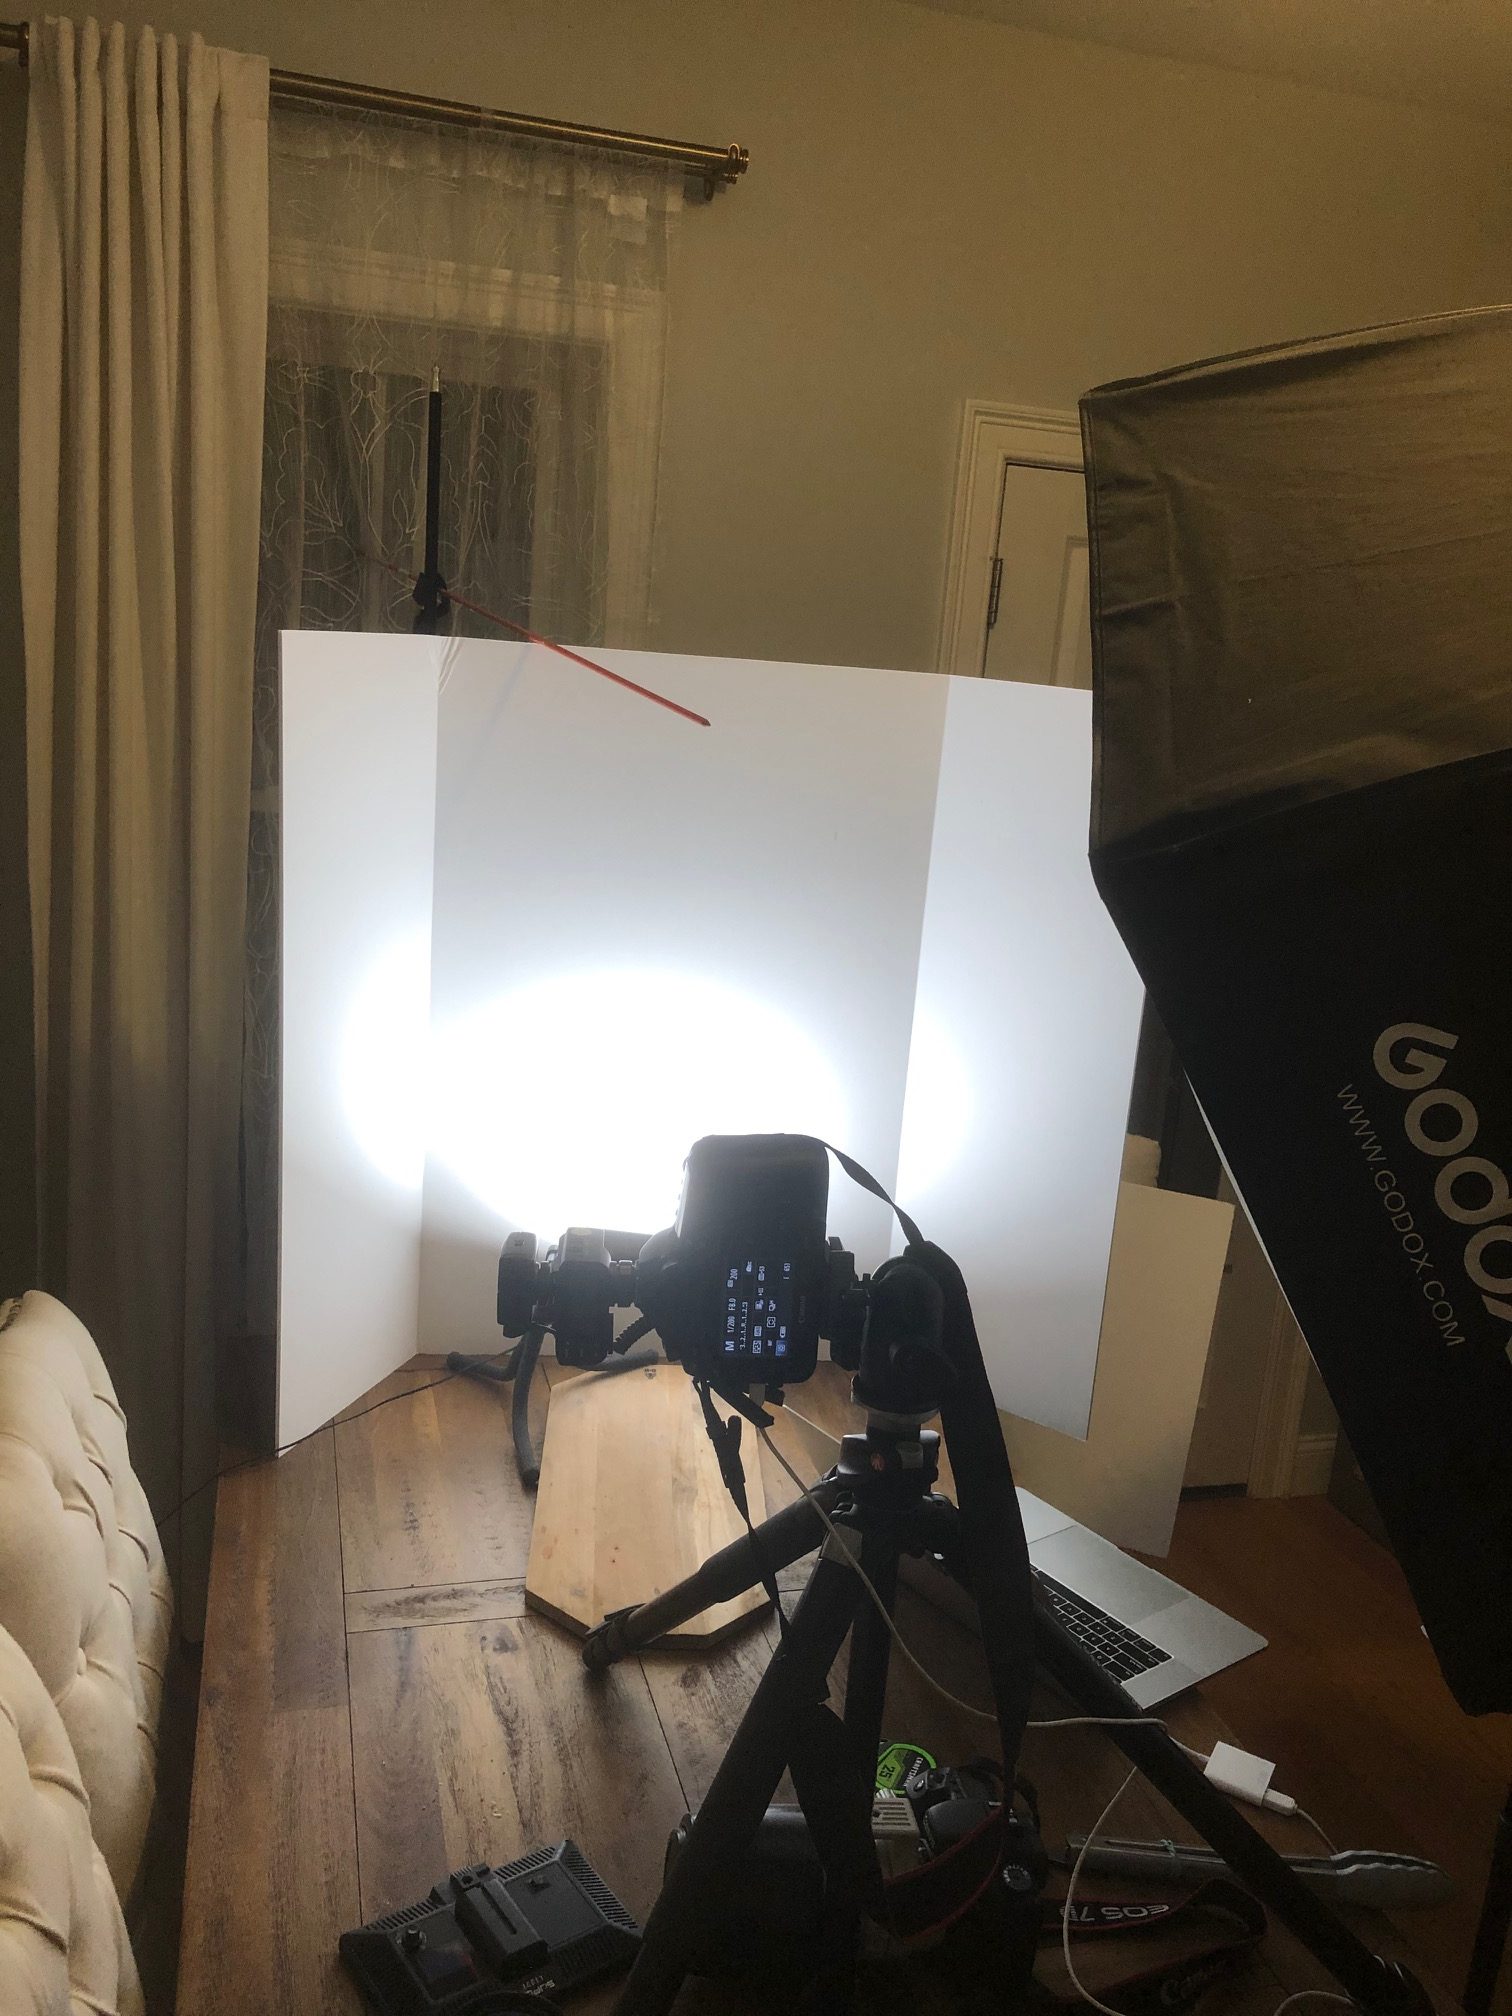
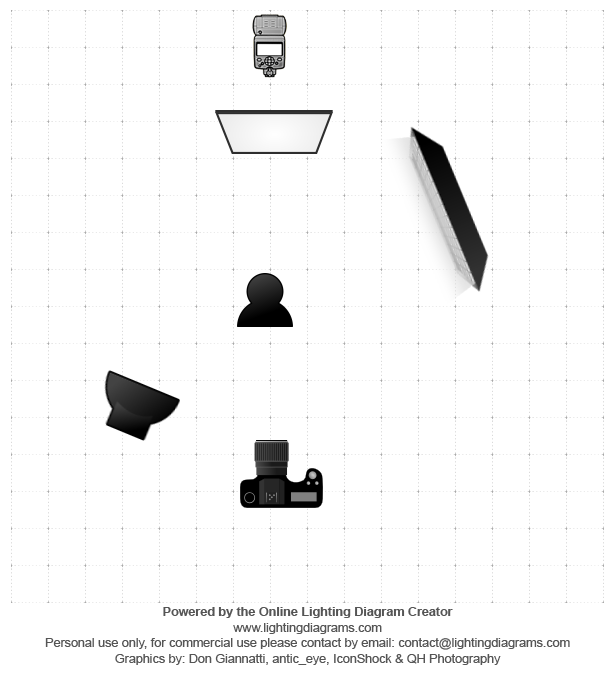
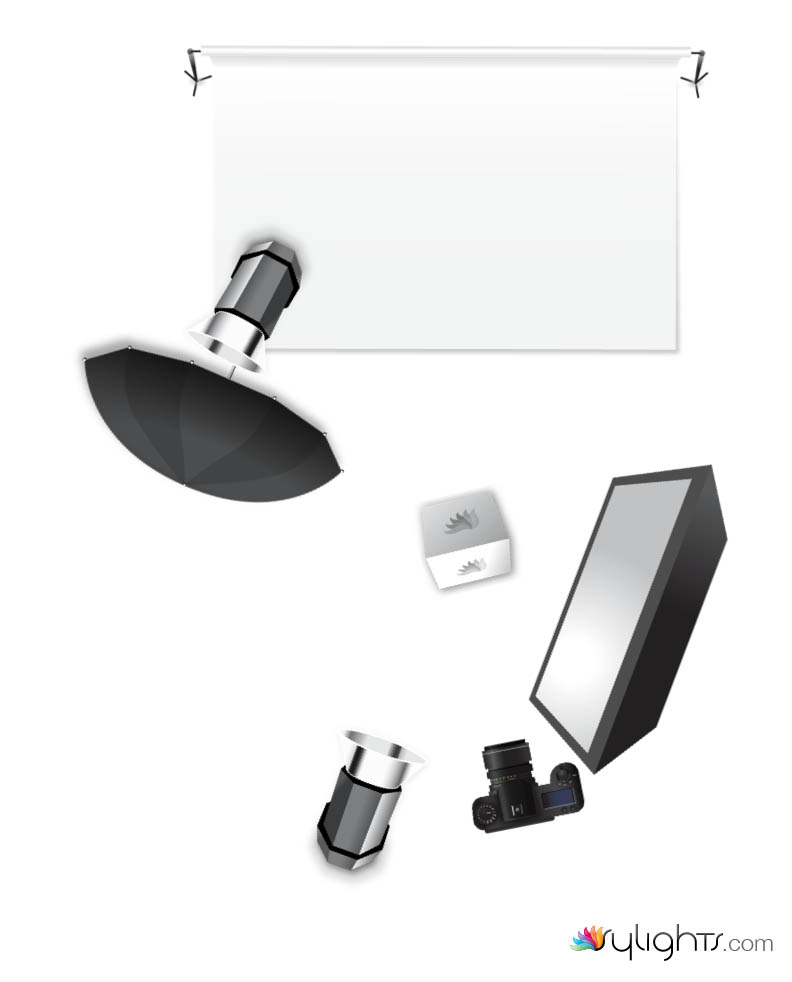
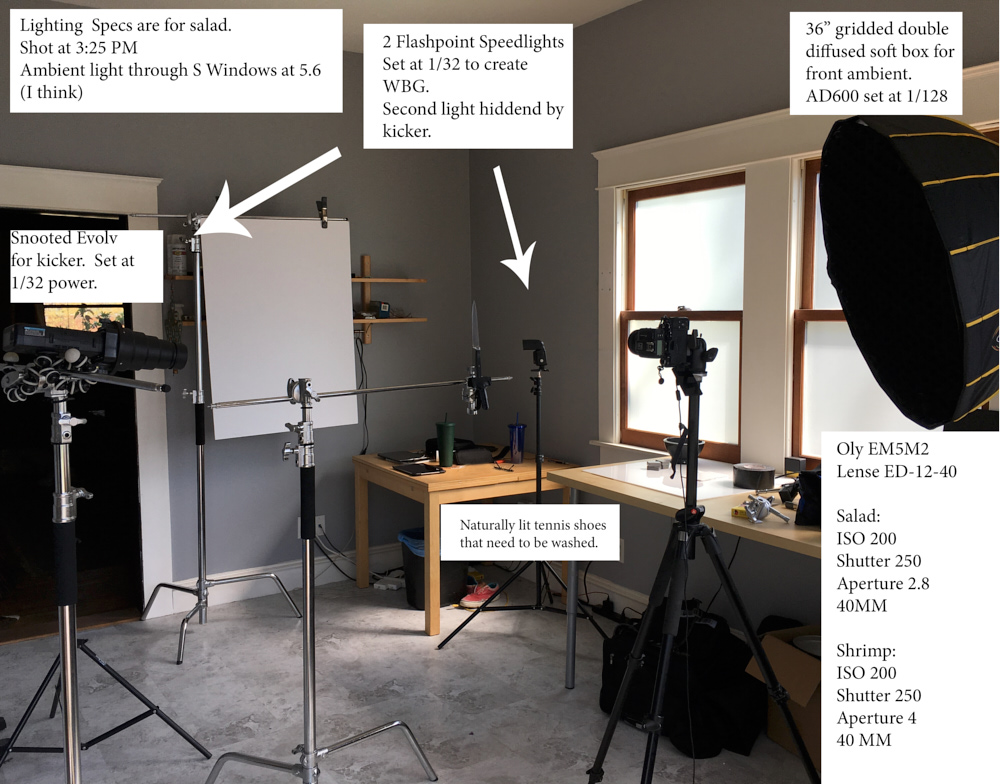
CONTROLLING THE AMBIENT LIGHT WITH STROBES
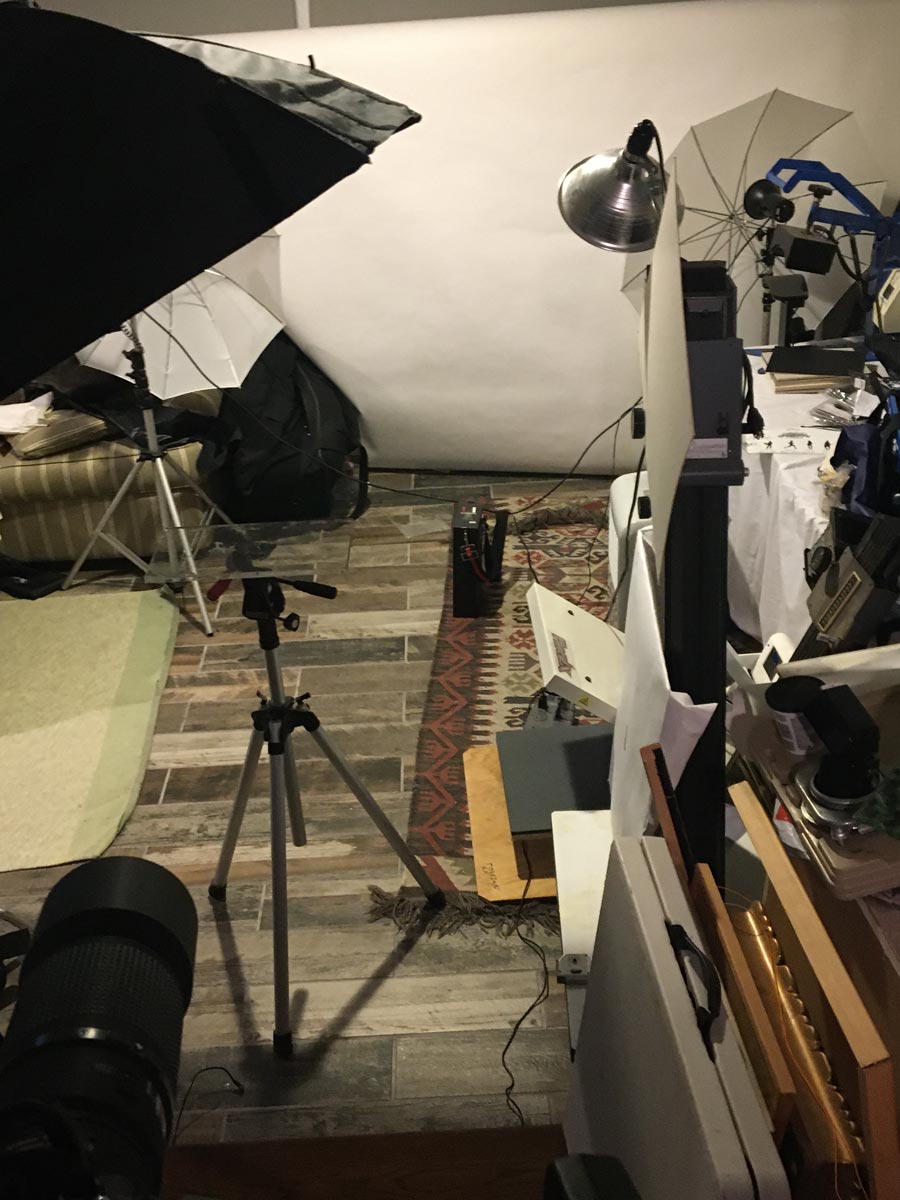
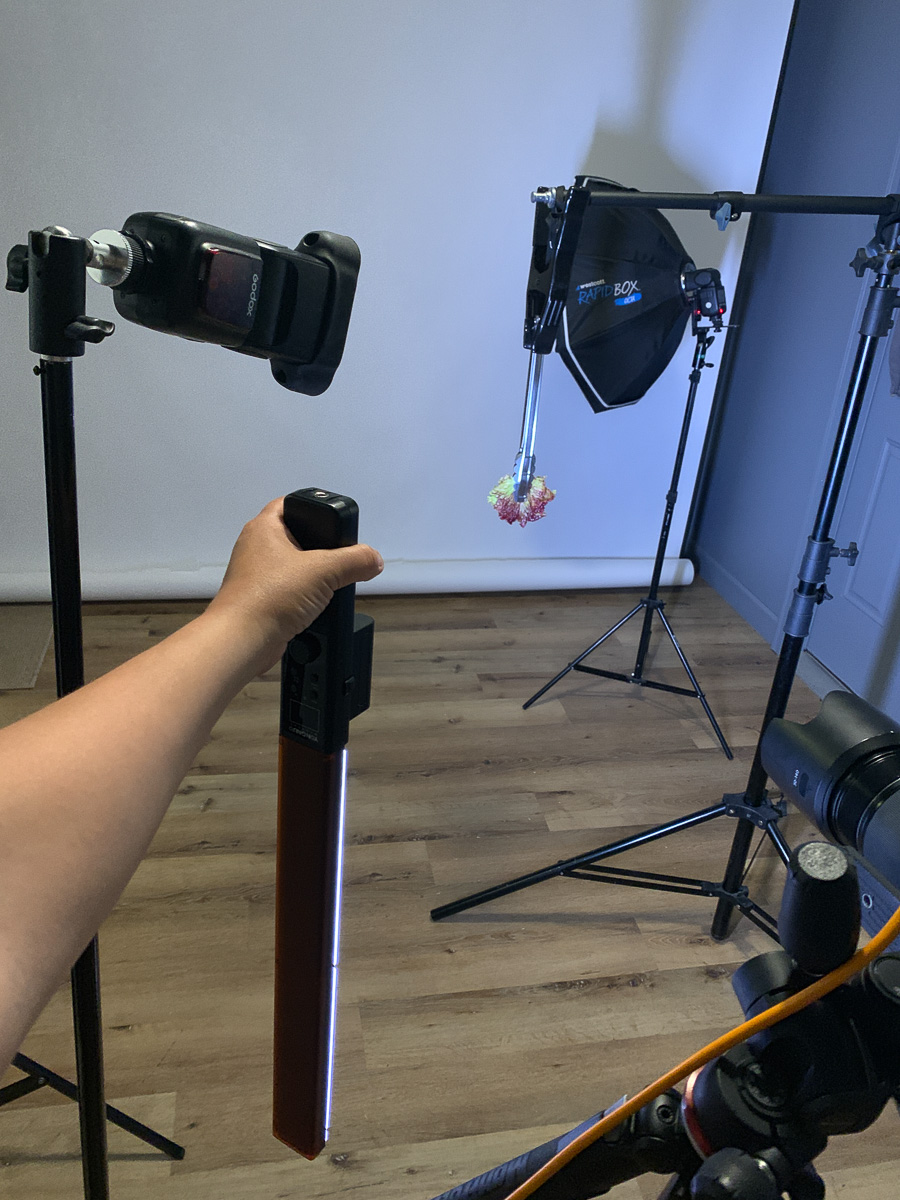
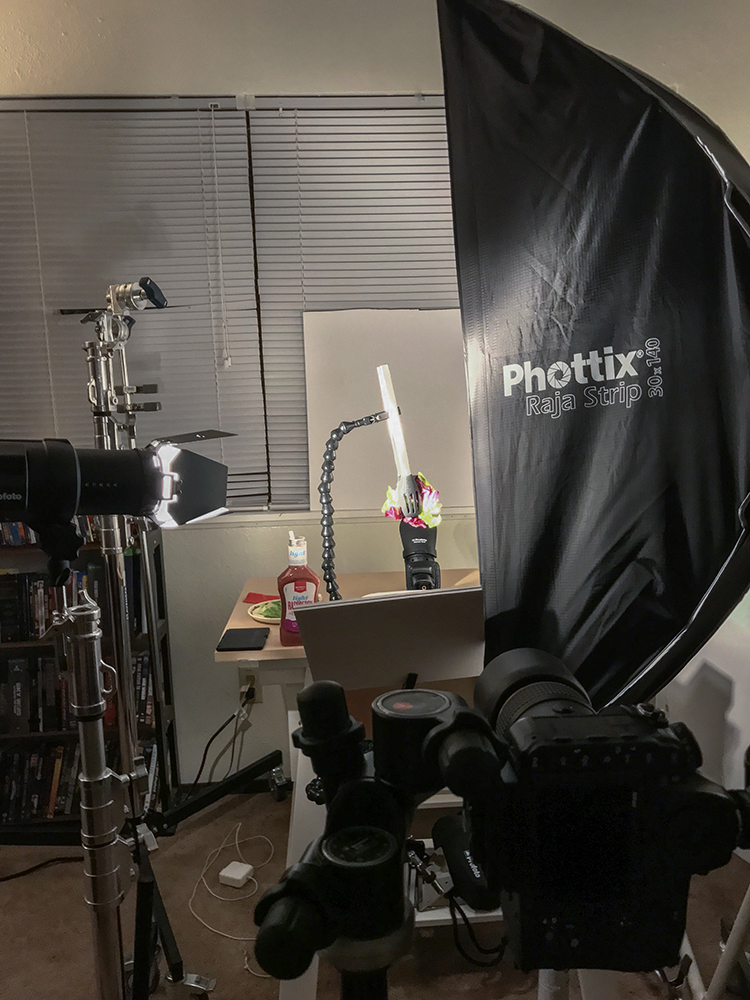
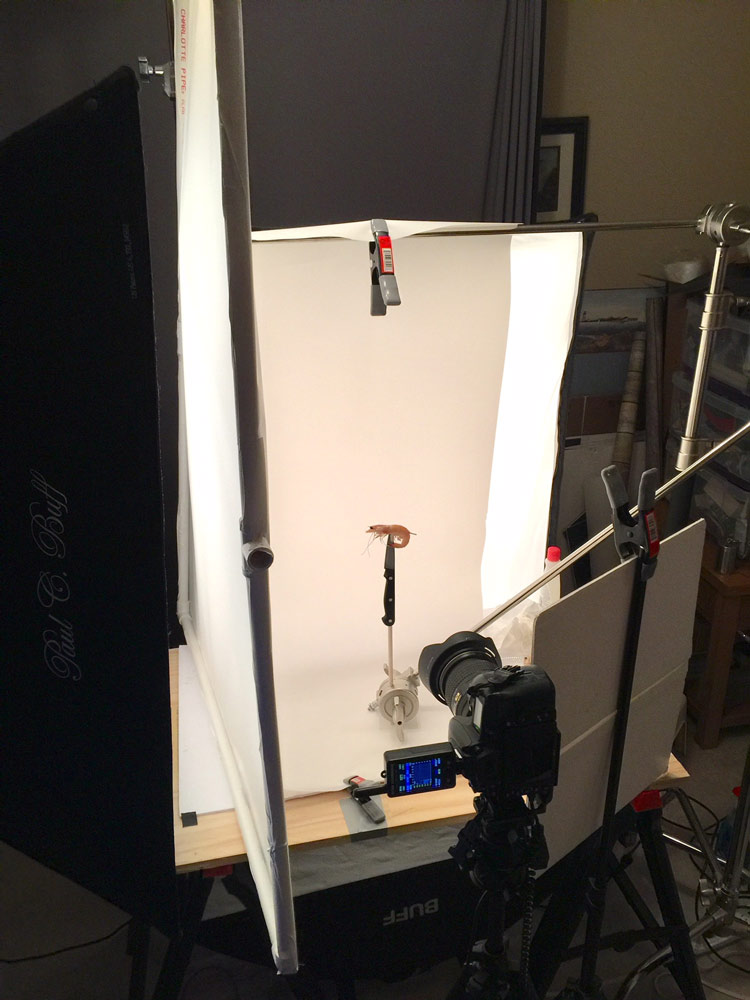
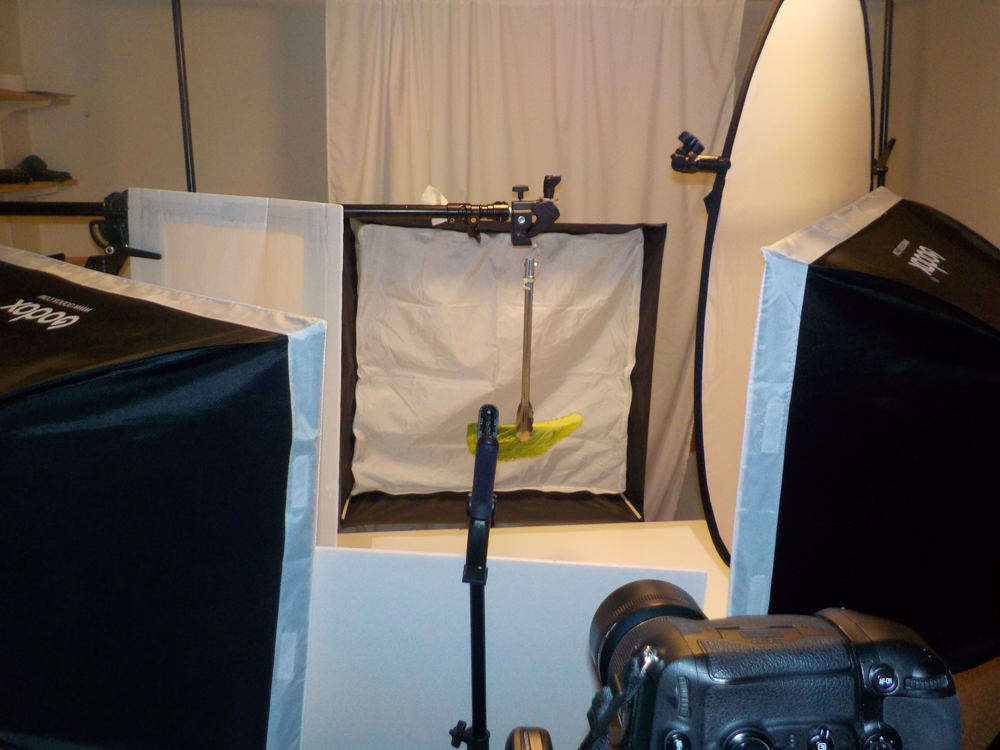
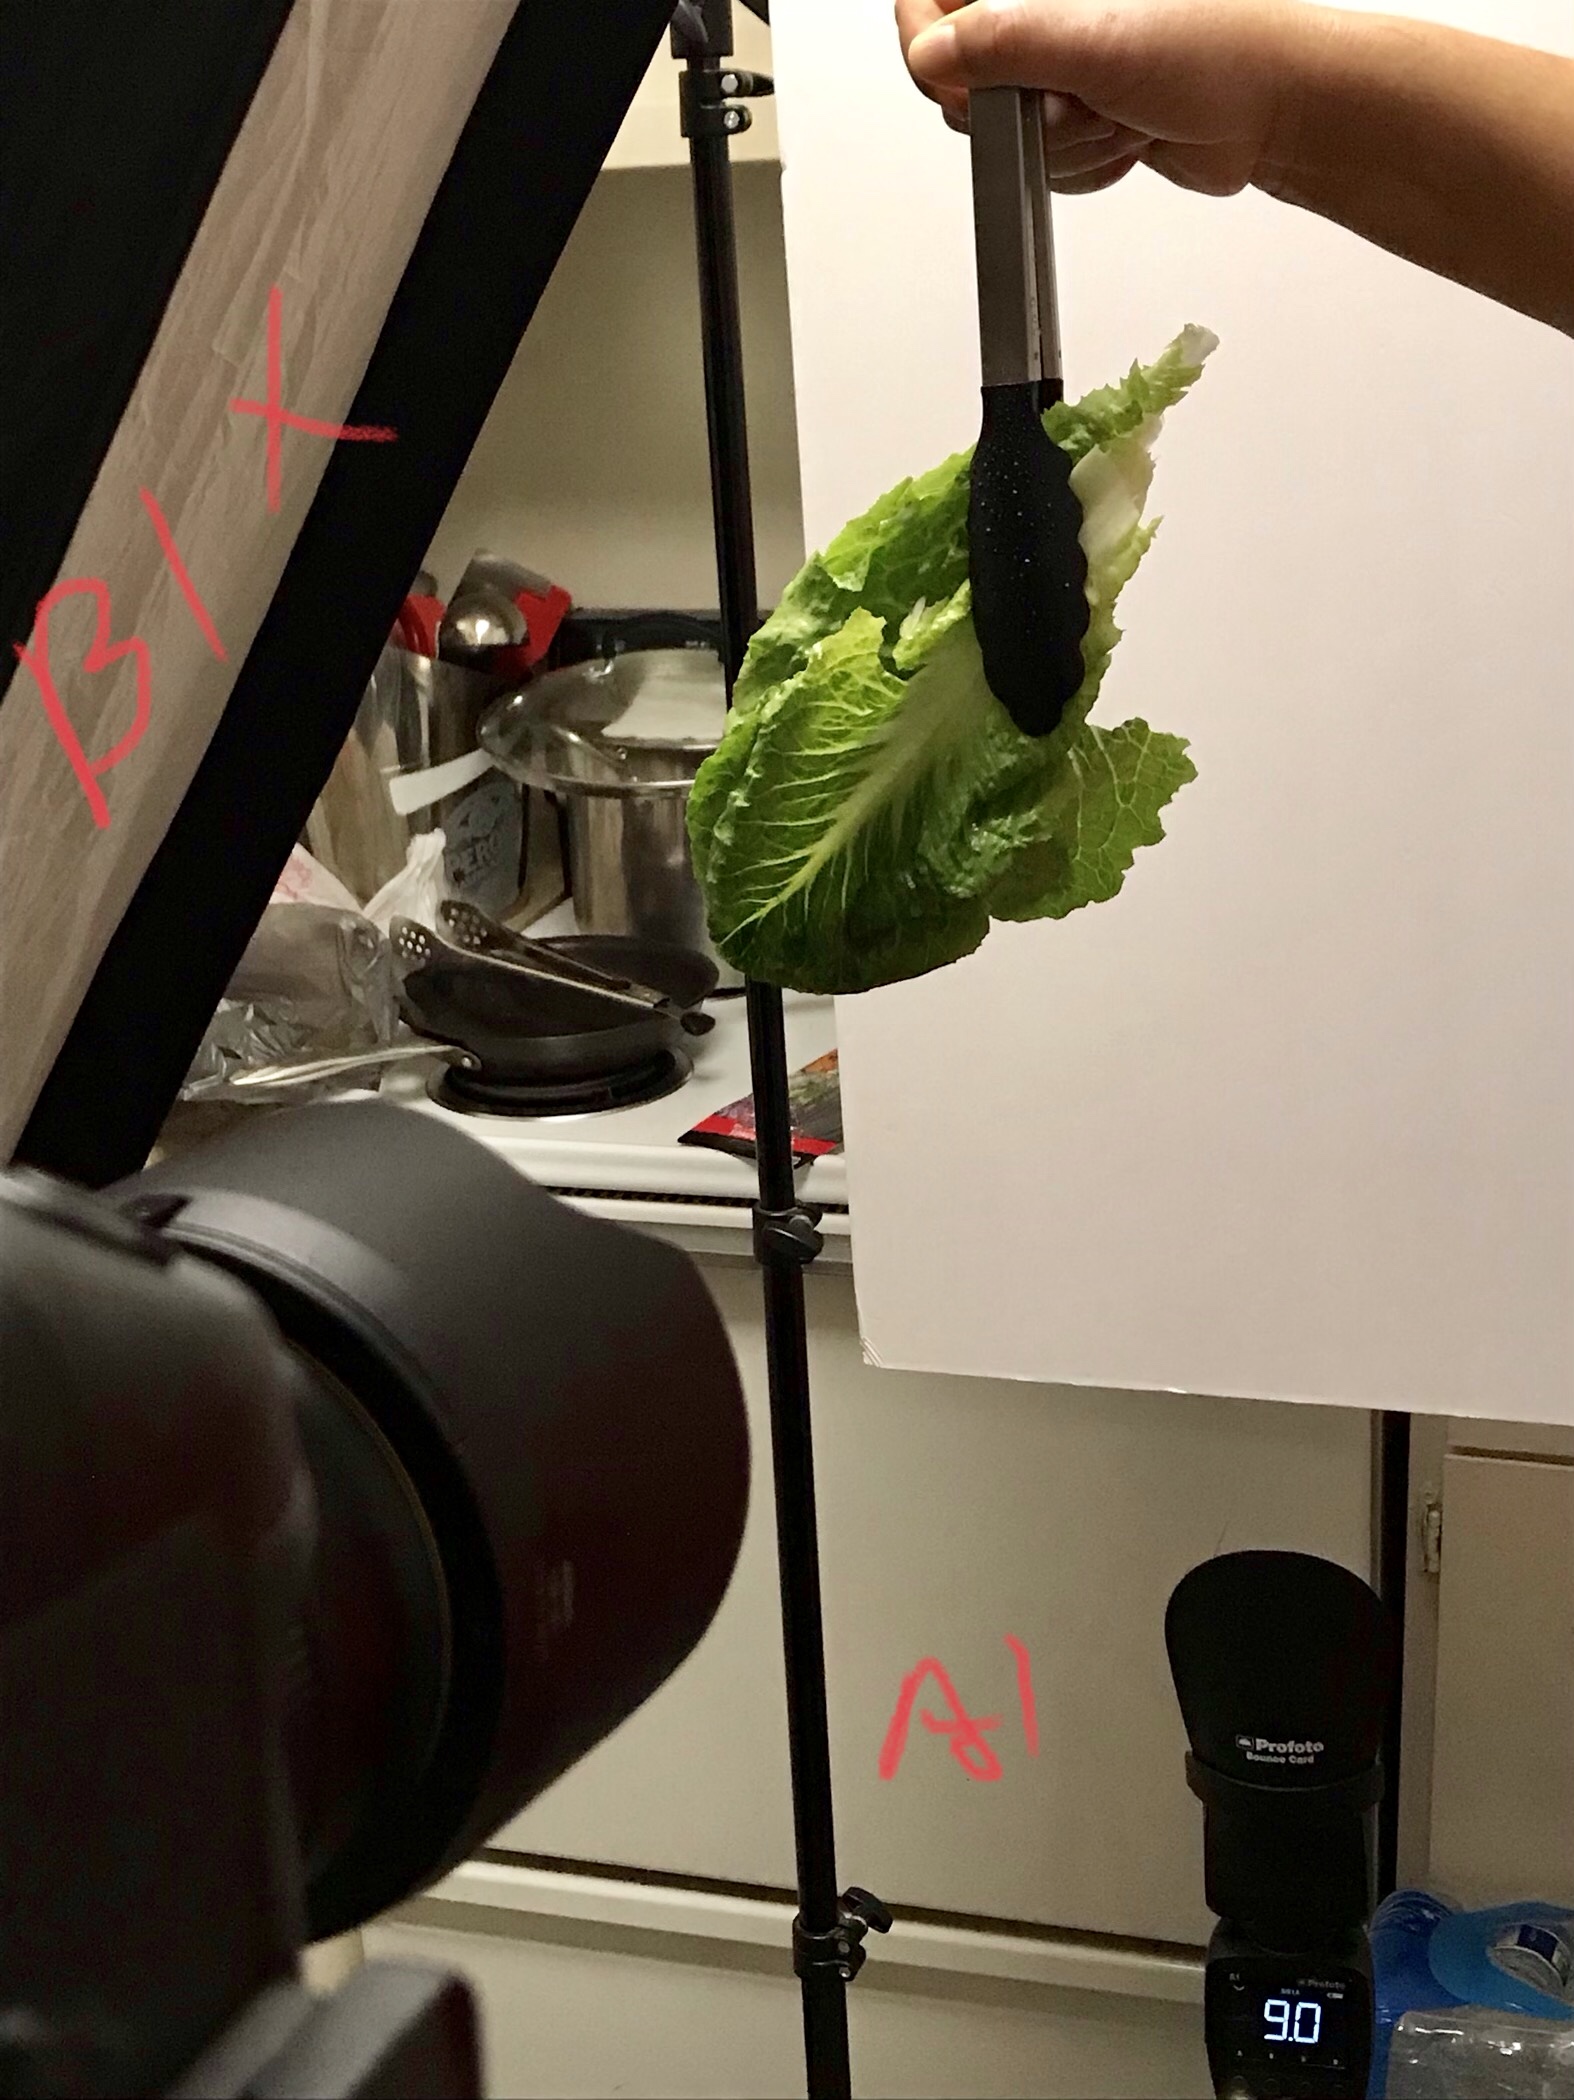
You will use a softer light source to add some ambient to your image. I show a softbox to camera right, but you may choose any angle to the subject that works for you, and you may choose scrim/softbox/bounce cards, bright room… again, whatever works best for your setup.
Then add a sharper (smaller light source) for your “main”. This can be a bare speedlight, bare reflector flash, or a snoot/gridspot – your choice. You may even use a diffuser on the small reflector… again, these are all stylistic choices that each of you will make.
Natural light shooters may use the ambient light within their space and a small continuous light to add the main. It will have to be strong enough to overwhelm the ambient, but with these close-up shots that should be easy to do with the short distances needed.
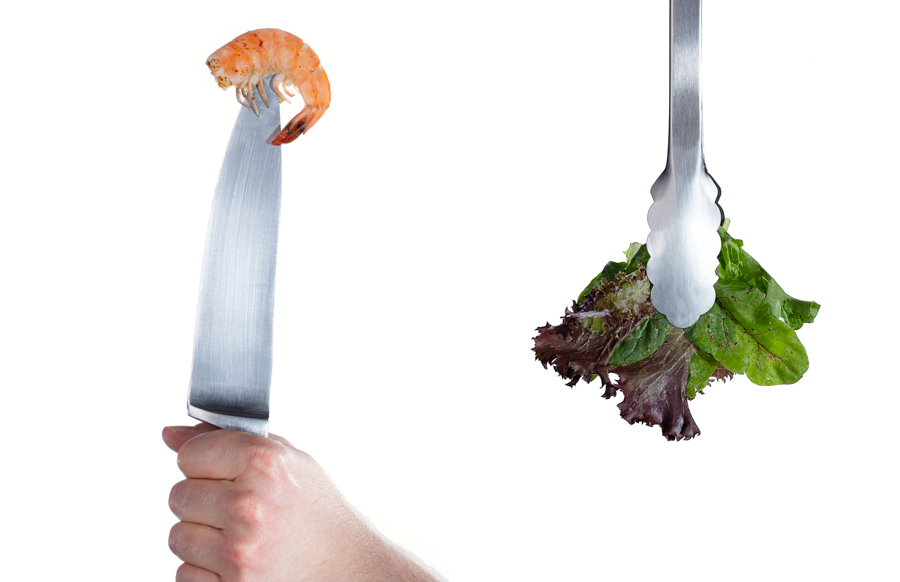
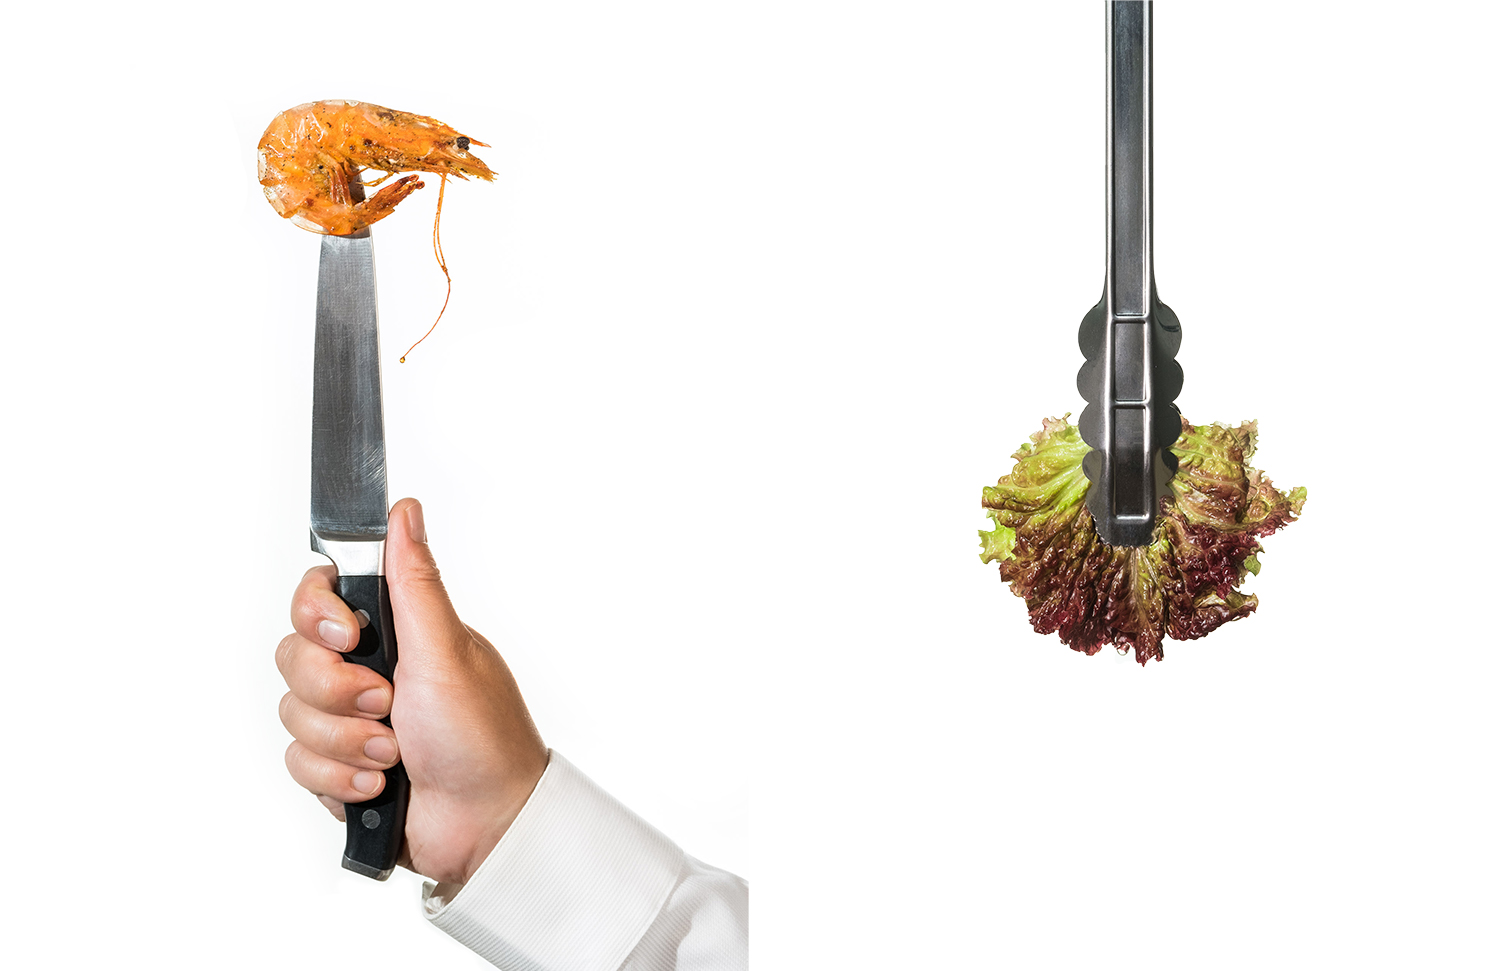
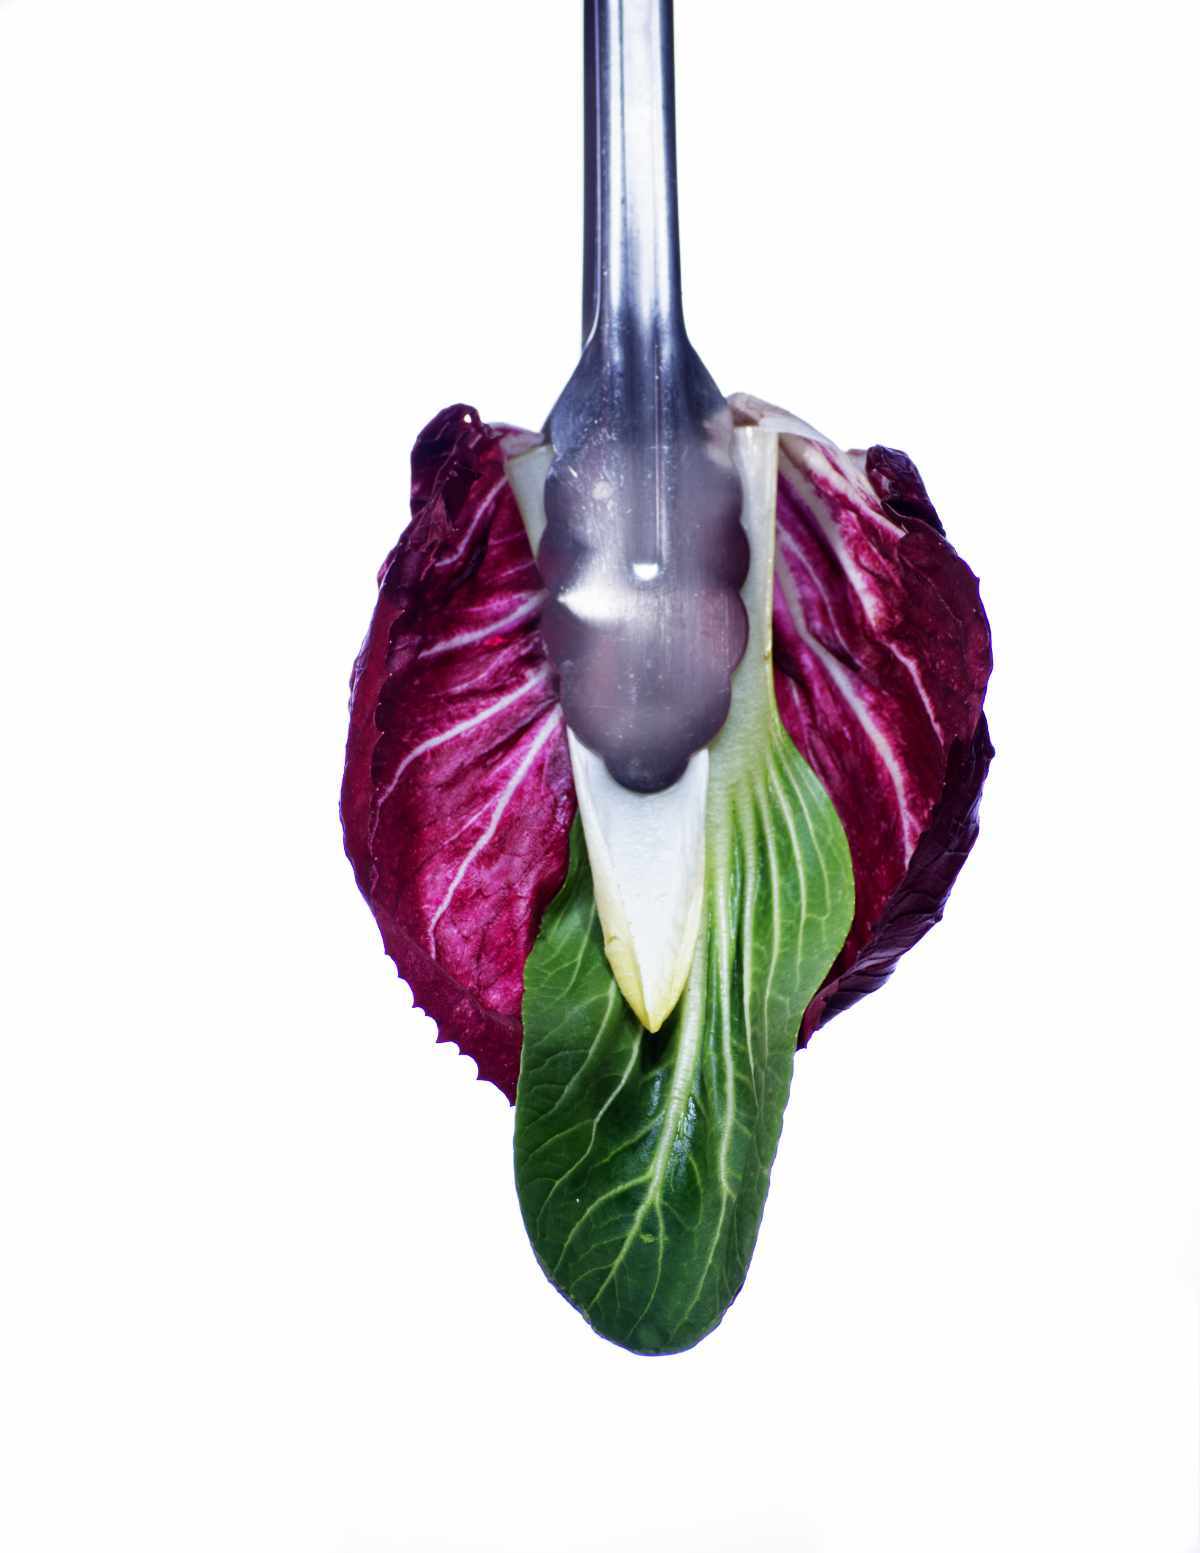
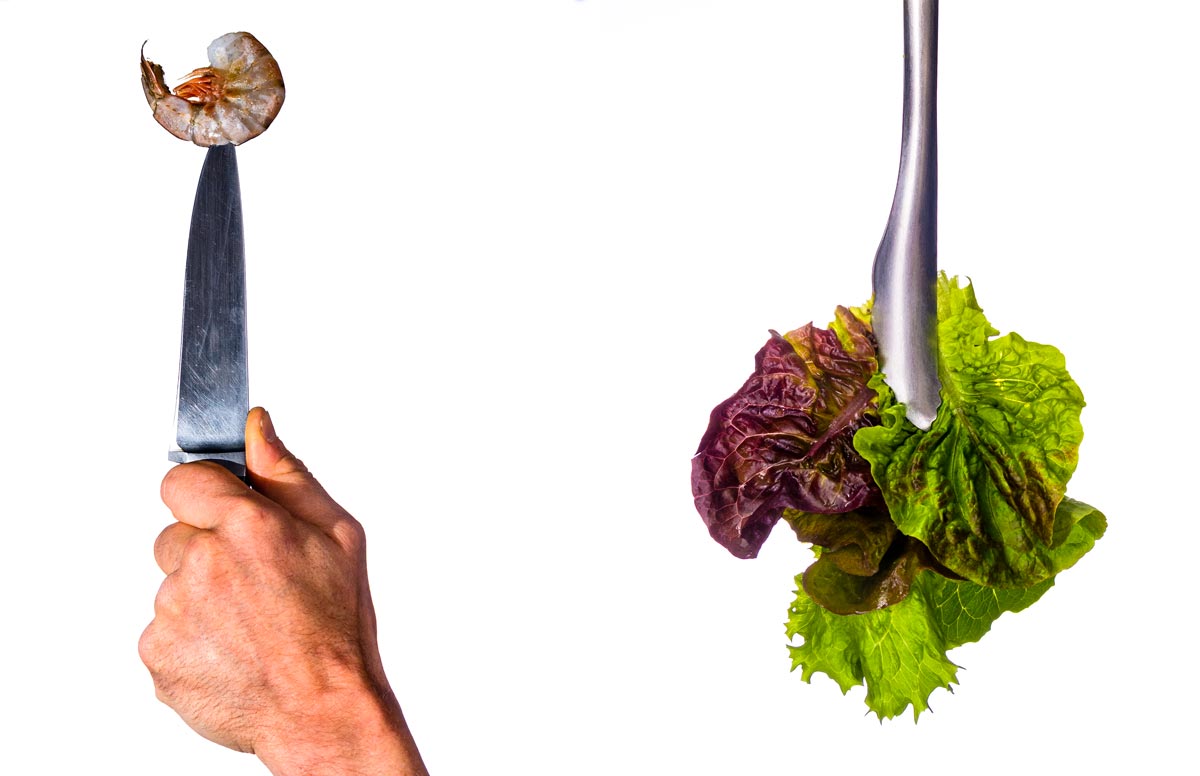
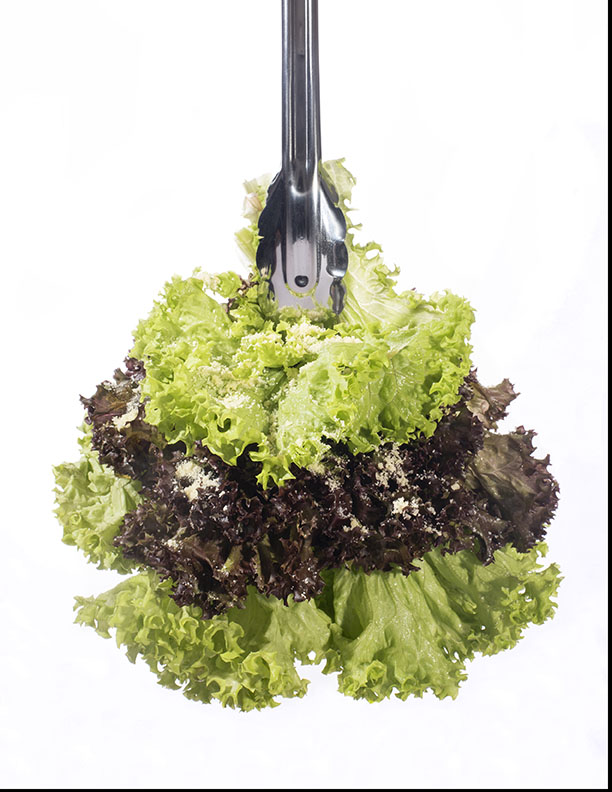
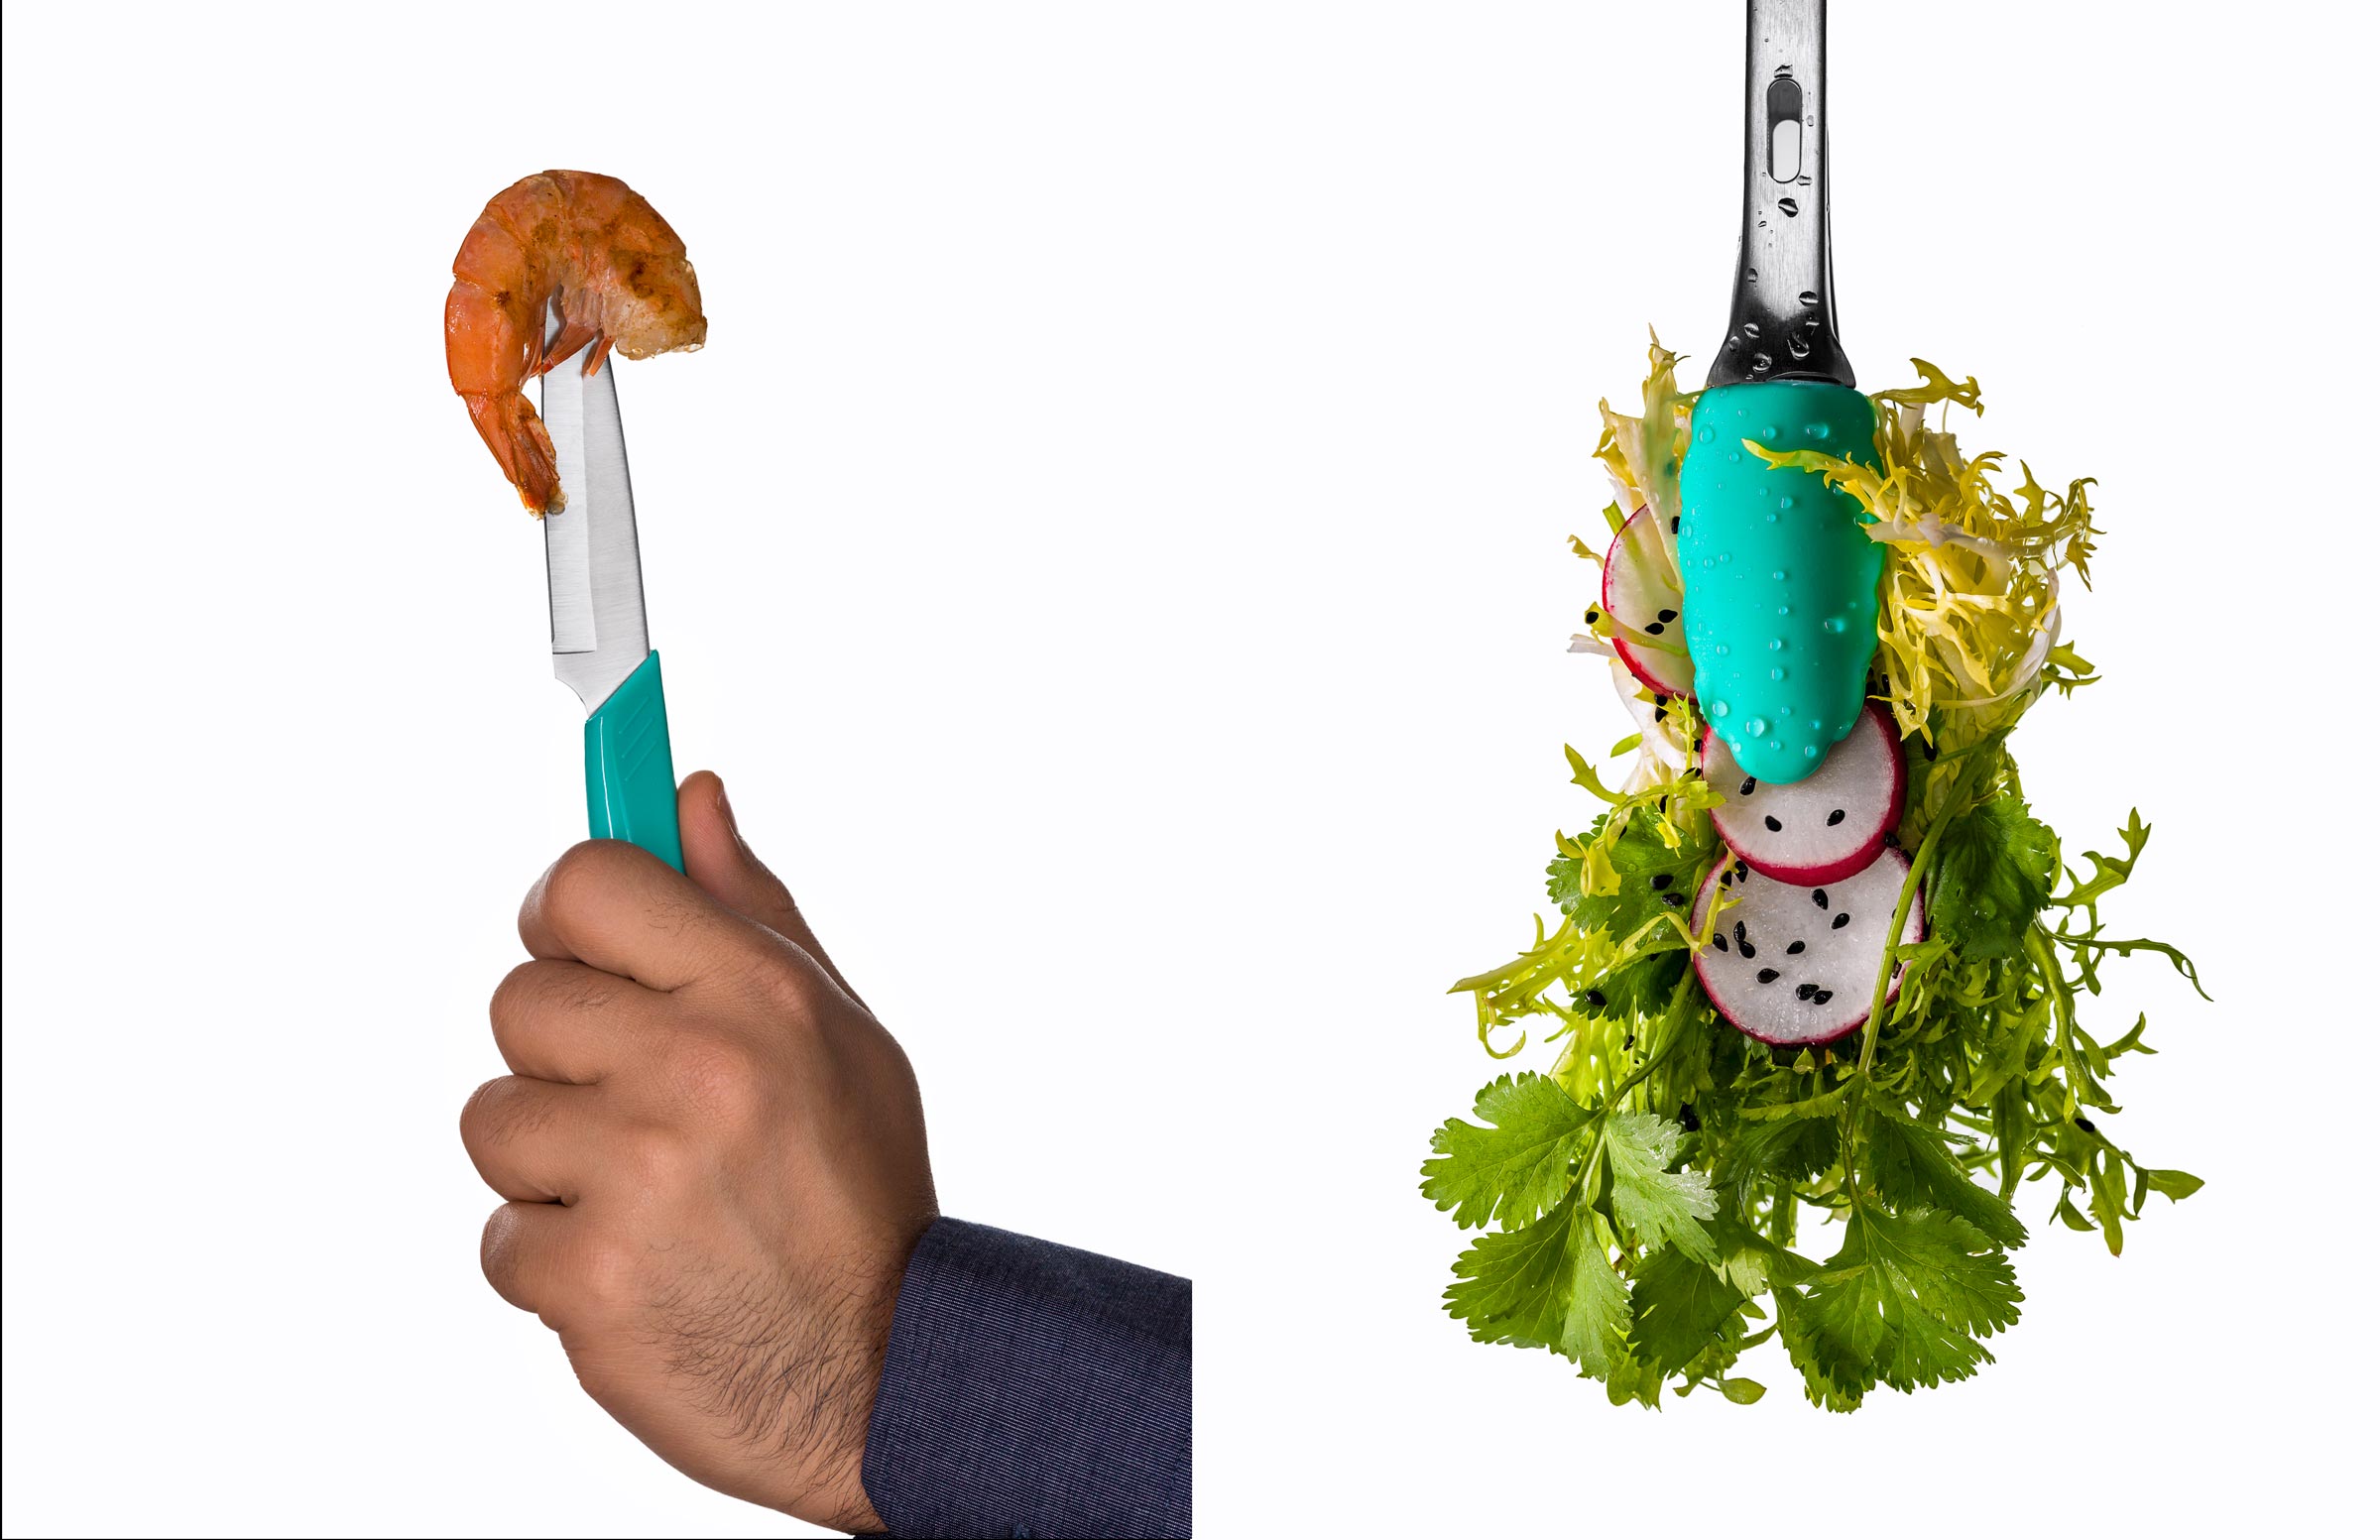
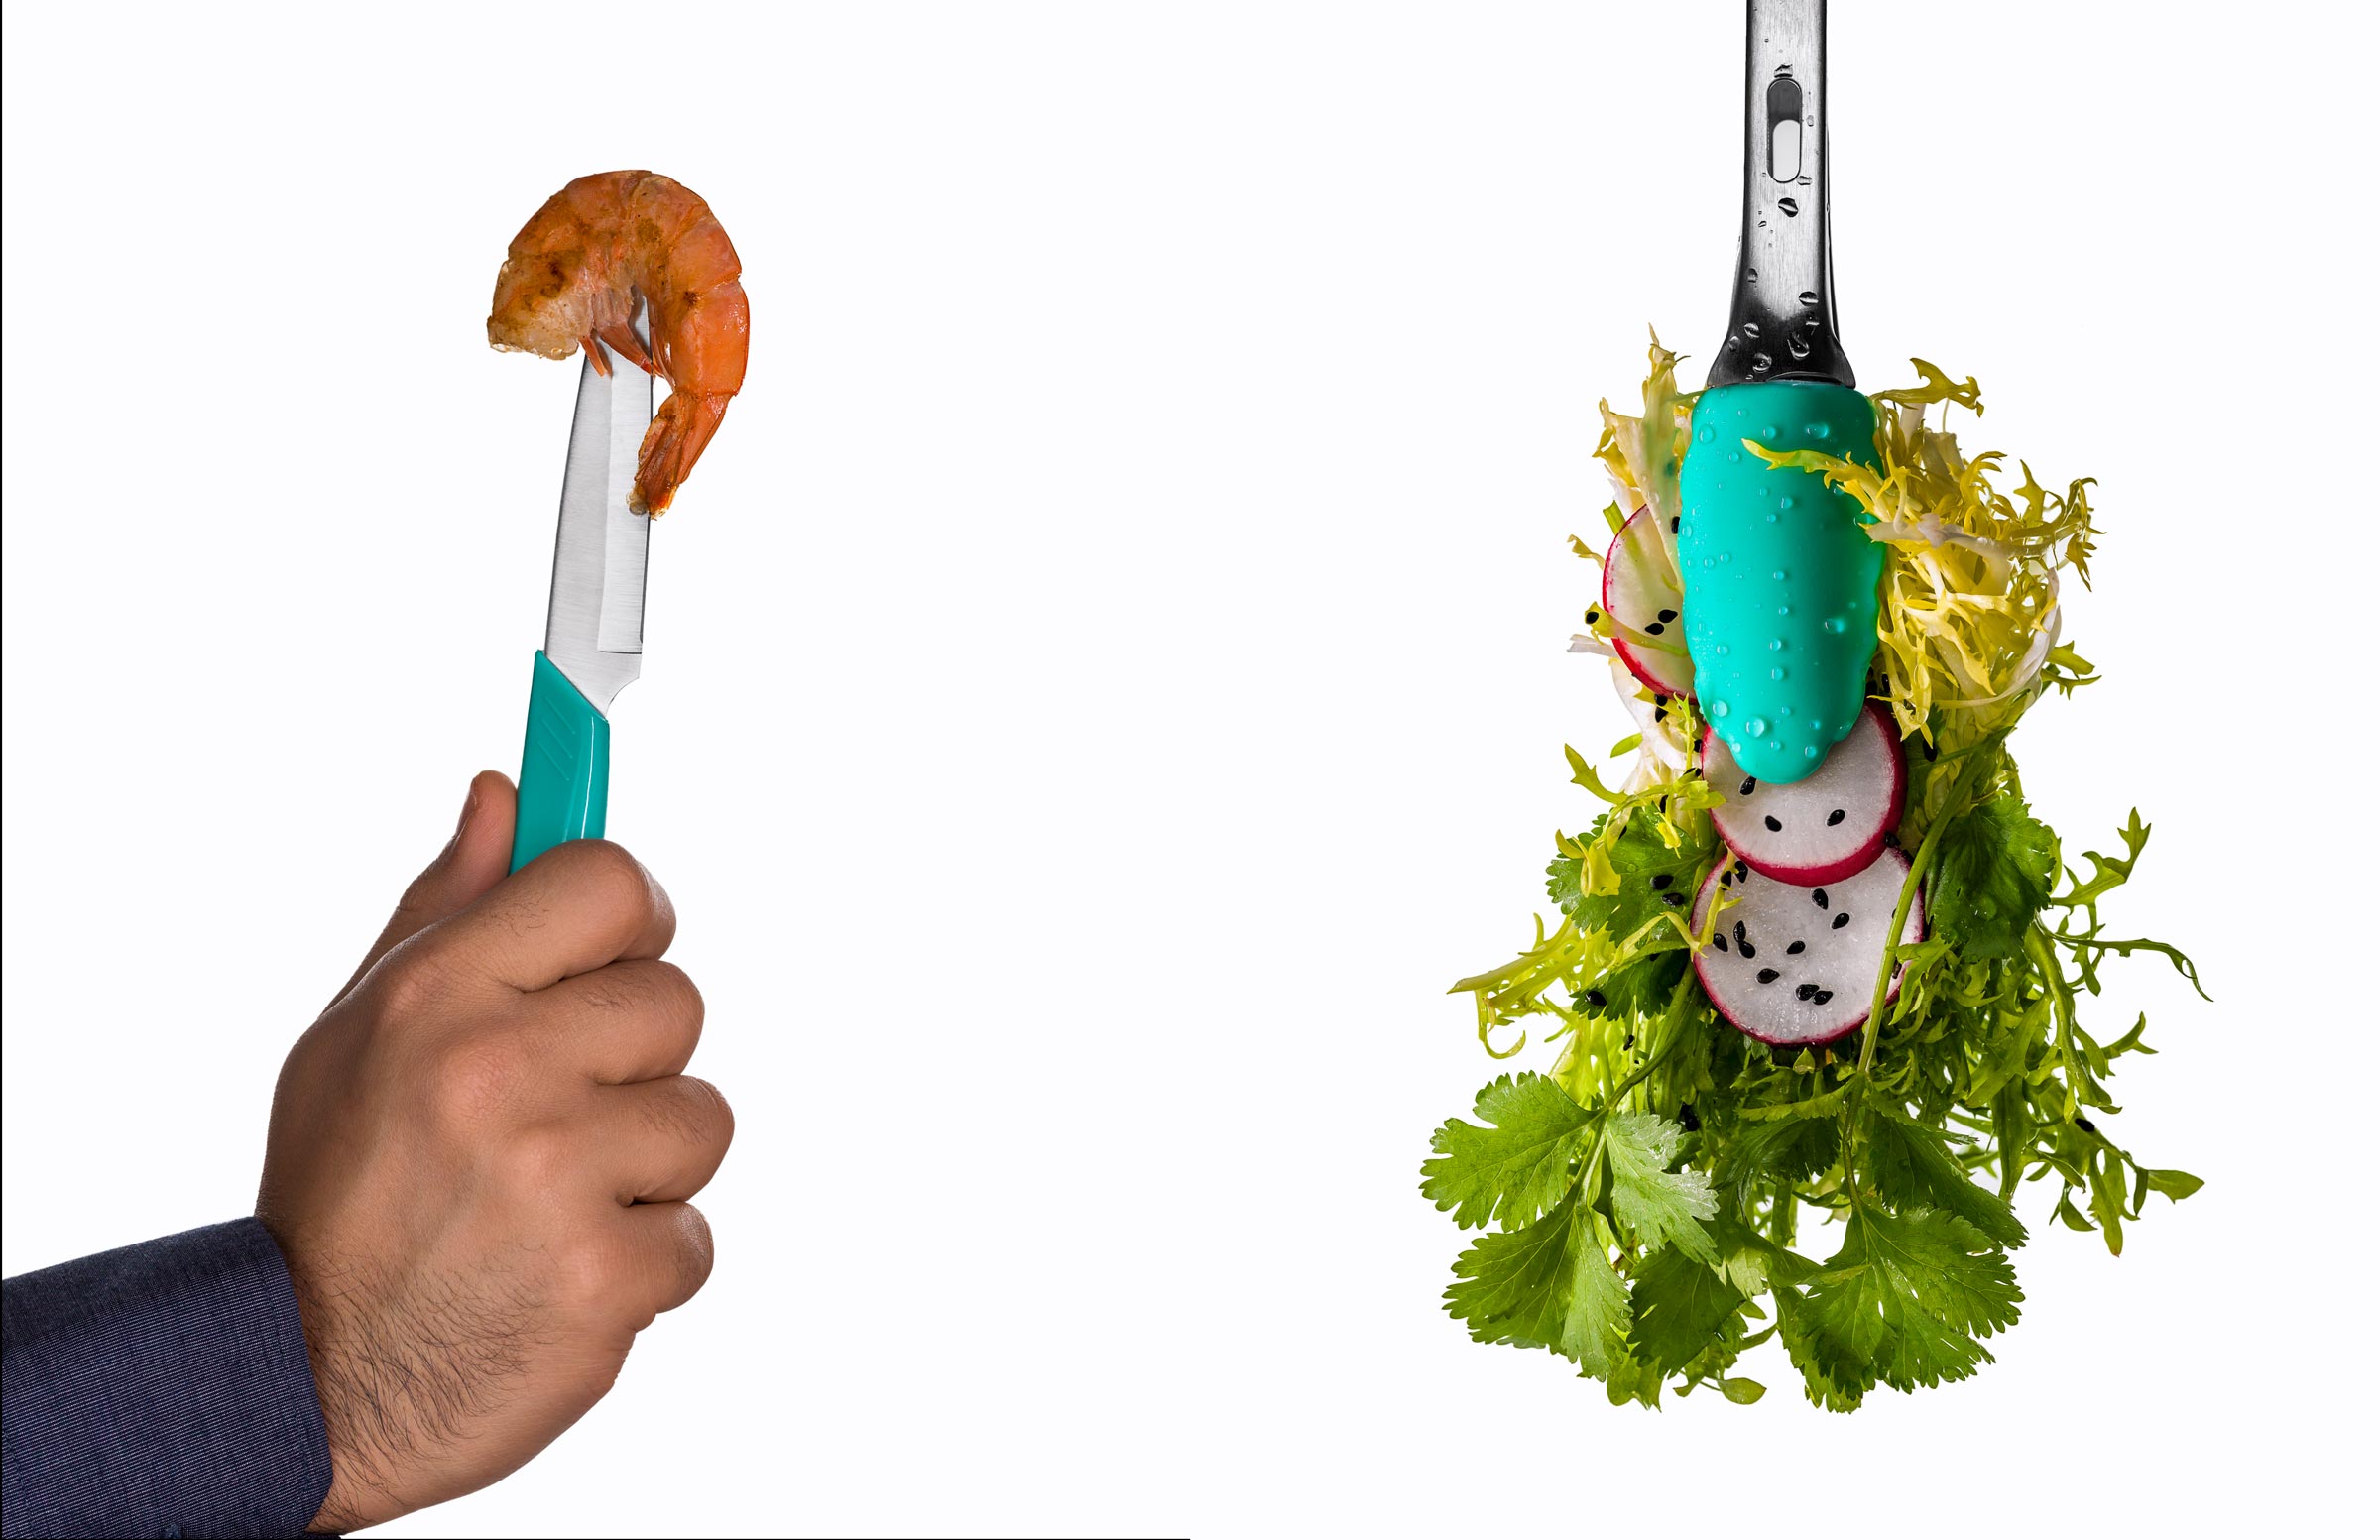
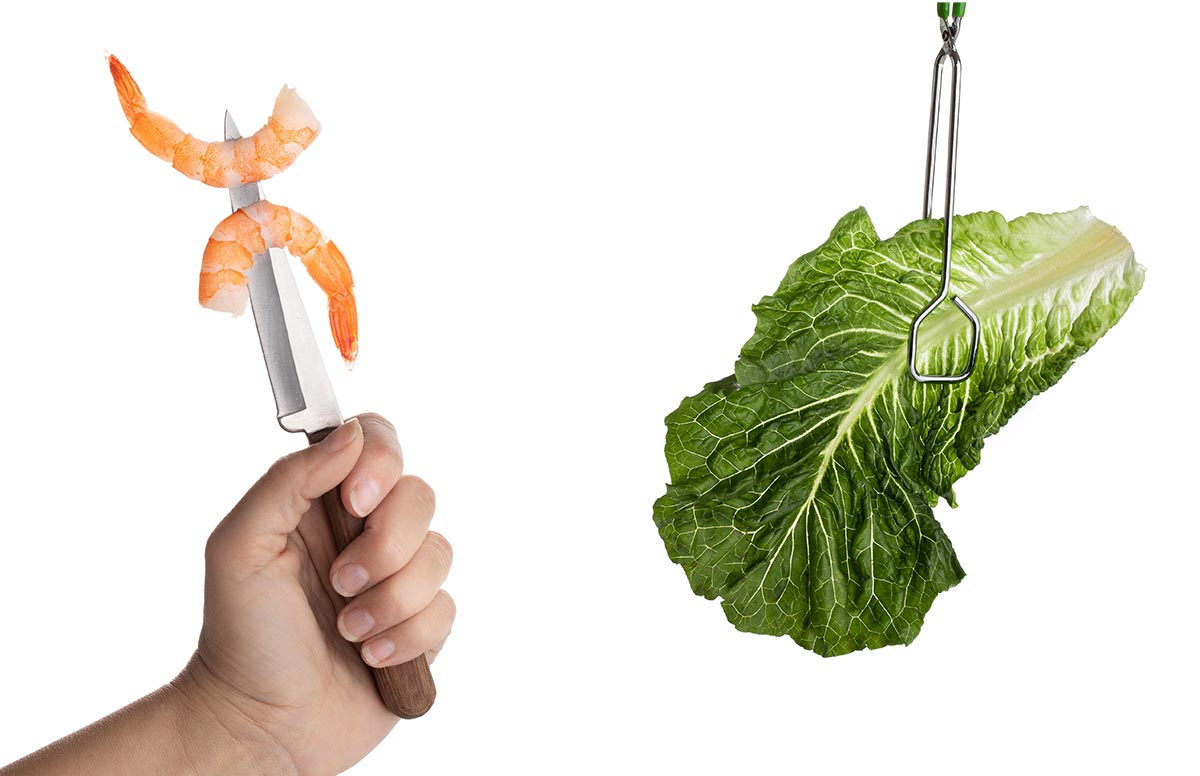
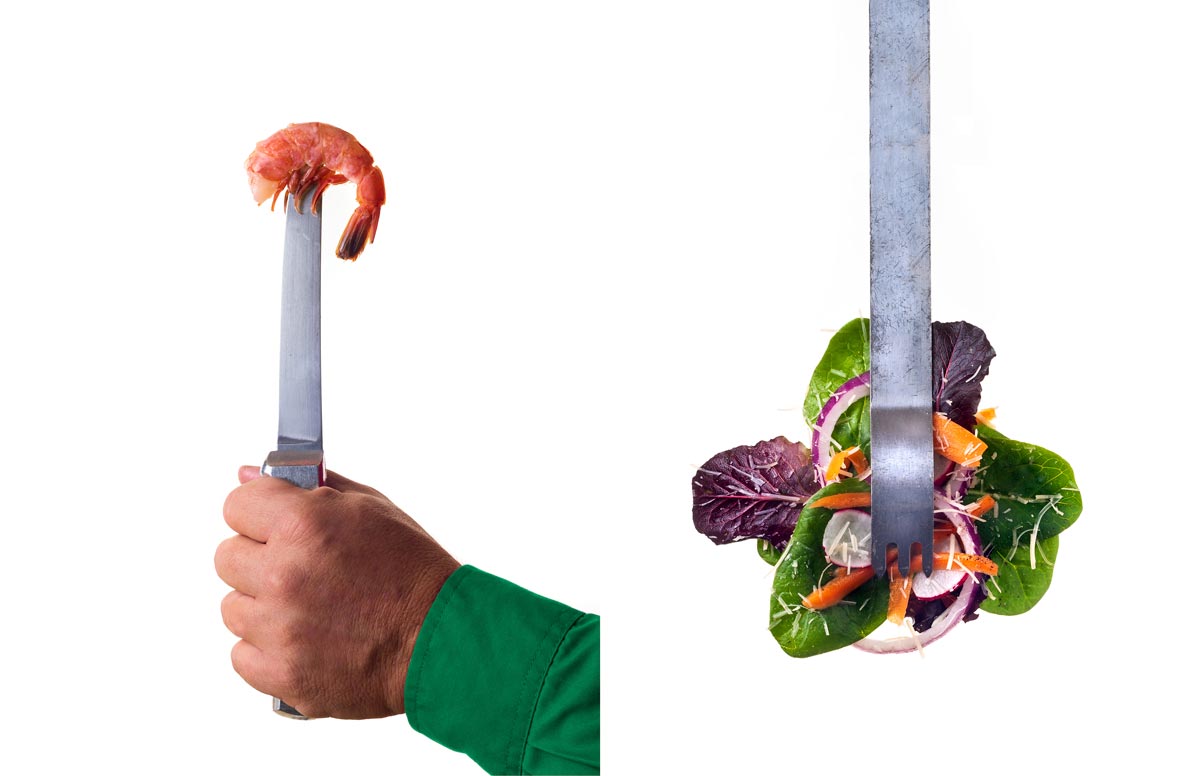
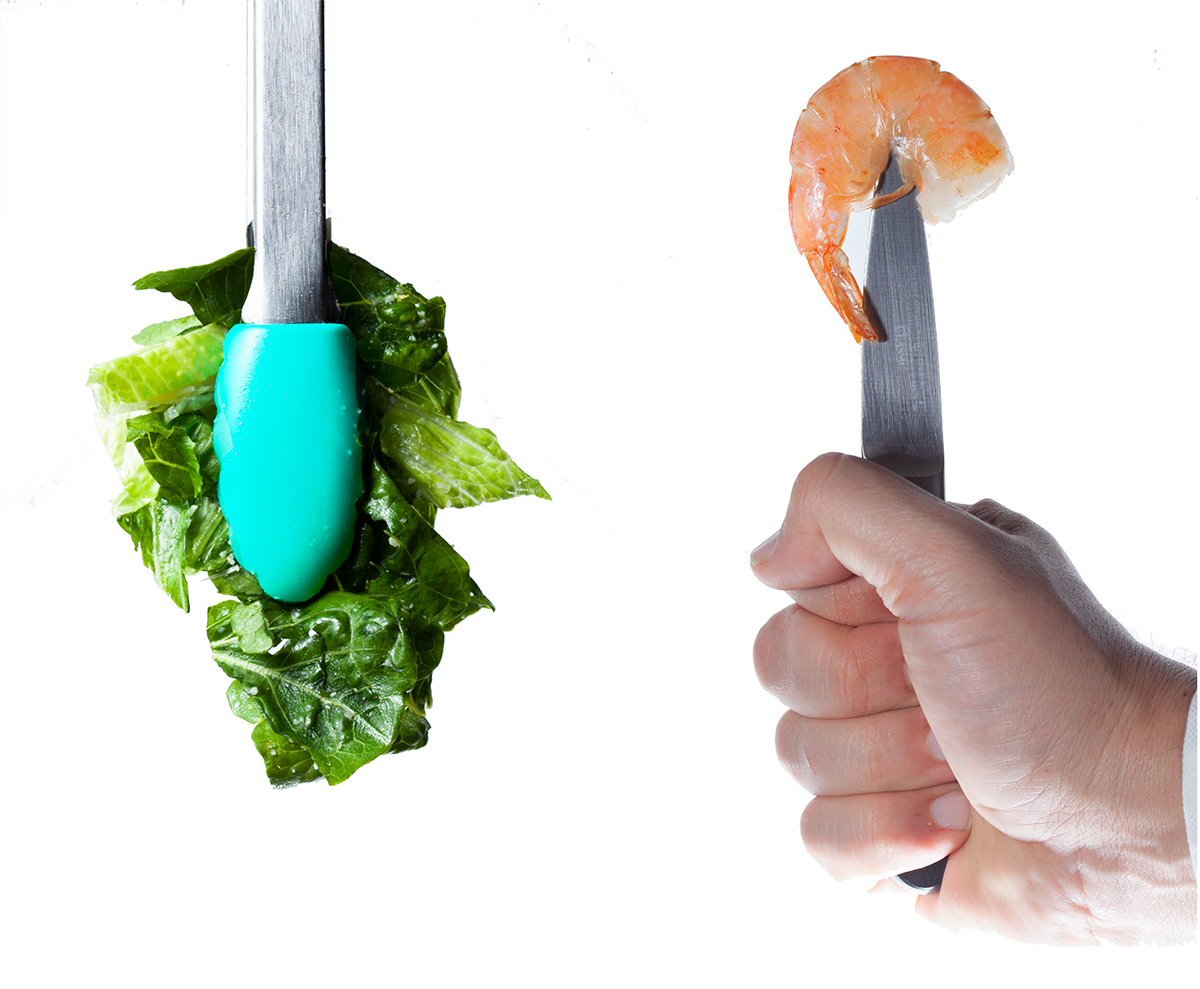
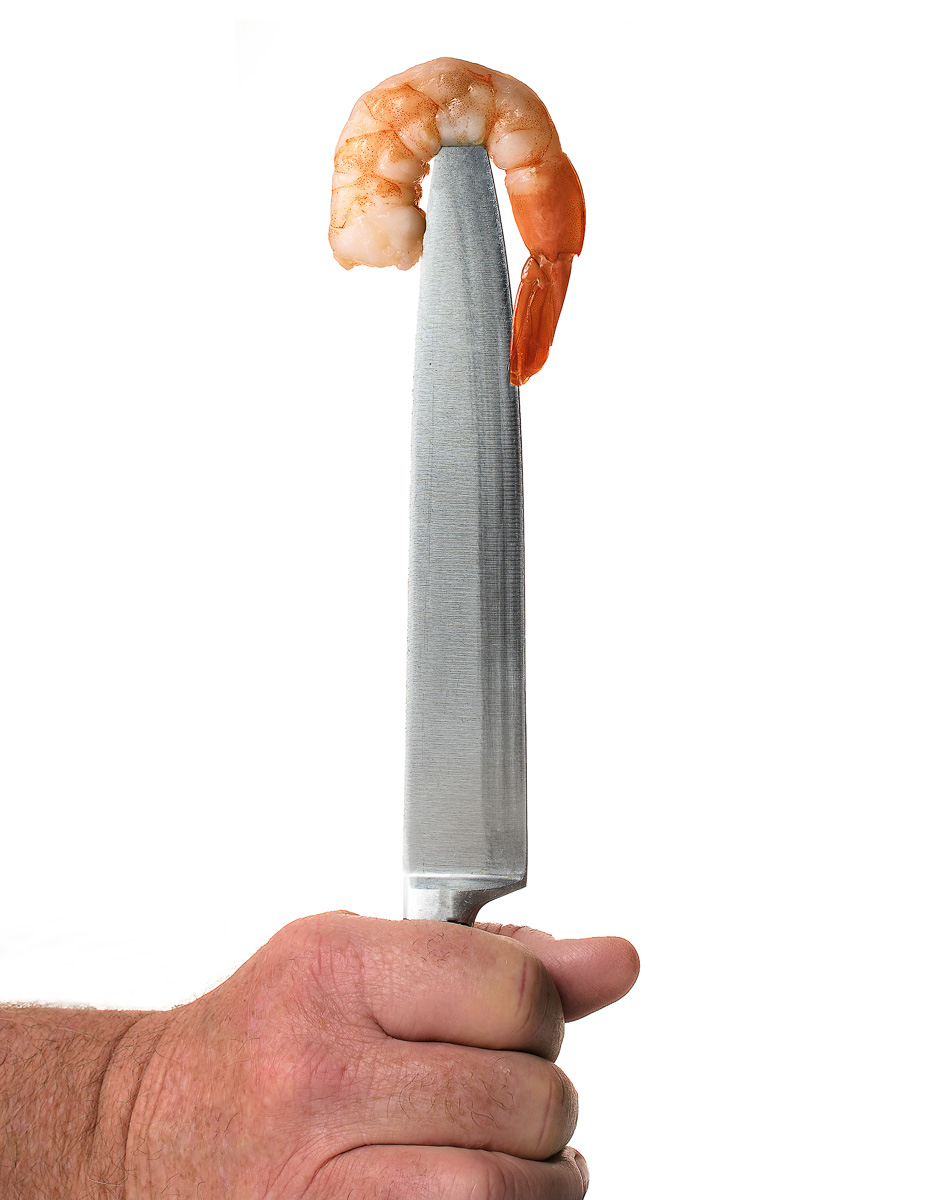
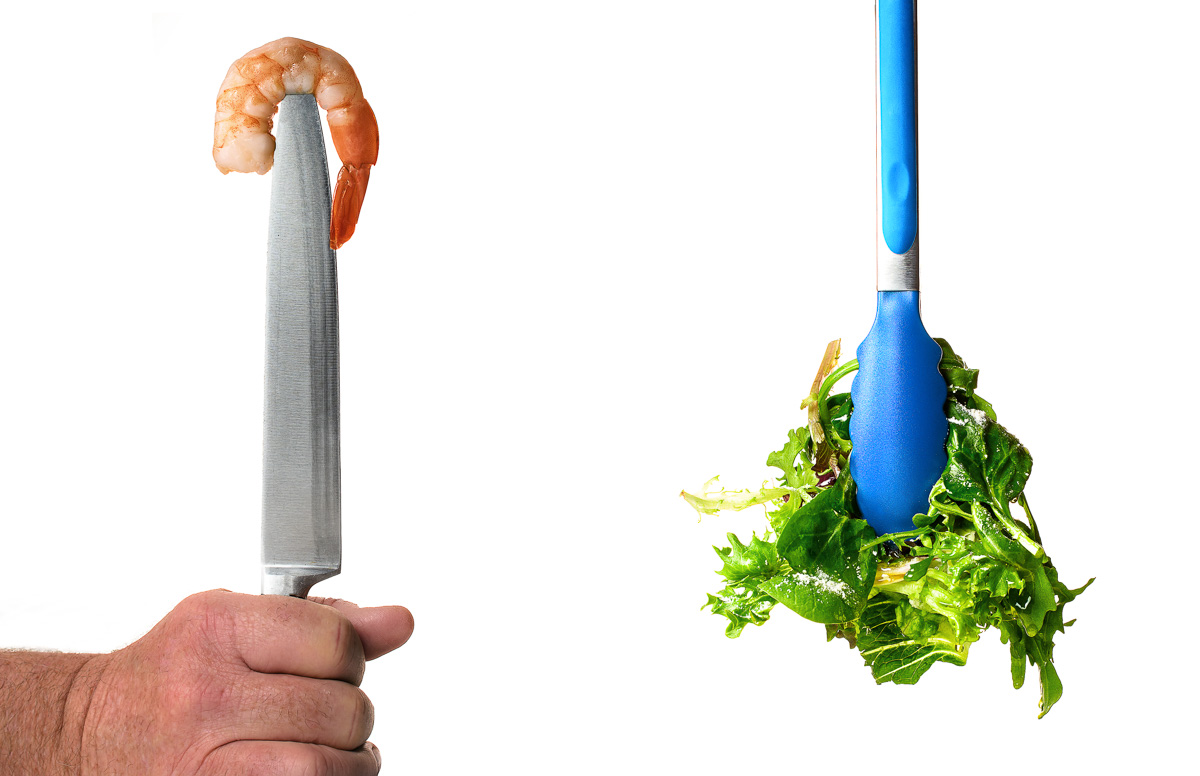
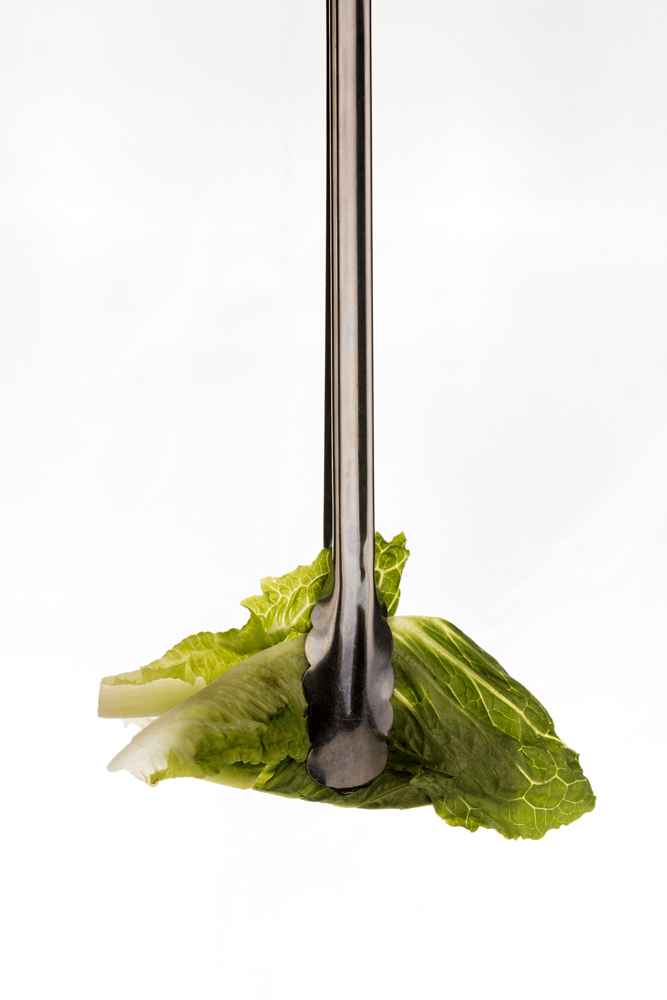
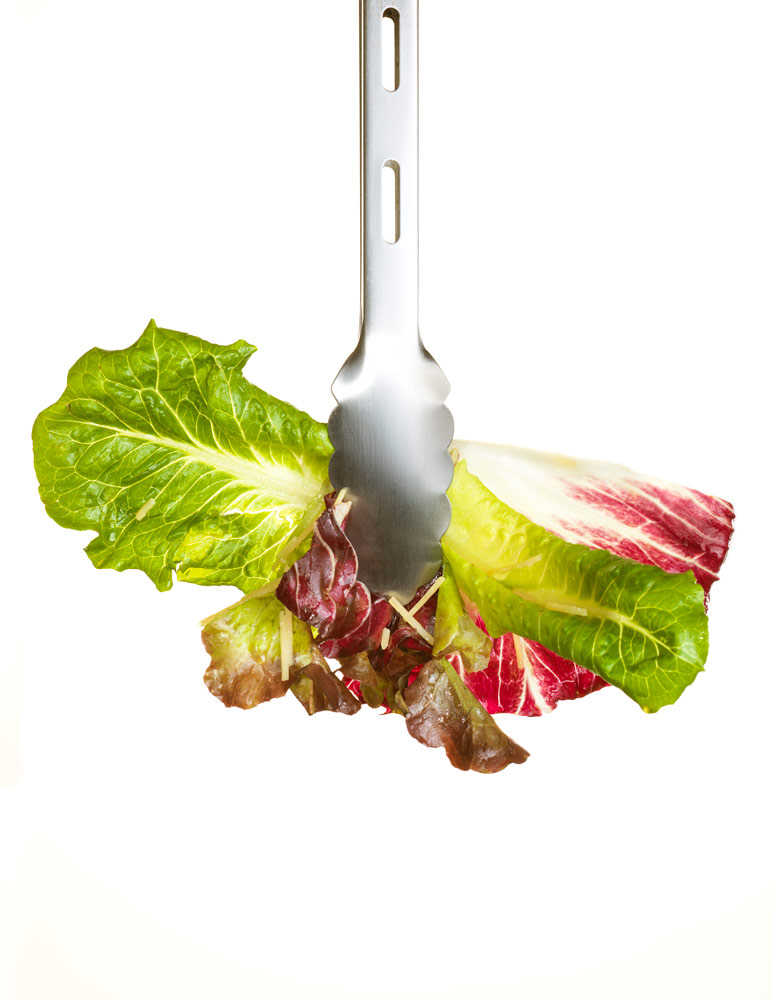
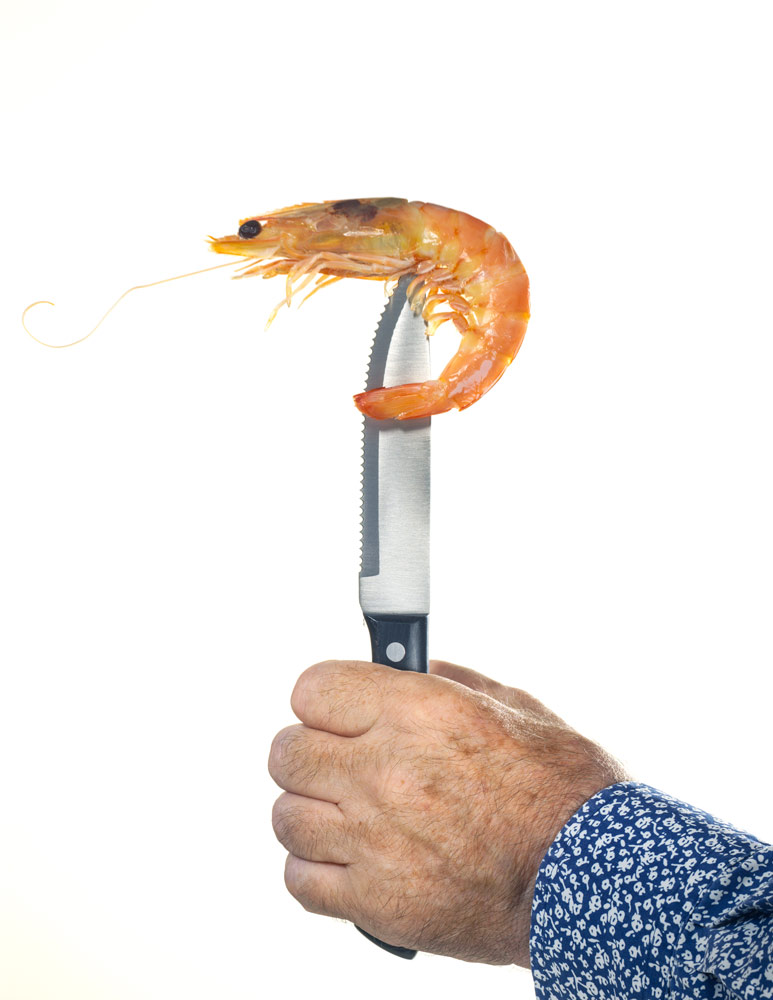
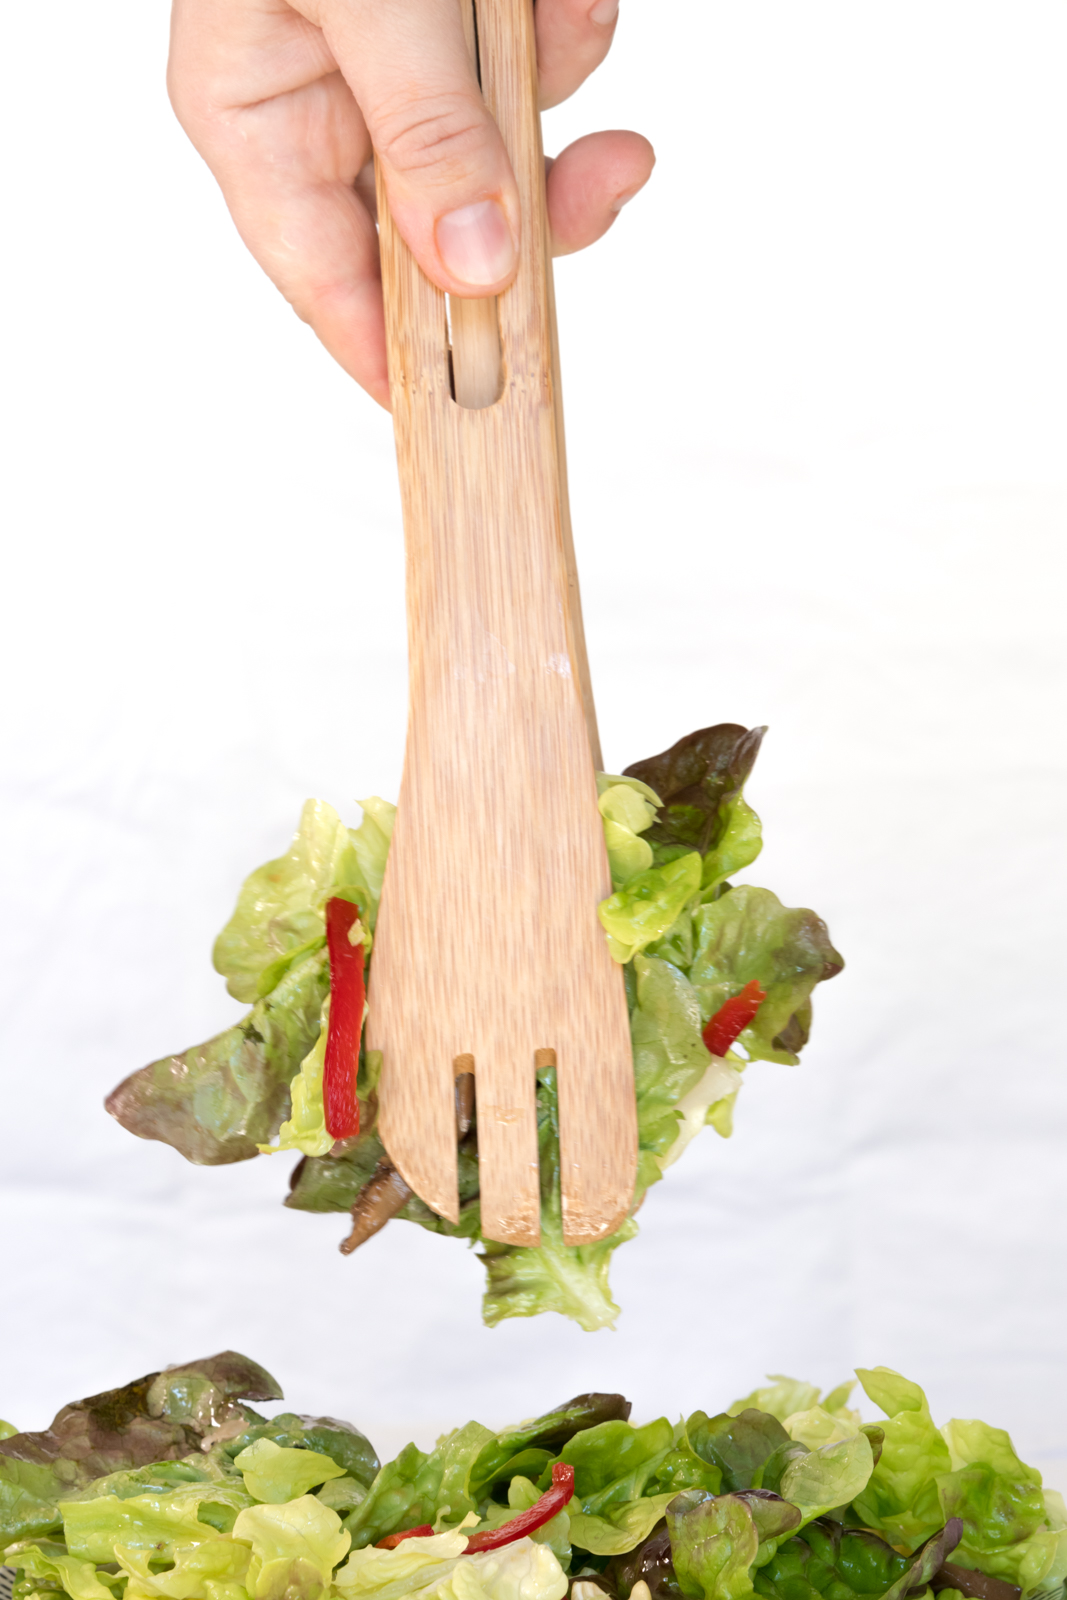
THE ASSIGNMENT IS TWO IMAGES:
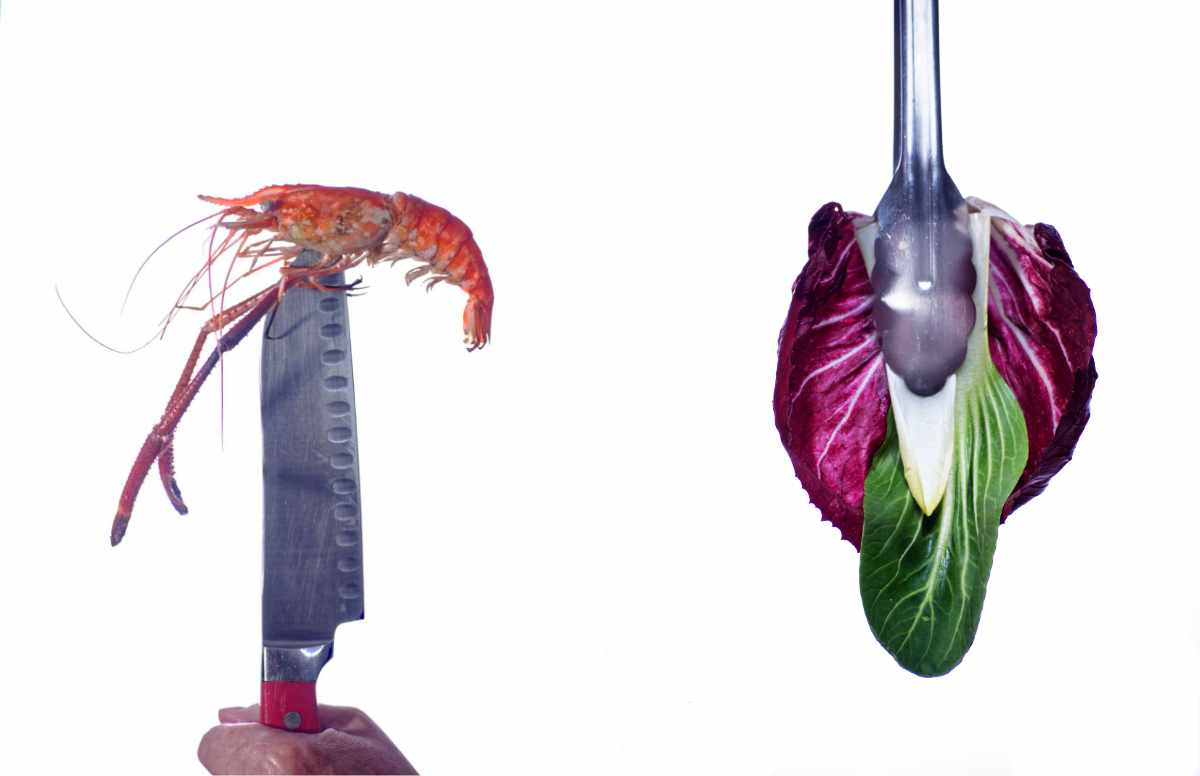
Each image is the equivalent to 8.5 x 11″ (the magazine dimensions). They will go next to each other in the 11×17 layout, so you should definitely check them out side by side to find out:
… if the white backgrounds match.
… if the color balance matches
… if the dimensions look good (check the distance from top to subject and bottom to subject… does it fit the layout?
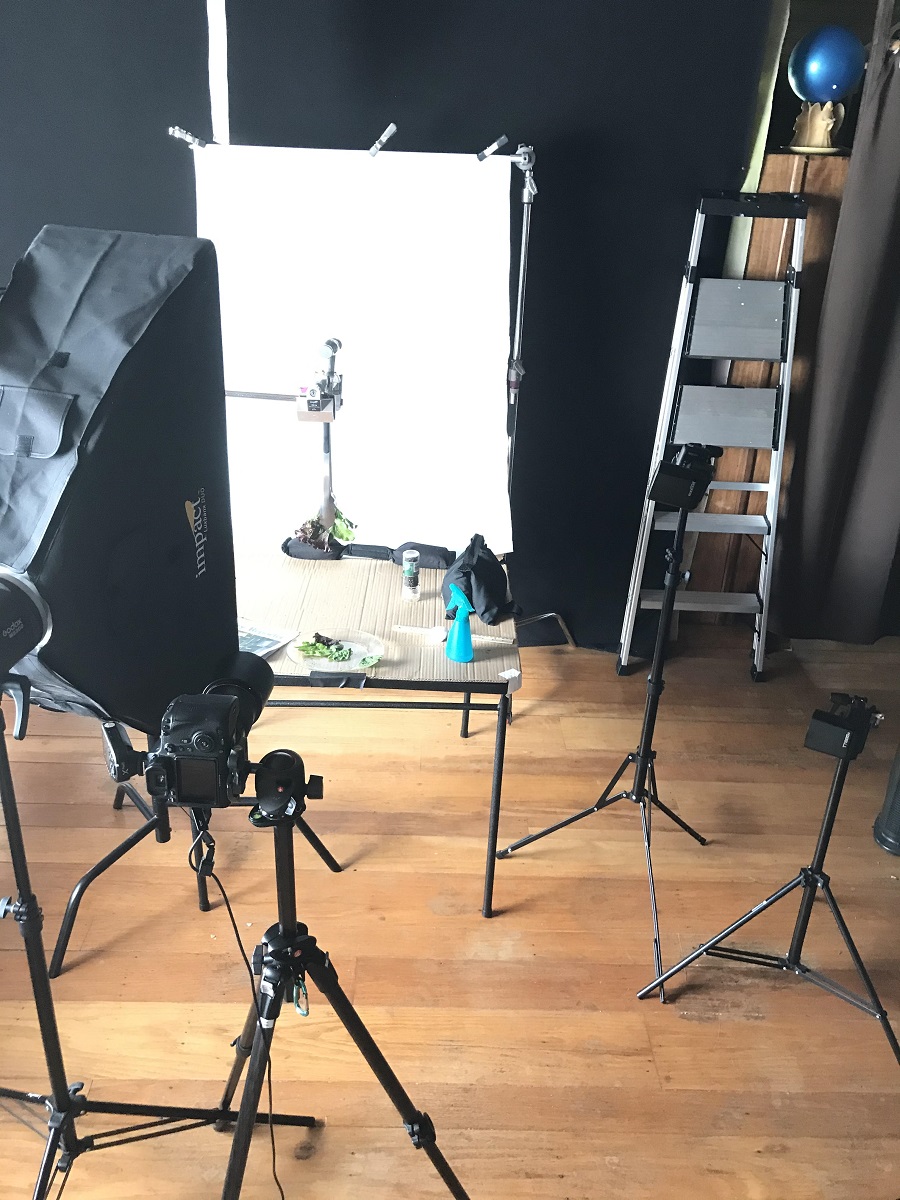
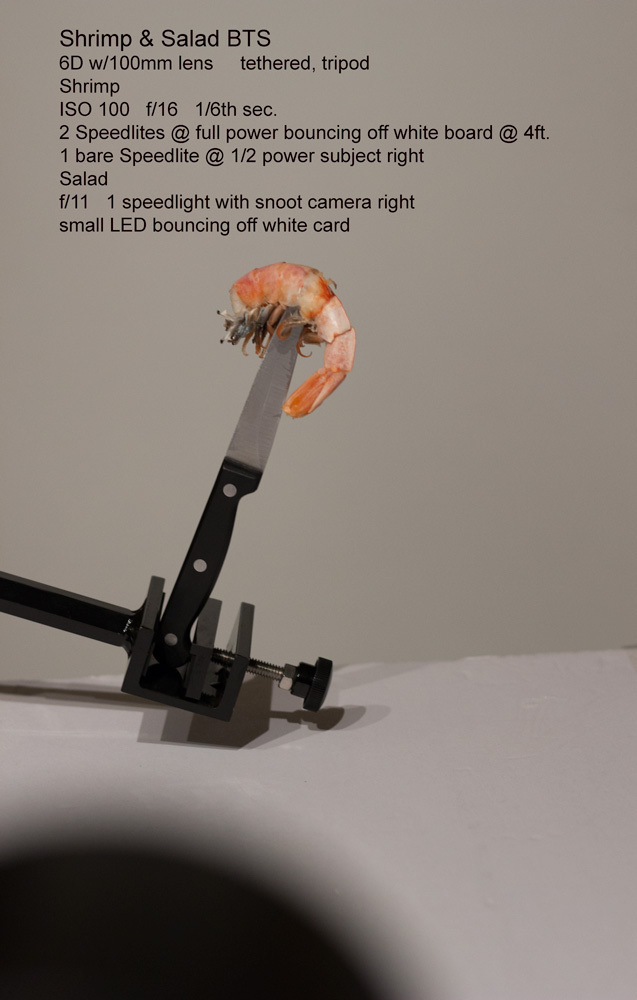
Shoot two images please (plus one BTS)
Then put them together on one canvas so both photos are on a single file. We can view both images side by side just as the magazine would show them.
Remember, the layout is a roadmap, but you can add your own touches to their design… just don’t change their design.


PREVIOUS REVIEWS

-
- P52
-
- P52
-
- P52

Wednesday Morning
Wednesday Evening
Saturday Morning
-
- P52
-
- P52
-
- P52
Wednesday Morning
Wednesday Evening
Saturday Morning